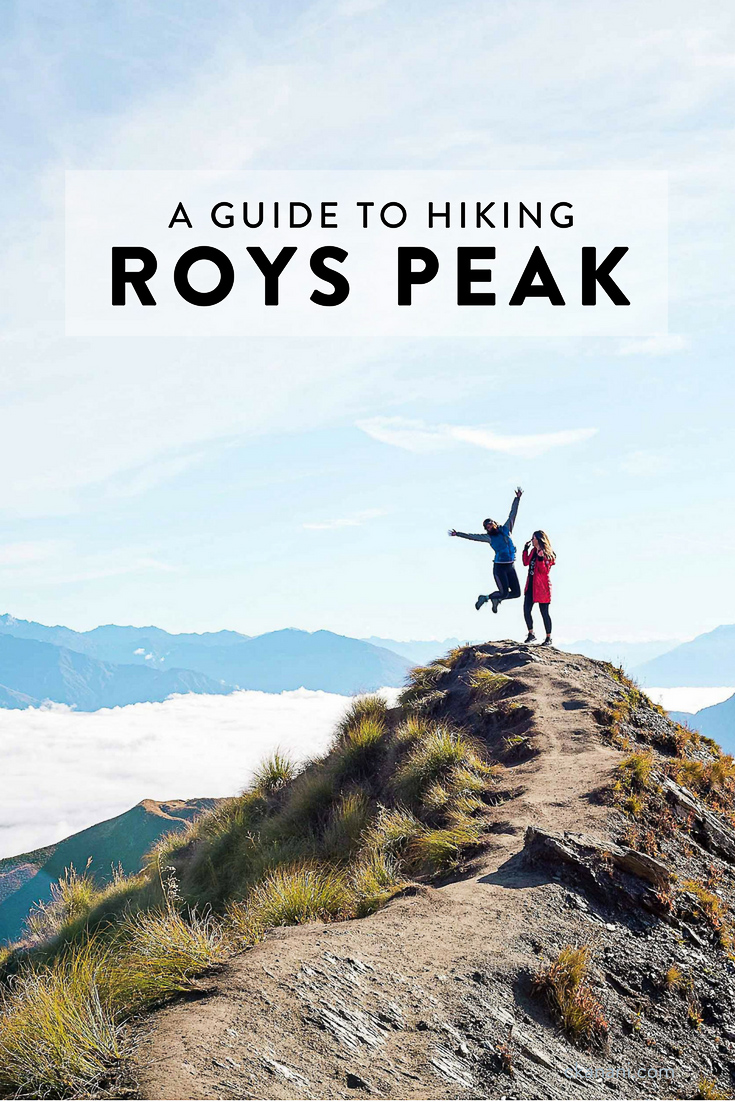
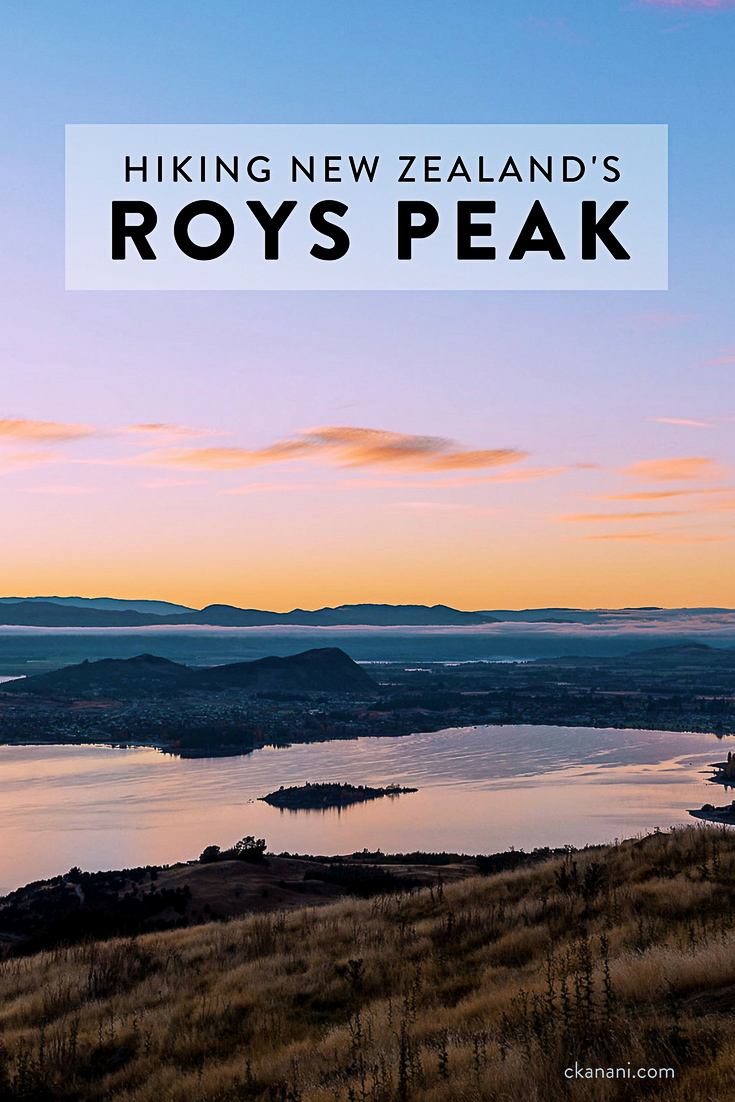
A Guide to Hiking Roys Peak in Wanaka New Zealand

Prior to visiting New Zealand, I did a lot of research on hikes because if there’s one thing I love it’s a picturesque view. I stumbled upon photos of the view from Roys Peak and knew immediately that I had to do it. In terms of beauty when you reach the top, Roys Peak is one of the best hikes in New Zealand.
If you are also thinking about doing the Roys Peak hike and wondering about the difficulty, length, and more, you’ve come to the right place!
A guide to hiking Roys Peak:
Roys Peak Difficulty
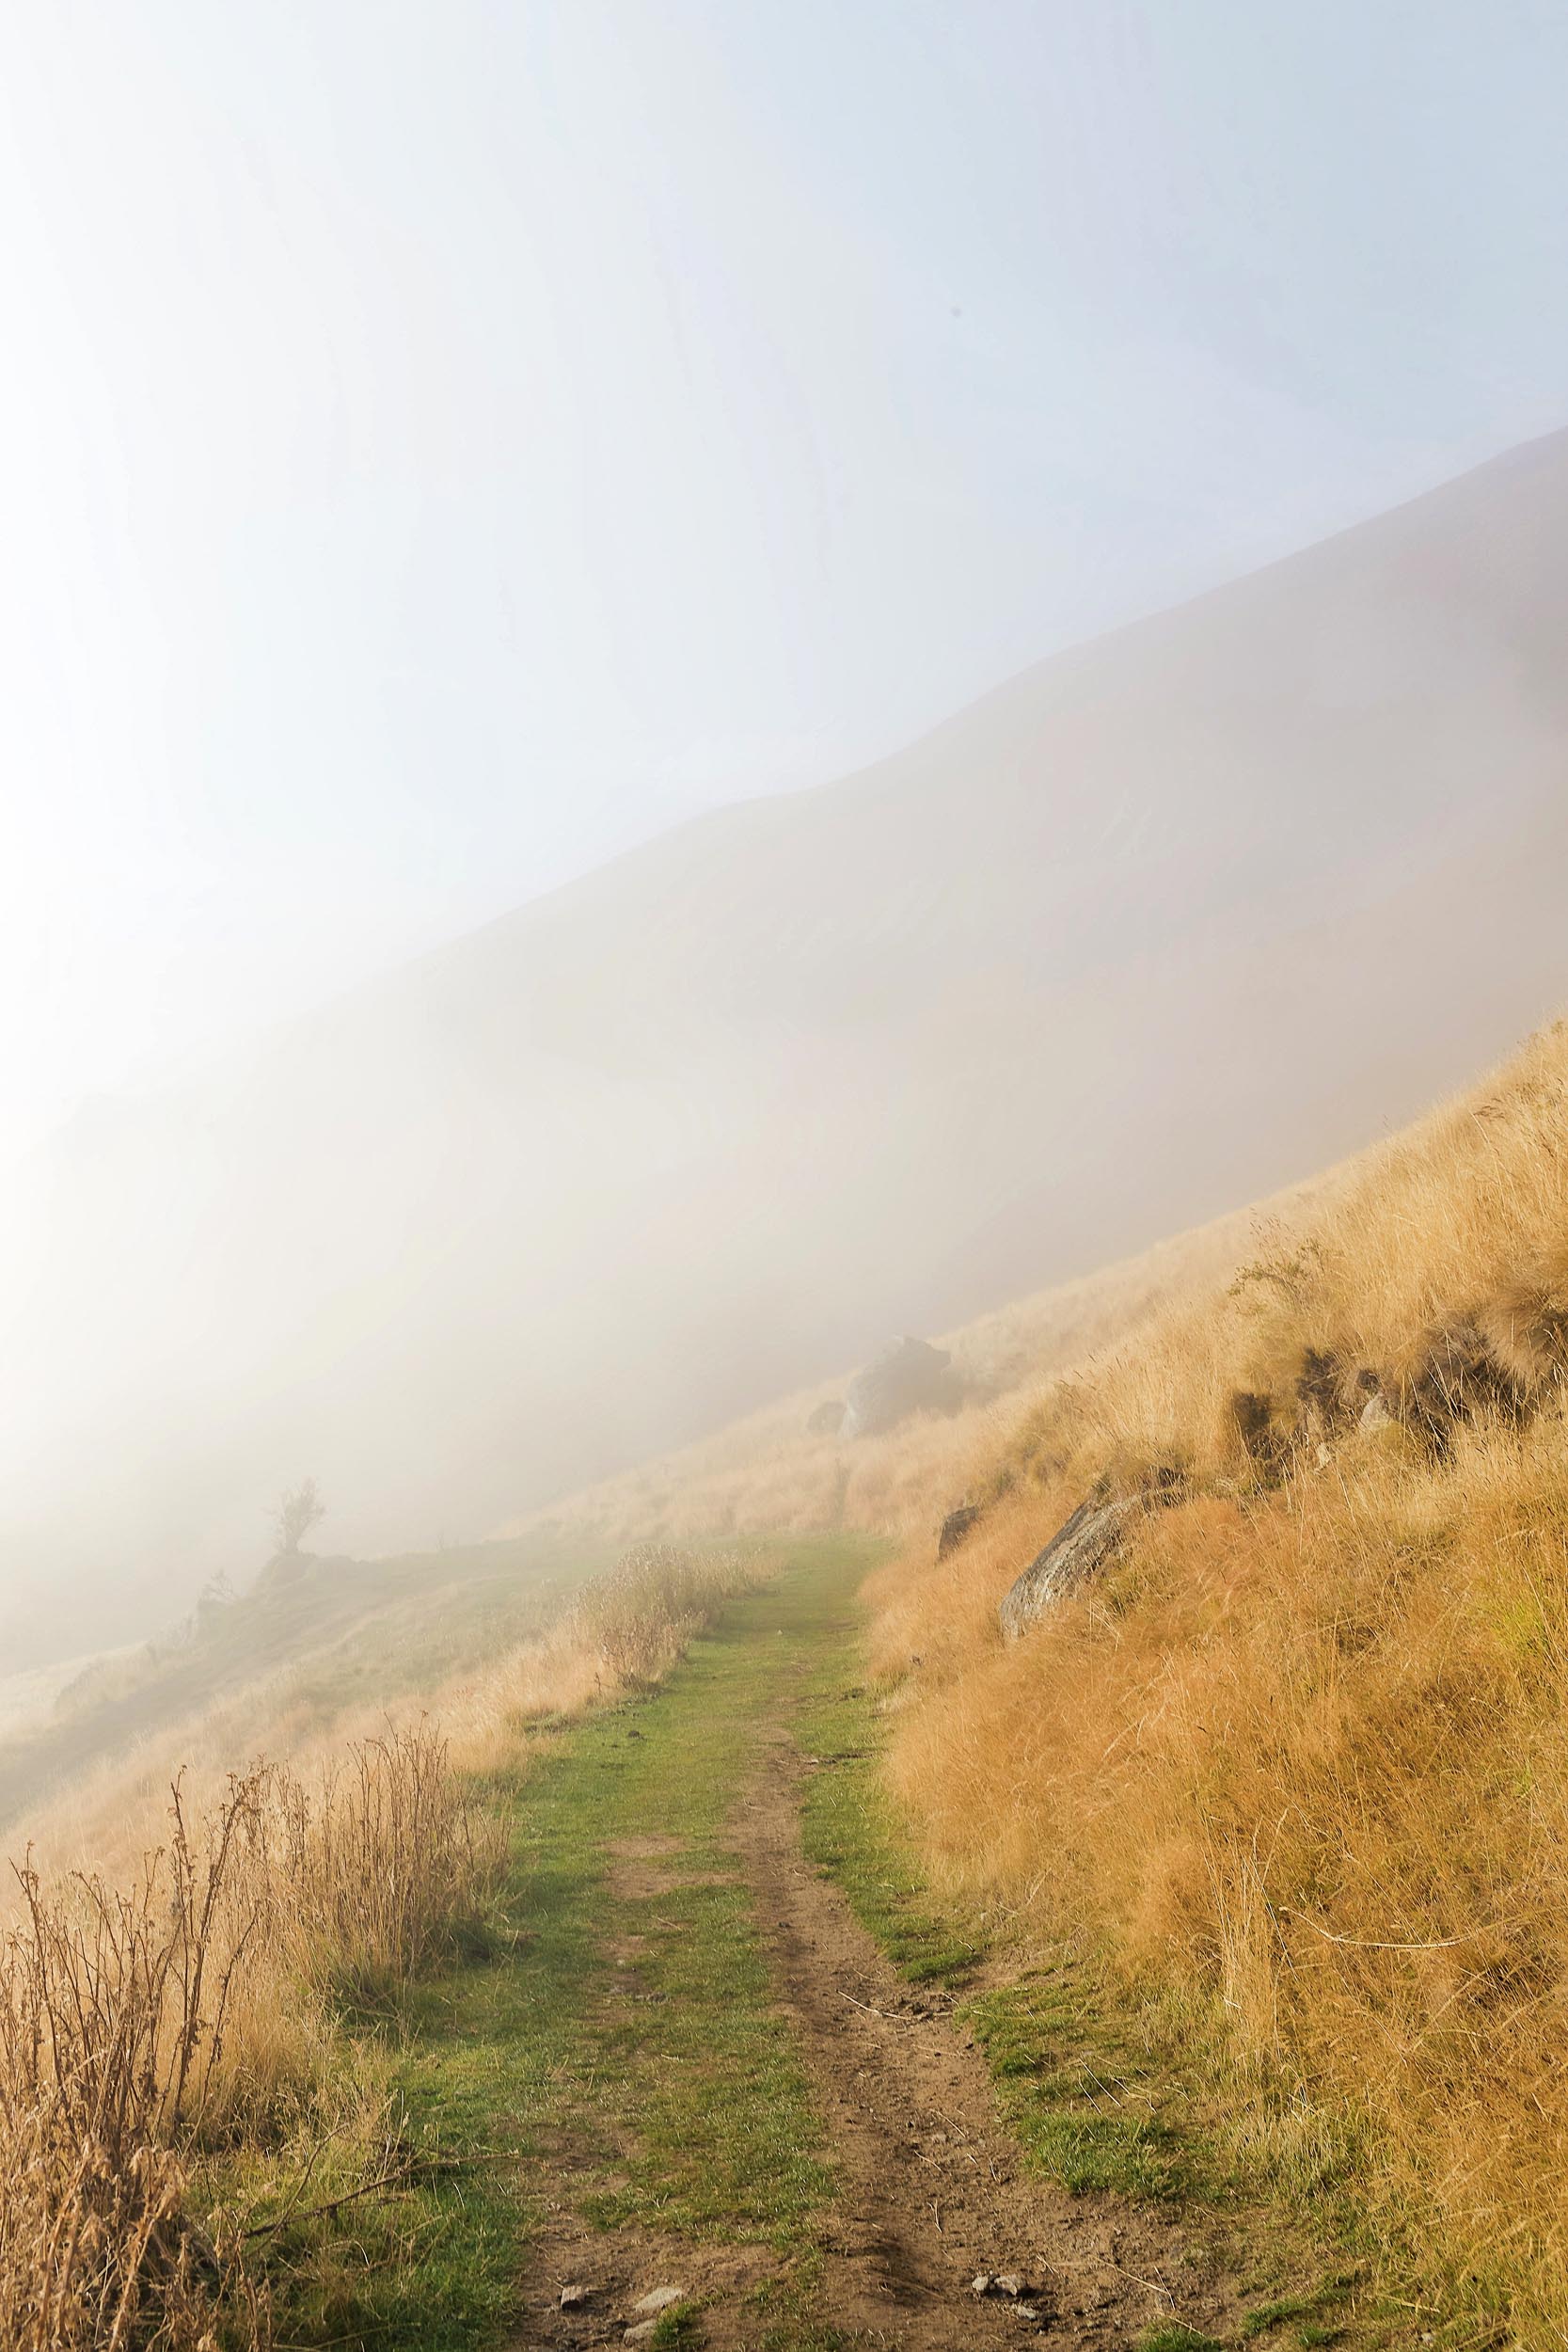
While visiting New Zealand we were only planning on being in Wanaka for one day which meant we could only choose one hike. After reading about Roys Peak, my friend decided she did not want to do it. The entire hike is switchbacks going basically straight up the mountain, without any change of scenery or anything to break up the time it takes. That night we had dinner with a local friend and asked him about the difficulty and if it was worth it. He told us it is not that bad so I convinced her to get up before the sun to make the trek.
The truth of it? Amy was right! It is hard. When they say it takes 5-7 hours, they mean it. They don’t mean 5-7 hours if you are out of shape and slow - they mean 5-7 hours for everyone. I live in San Francisco so I do a ton of walking up very large hills, a lot of hiking, and have a decent amount of strength from doing weighted circuit training and endurance from SoulCycle. Because of this I thought it would be no problem for me but I am happy to humbly admit it was much harder than I expected. It’s definitely possible, but just know it’s tough, extremely boring (sorry!), and really does take as long as they say. You will definitely be doing it for the view, not for the journey!
Side note: I was also sick and could not breathe out of my nose at the time so that likely played a factor in it.

How to Prepare for Hiking Roys Peak
COMFORTABLE LEGGINGS. Alo’s high waisted ones are the very best! It is cold so you will definitely want to wear pants, especially if you are going first thing in the morning. Click here for my favorite ones.
ATHLETIC SNEAKERS. If you’re in the market for sneakers and haven’t tried Adidas UltraBOOSTs yet you are in for a treat! They feel like you are walking on clouds. My favorite are the Stella McCartney x Adidas ones (click here for those) but the regular ones are just as good. Click here to see the latest prices.
NO-SHOW SOCKS. Ones that do not fall down! I have tried so many different ones and find that most do fall down and there's nothing worse than that while trying to hike, yah? Click here for the ones I love (they stay up!).
CUTE TOP. While I think it's incredibly important to have quality bottoms and sneakers, I find it's fine to buy cheaper workout tops because quality deos not effect you as much there. Click here for where I often find mine.
JACKET. DO NOT forget a pack layers! It will be extremely cold at first, then likely warm, then very cold again once you get to the top. I packed a lightweight down from Canada Goose because it takes up almost no space yet is incredibly warm. Click here to see the latest prices.
BASEBALL CAP. To block the sun! Click here for the one I am loving.
SUNGLASSES. Of course! Three timeless styles I’ve been wearing non-stop: click here for my favorite Quay aviators (I have both the black and the rose gold), click here for my round Ray-Bans, and click here for my all time favorite black on black Ray-Bans that are often hard to track down because they sell out consistently.
SPF. Incredibly important, do NOT forget this. Apply it before you go. Click here for my favorite face SPF. I also always carry a mineral powder sunscreen brush with me at all times to put on top and lock in the SPF. Click here for the one I use and recommend.
REUSABLE WATER BOTTLE. Please do not forget this (and PLEASE do not buy single-use plastic ones instead). The hike is relatively easy but still tiring and you will absolutely need to bring water with you. Hydro Flask is the best because it keeps your drink cold (or warm). So worth the investment. Click here to see the latest prices.
CAMERA. You cannot hike Roys Peak without bringing a camera to capture the view at the end! It's basically the only reason to hike Roys Peak (haha). Click here to see the latest prices for my Sony a7II. If you don't need a full frame camera (if you aren't sure what that means, you don't need one!), I recommend the Sony a6500 instead. Click here to see the latest prices.
THE RIGHT LENS. Don't forget a wide angle lens! Click here to see the latest prices for my 35mm.
STYLISH CAMERA BAG. I never go anywhere without mine! It is incredibly important to protect your camera gear but I don’t think you should sacrifice your style to do it. Click here for my stylish camera bag roundup.
TRIPOD. If you need it to capture photos! Click here to see the latest prices for my travel tripod. Need a remote trigger too? Click here to see the latest prices.

Getting to Roys Peak Wanaka Trailhead
Roys Peak is located in Wanaka New Zealand on the south island, about an hour and a half north of Queenstown.
To get to the trailhead you will need to drive from Wanaka (or elsewhere). It is a short drive from town but would be a long walk on a highway so I do not recommend doing that. There is a parking lot located at the base on Mount Aspiring Road at 599/1131 Mount Aspiring Road where you can leave your car. You can also find it by typing “Roy’s Peak Parking” into Google Maps. The lot is small so you will want to get there early.
ABOUT THE Roys Peak HIKE
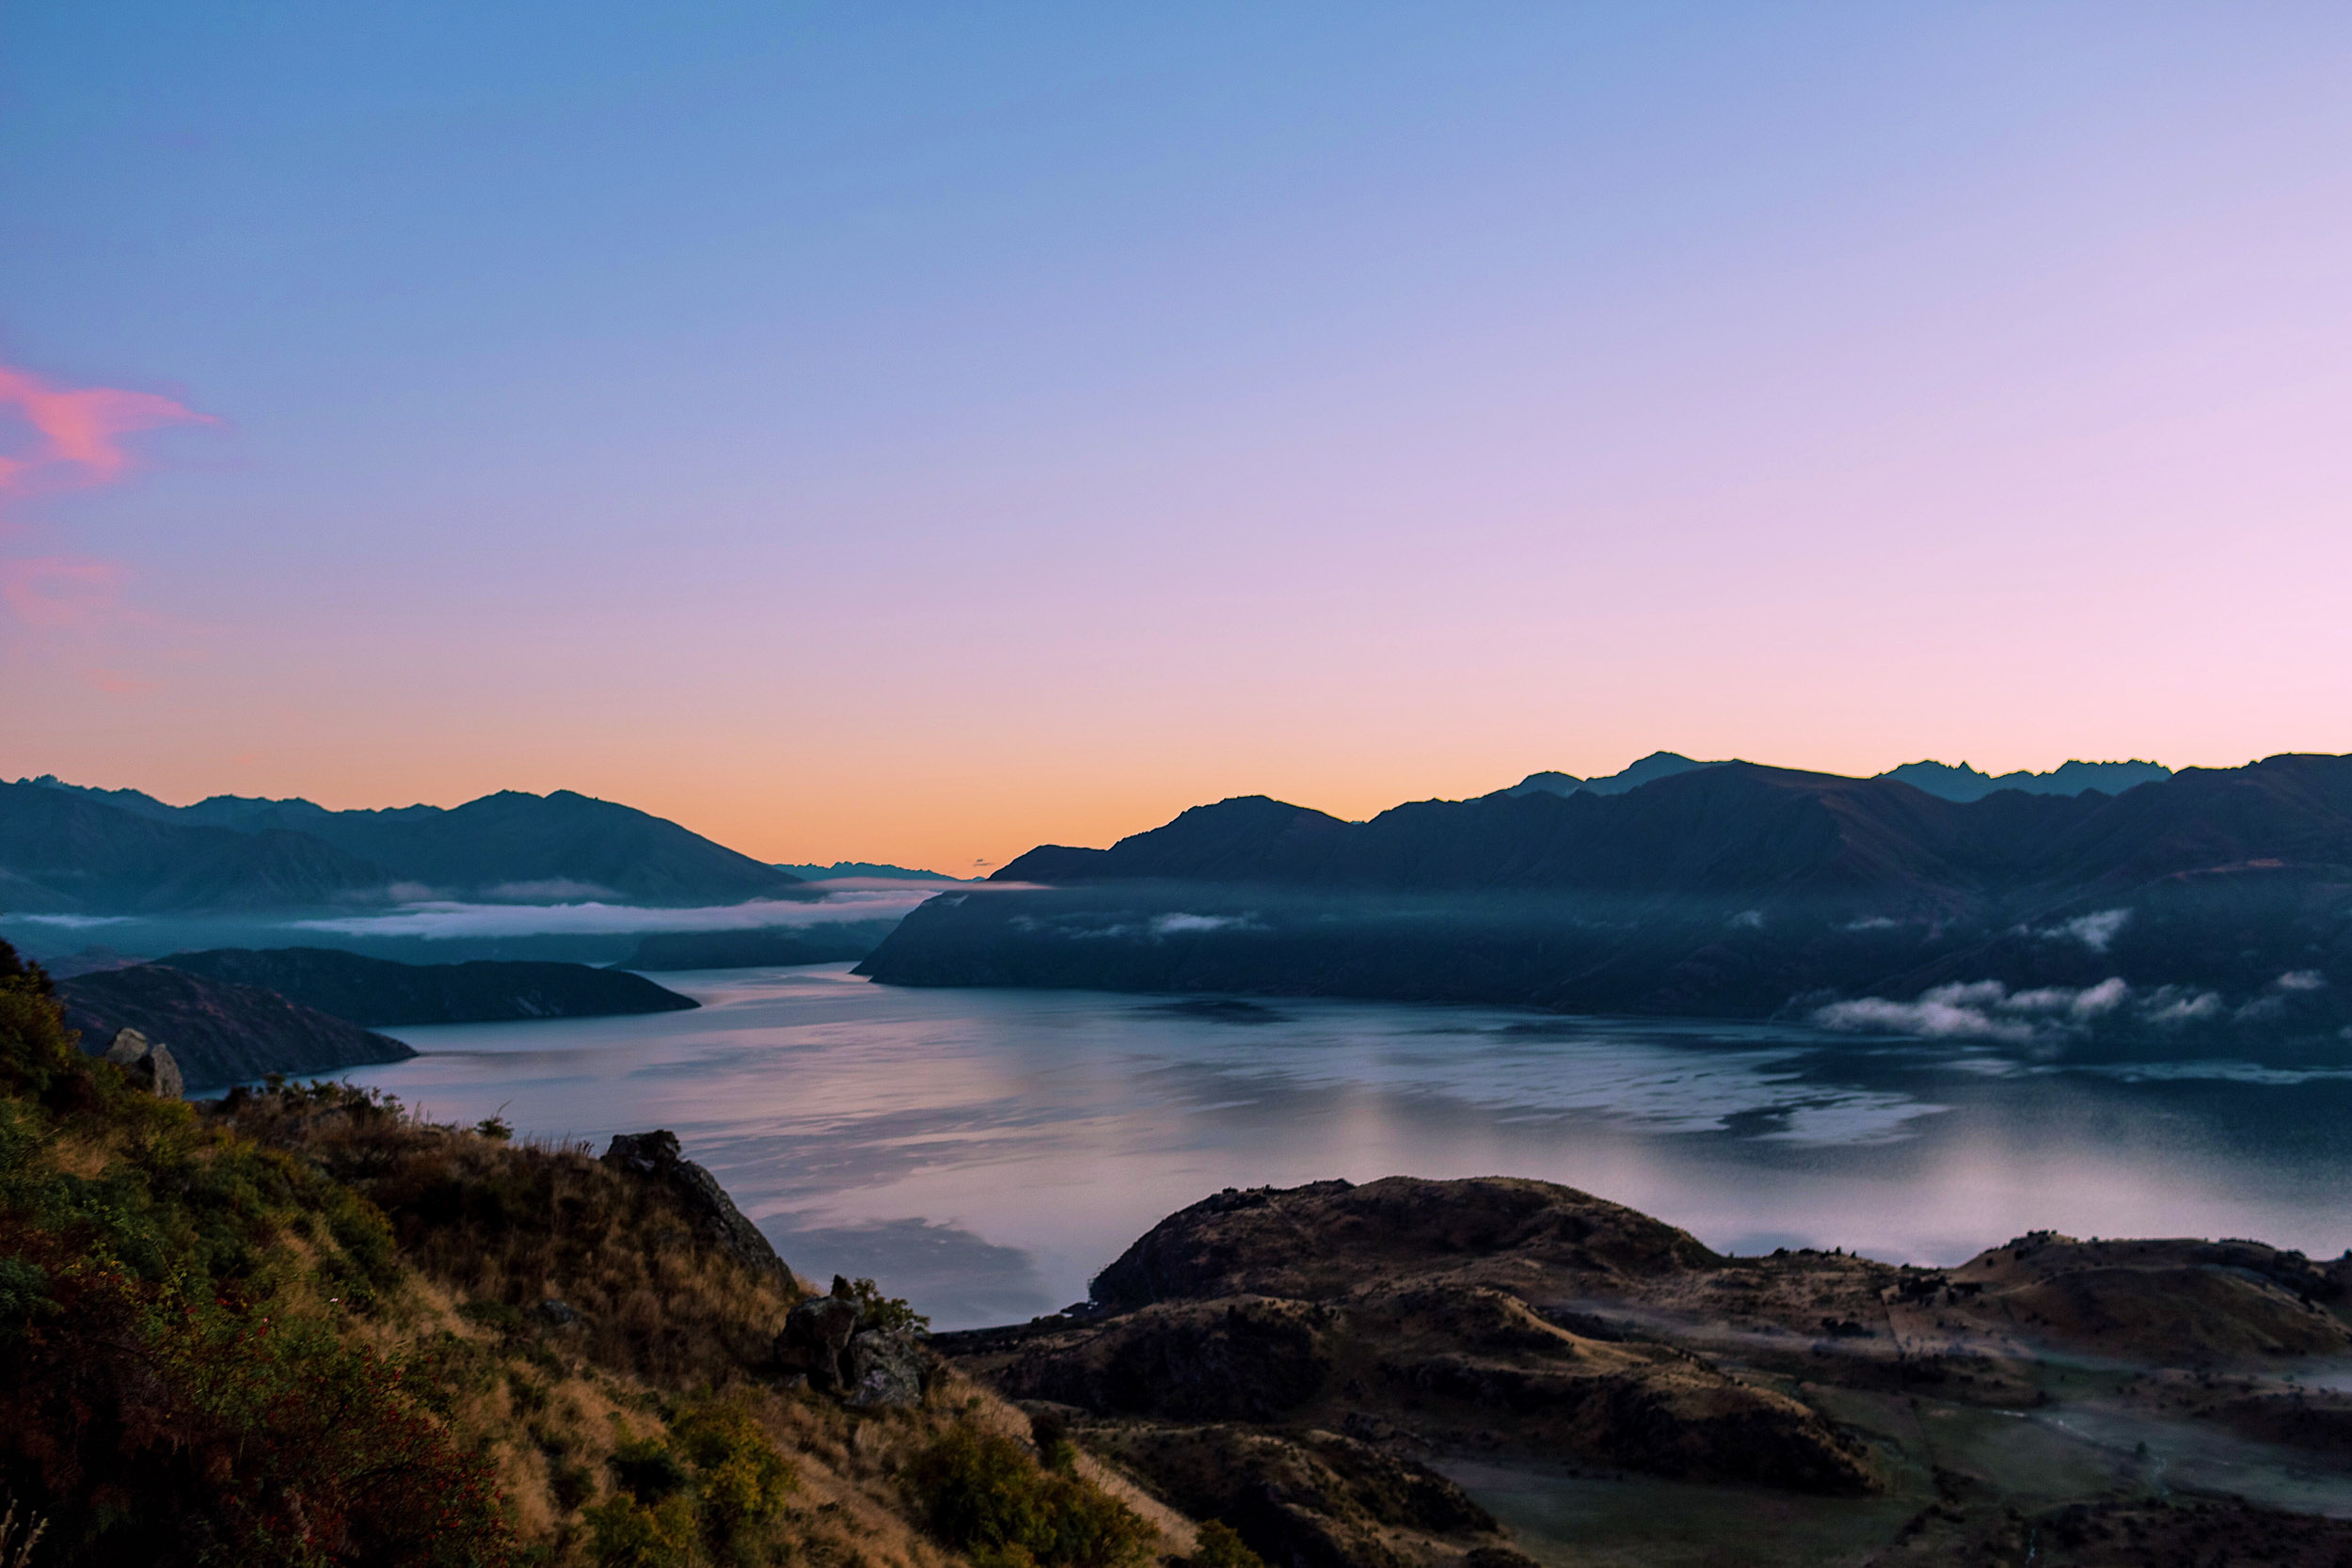
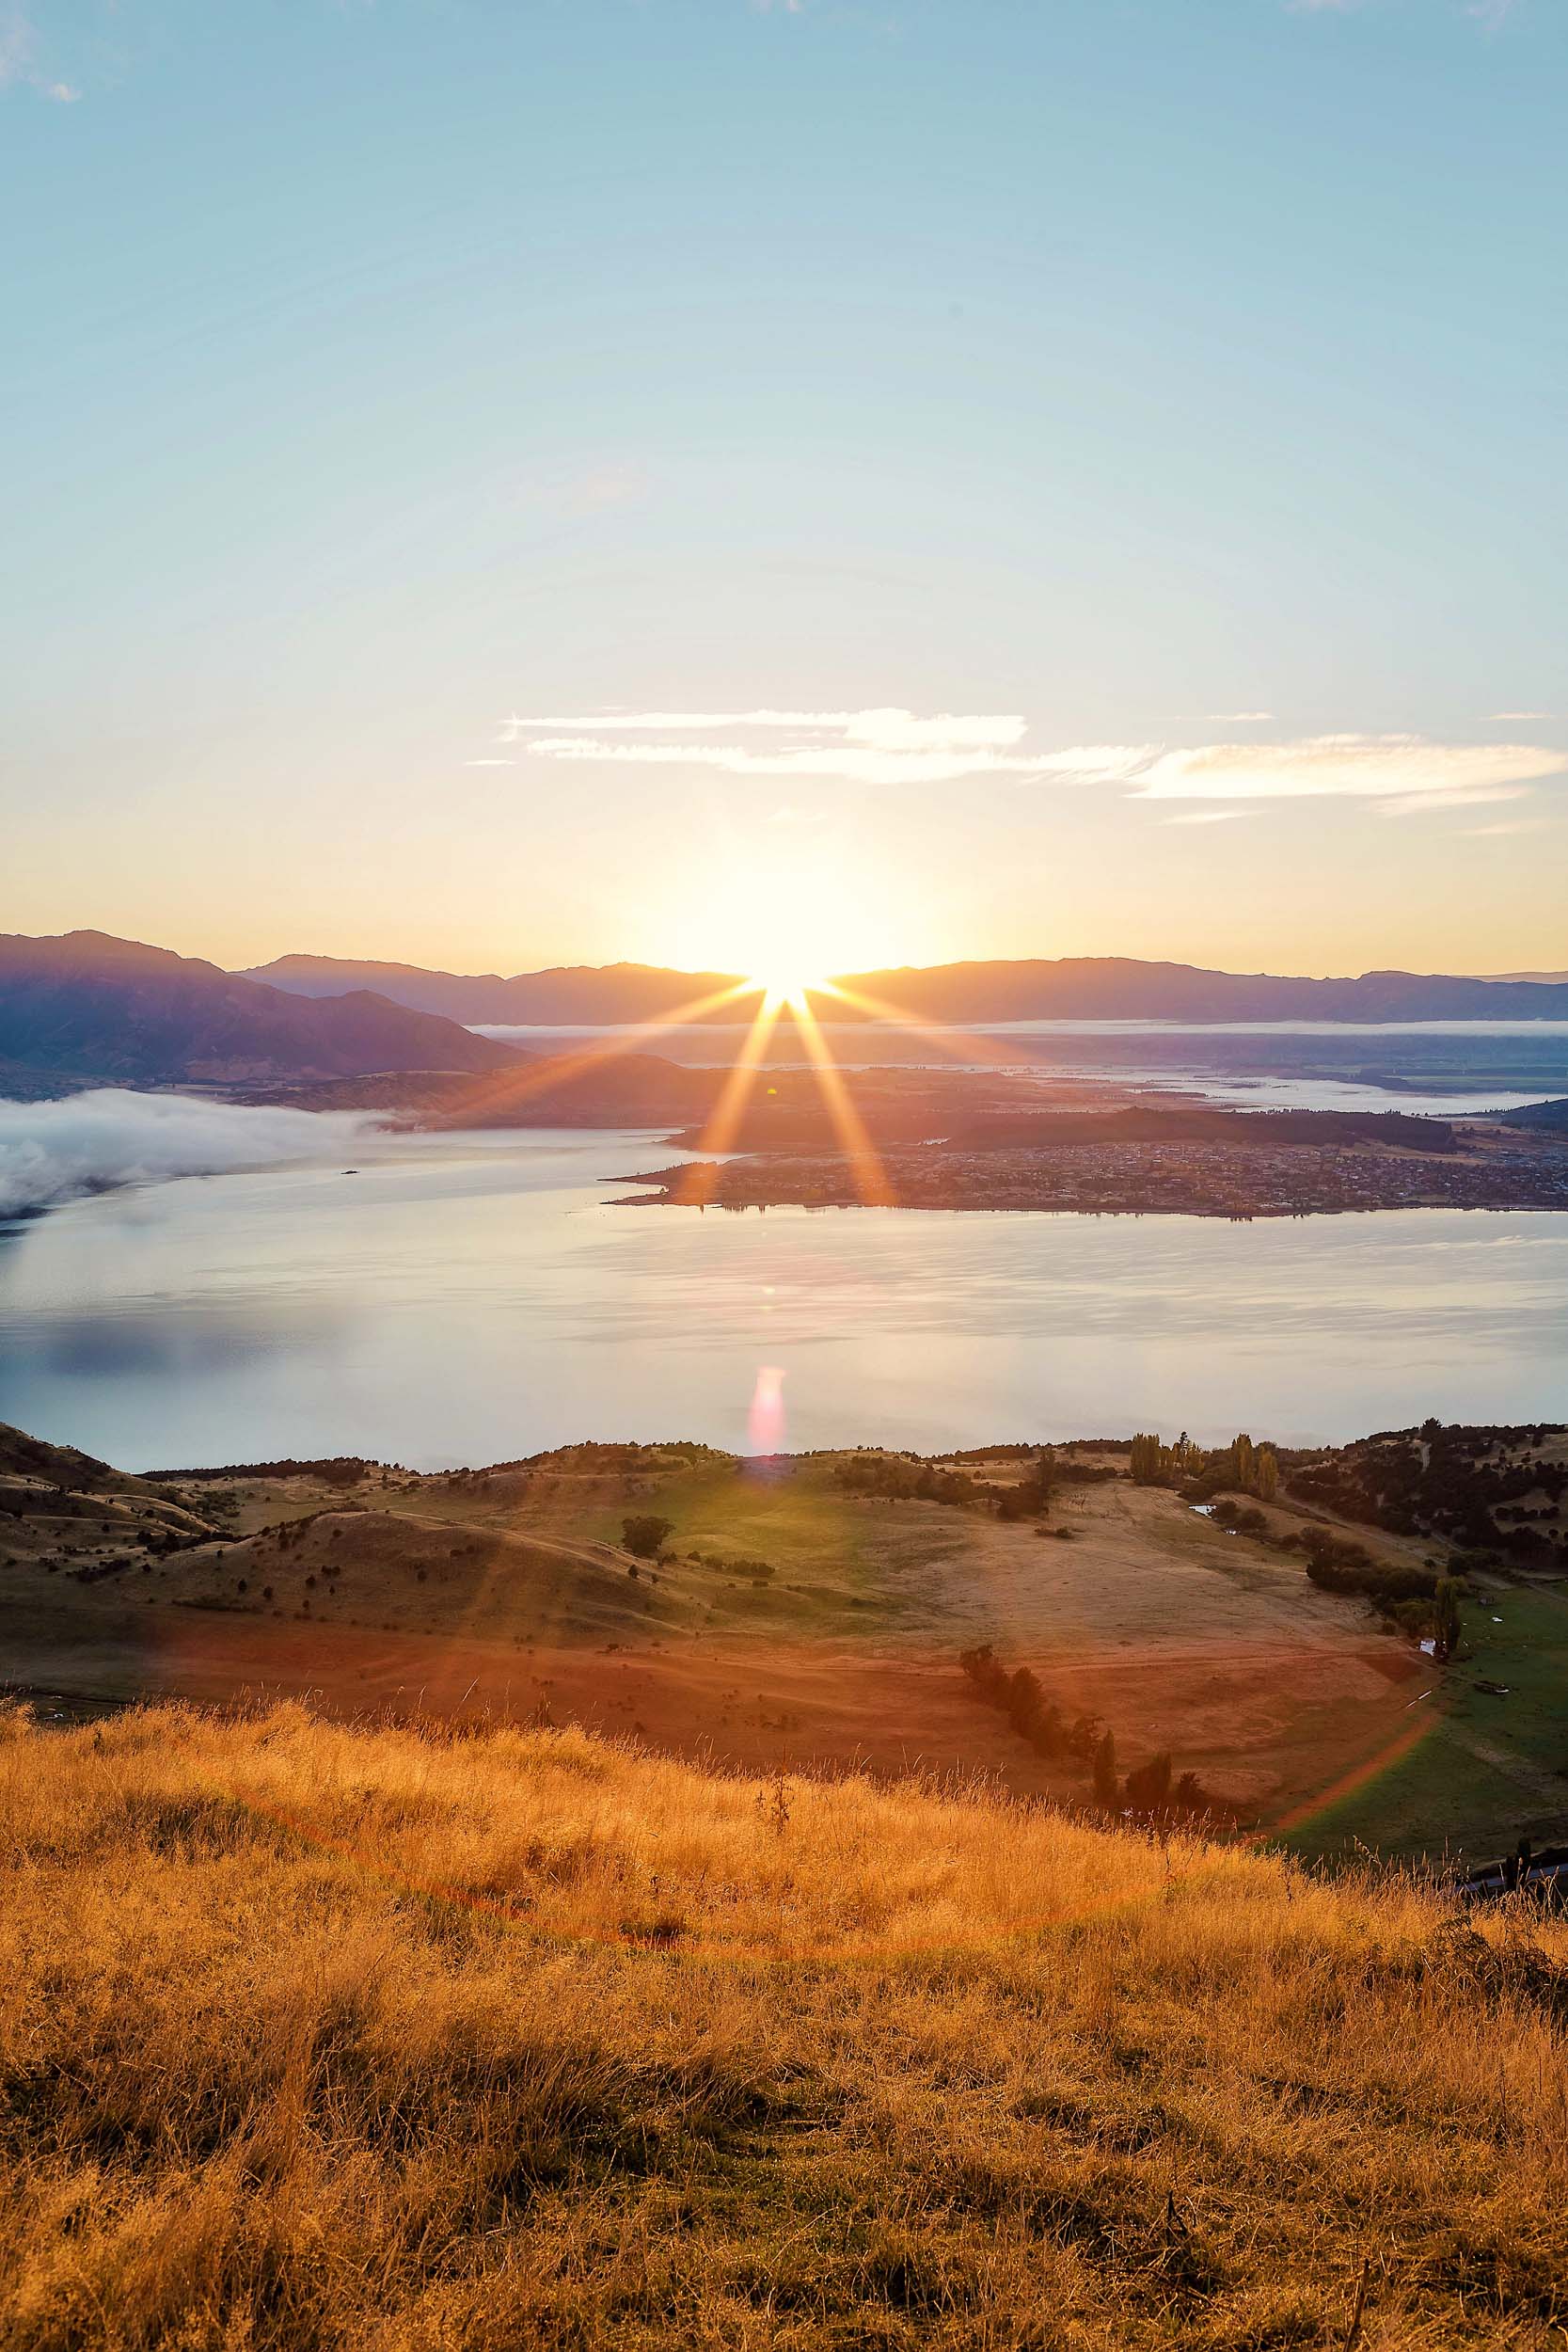
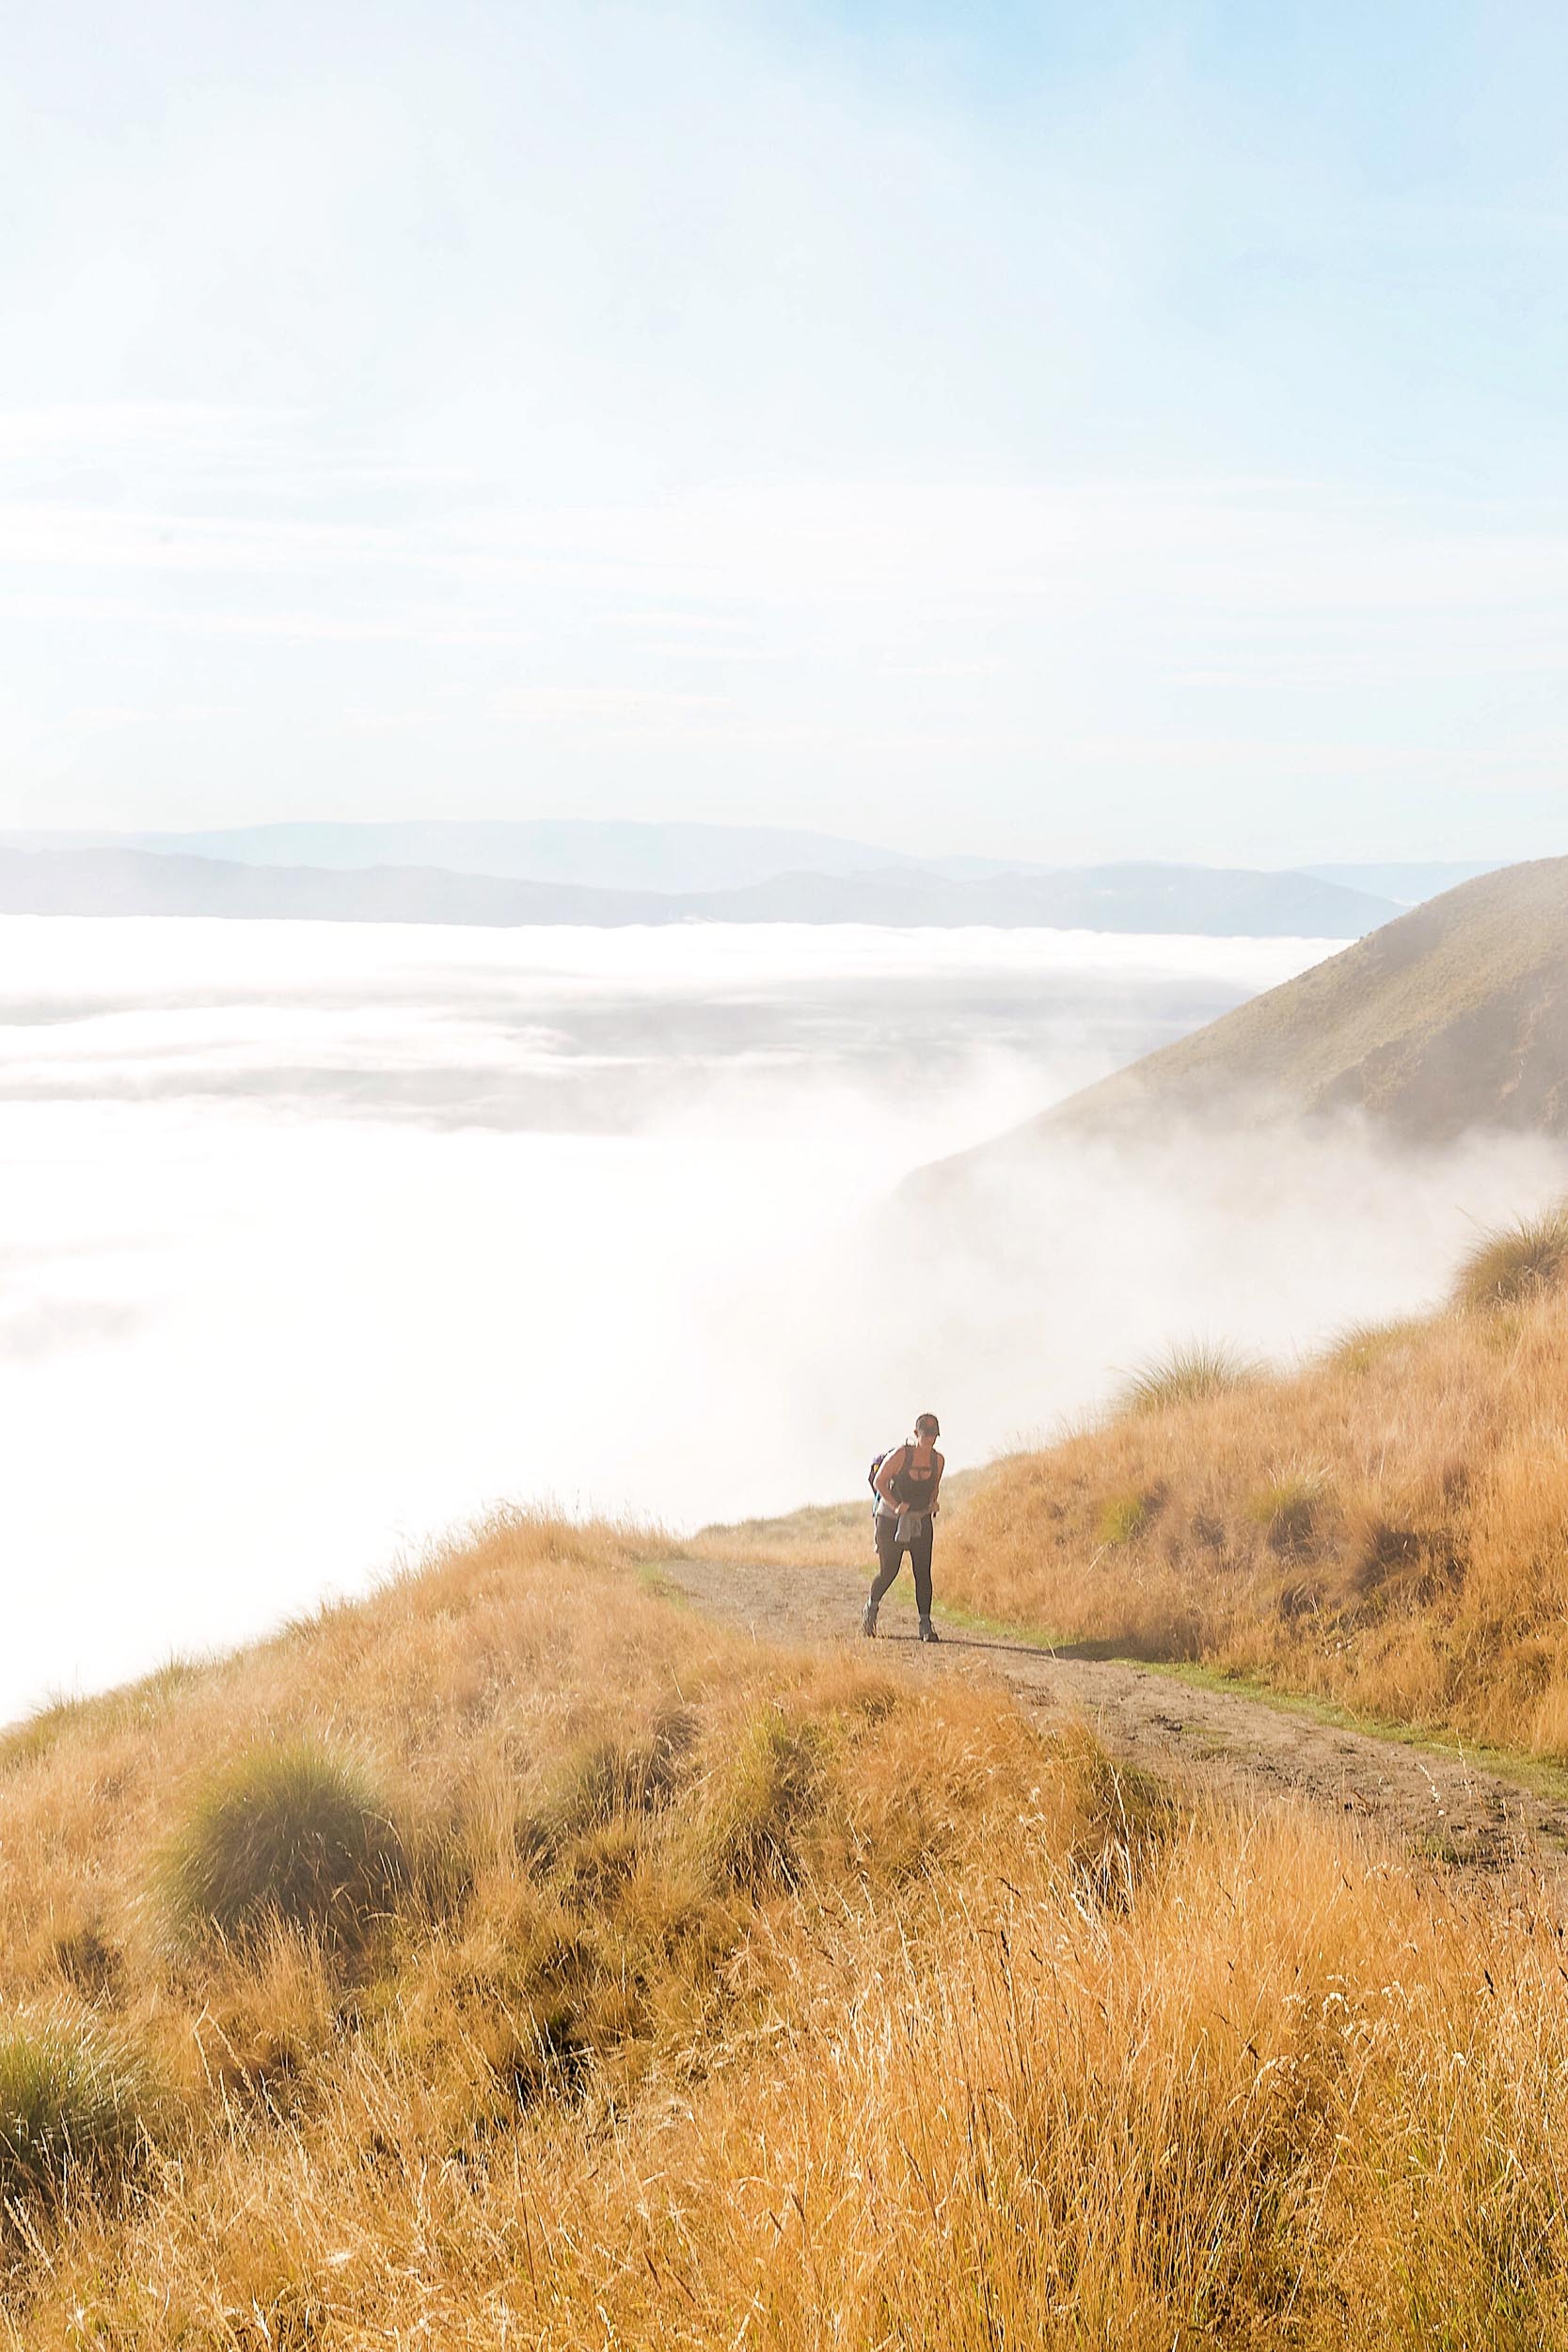
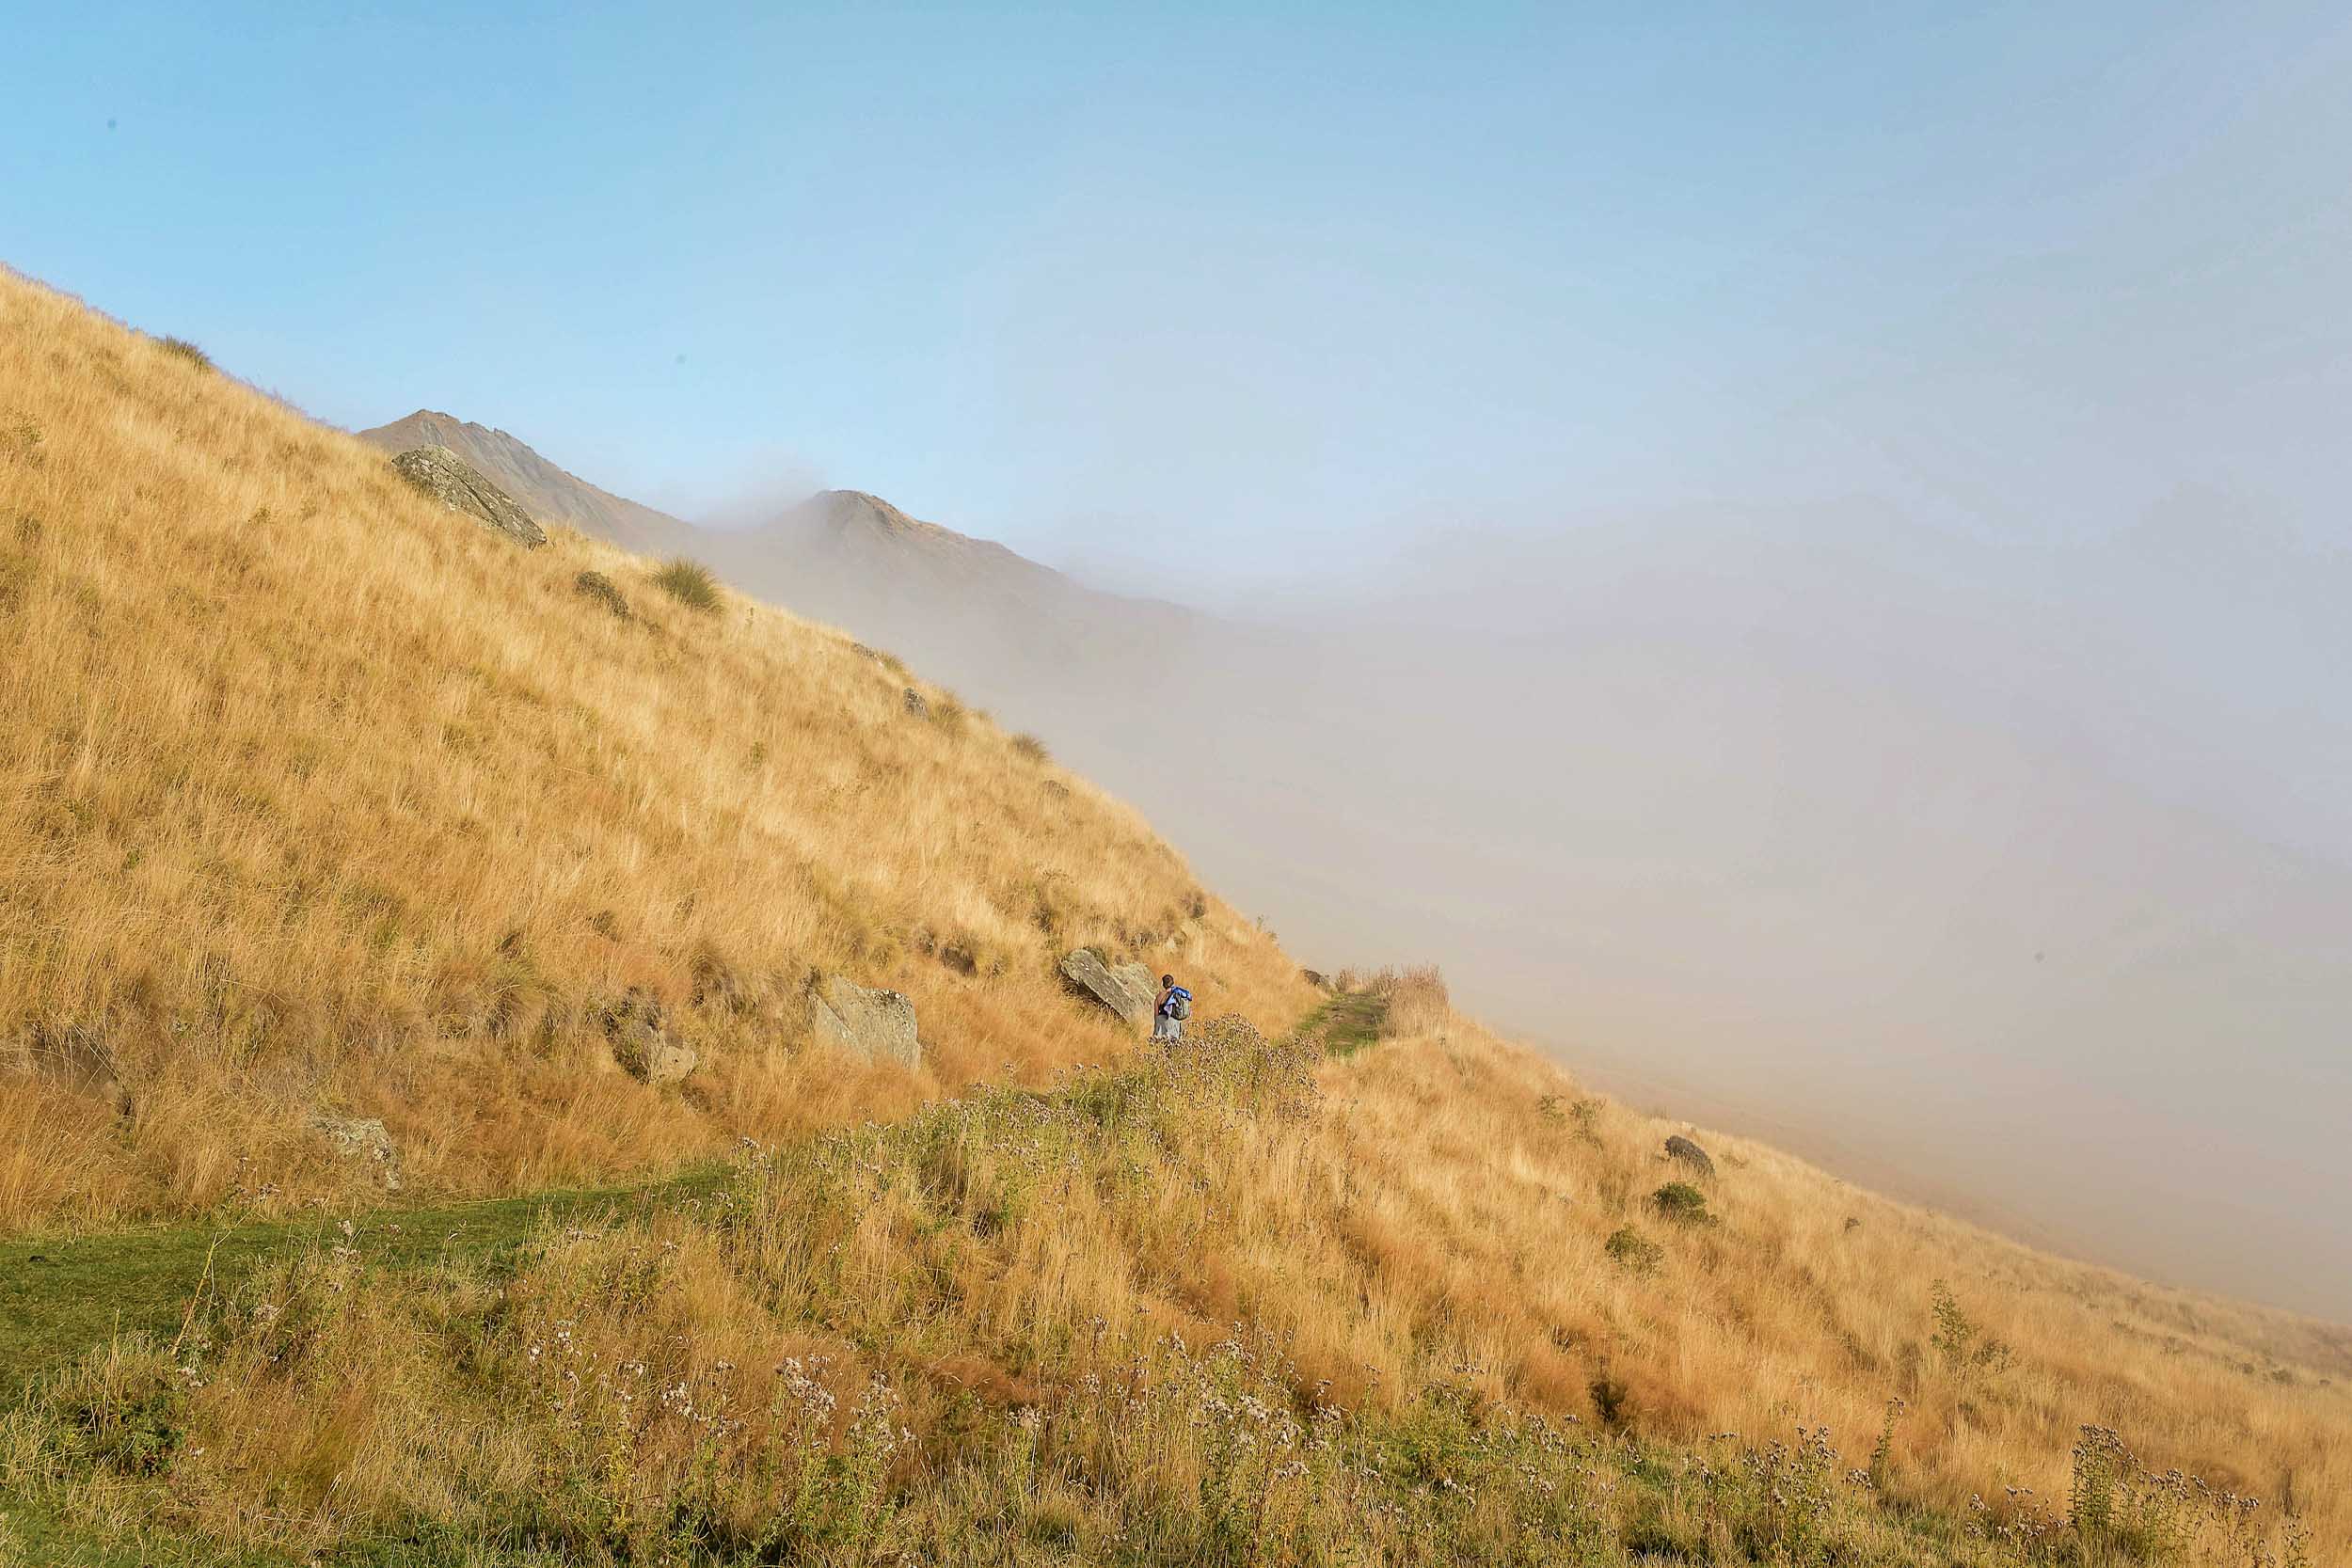
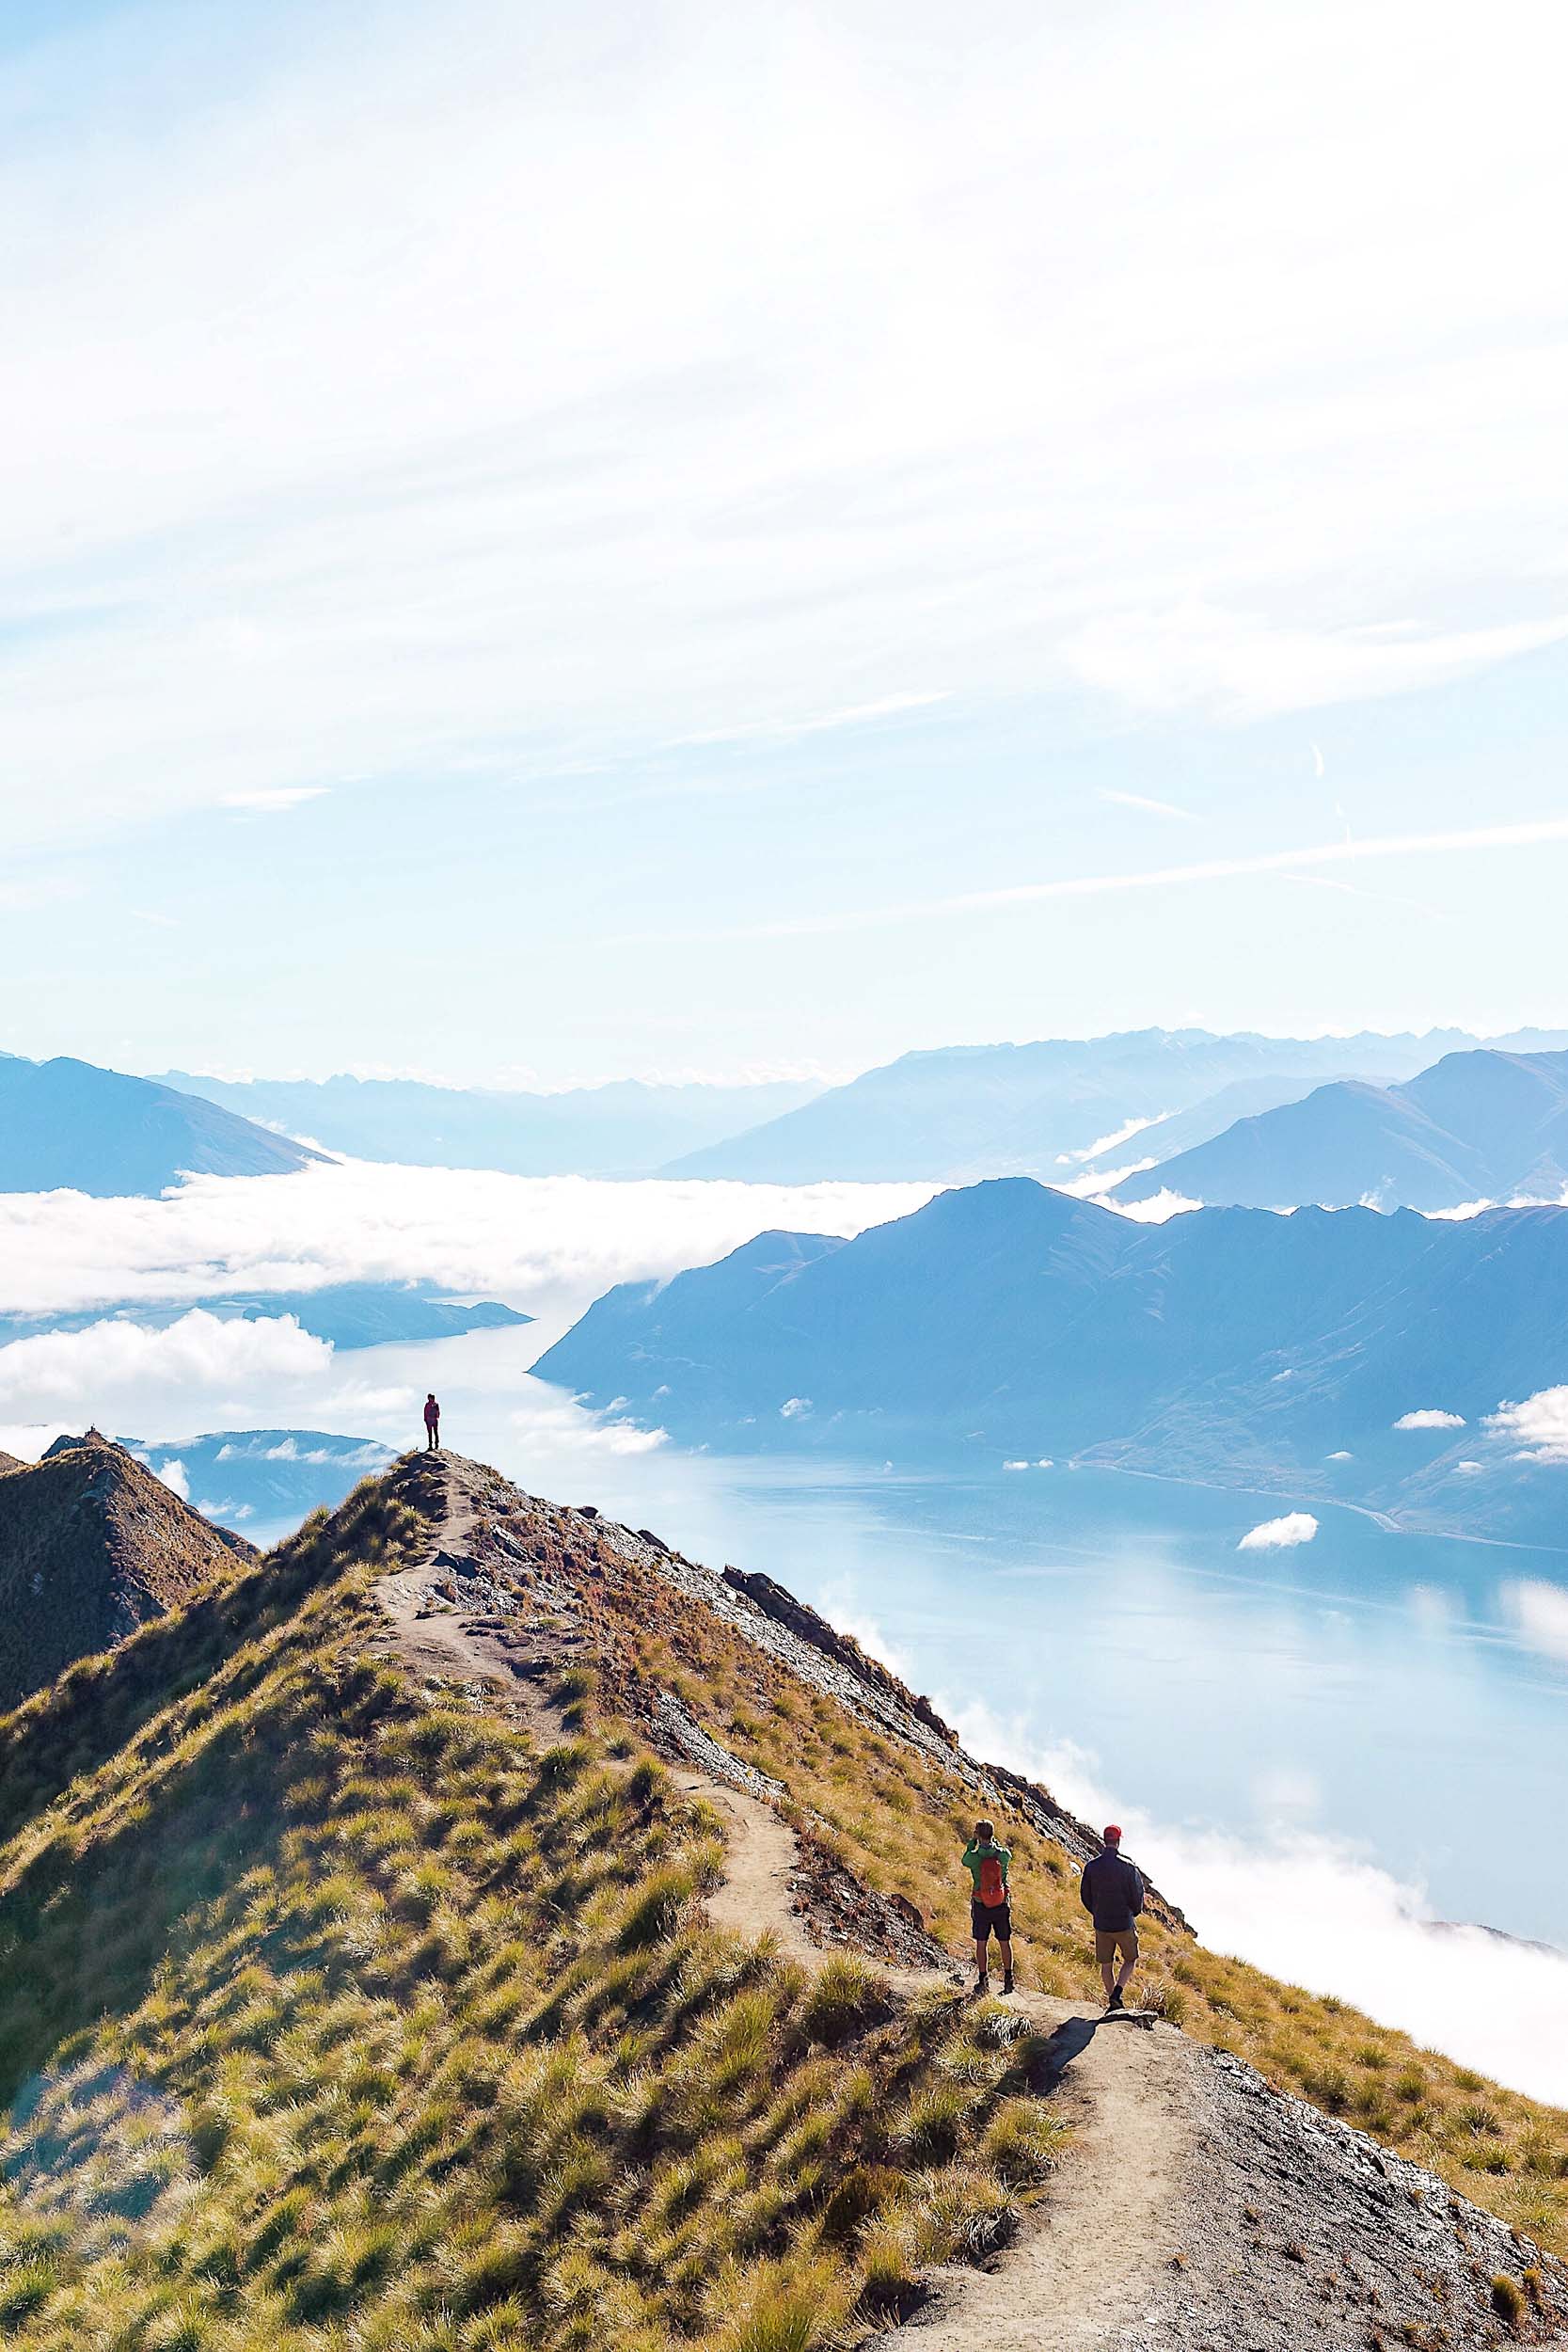
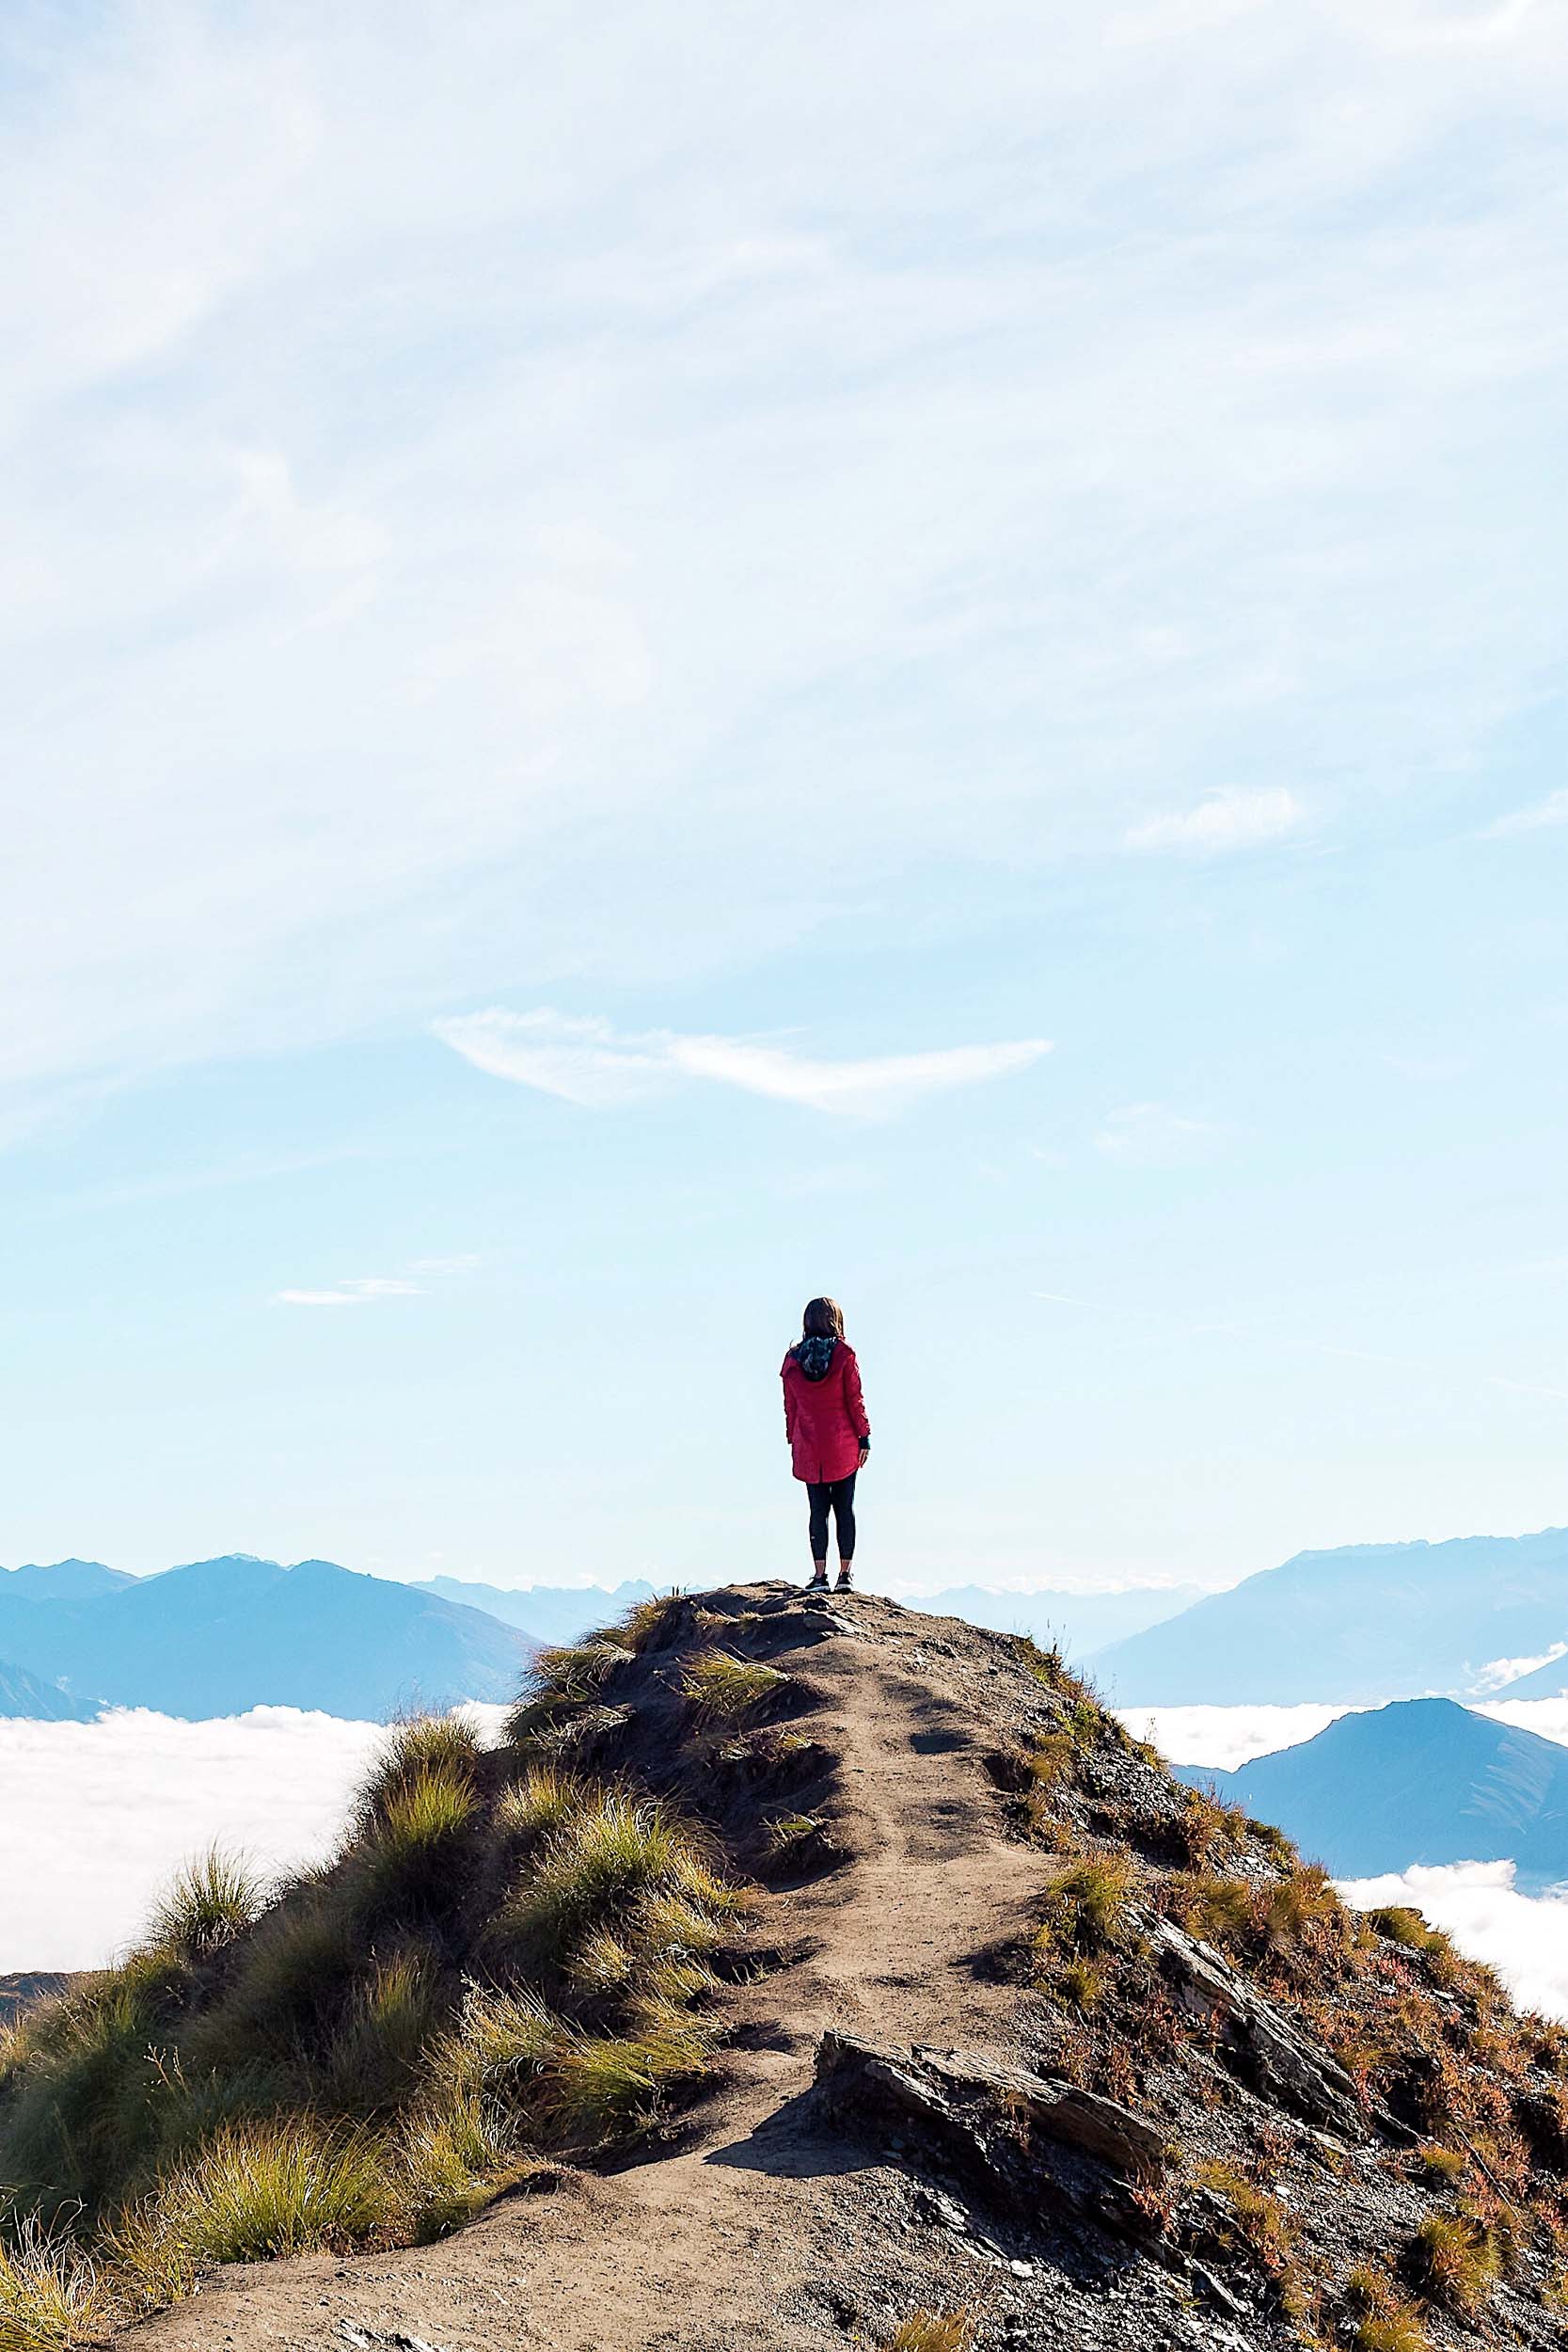
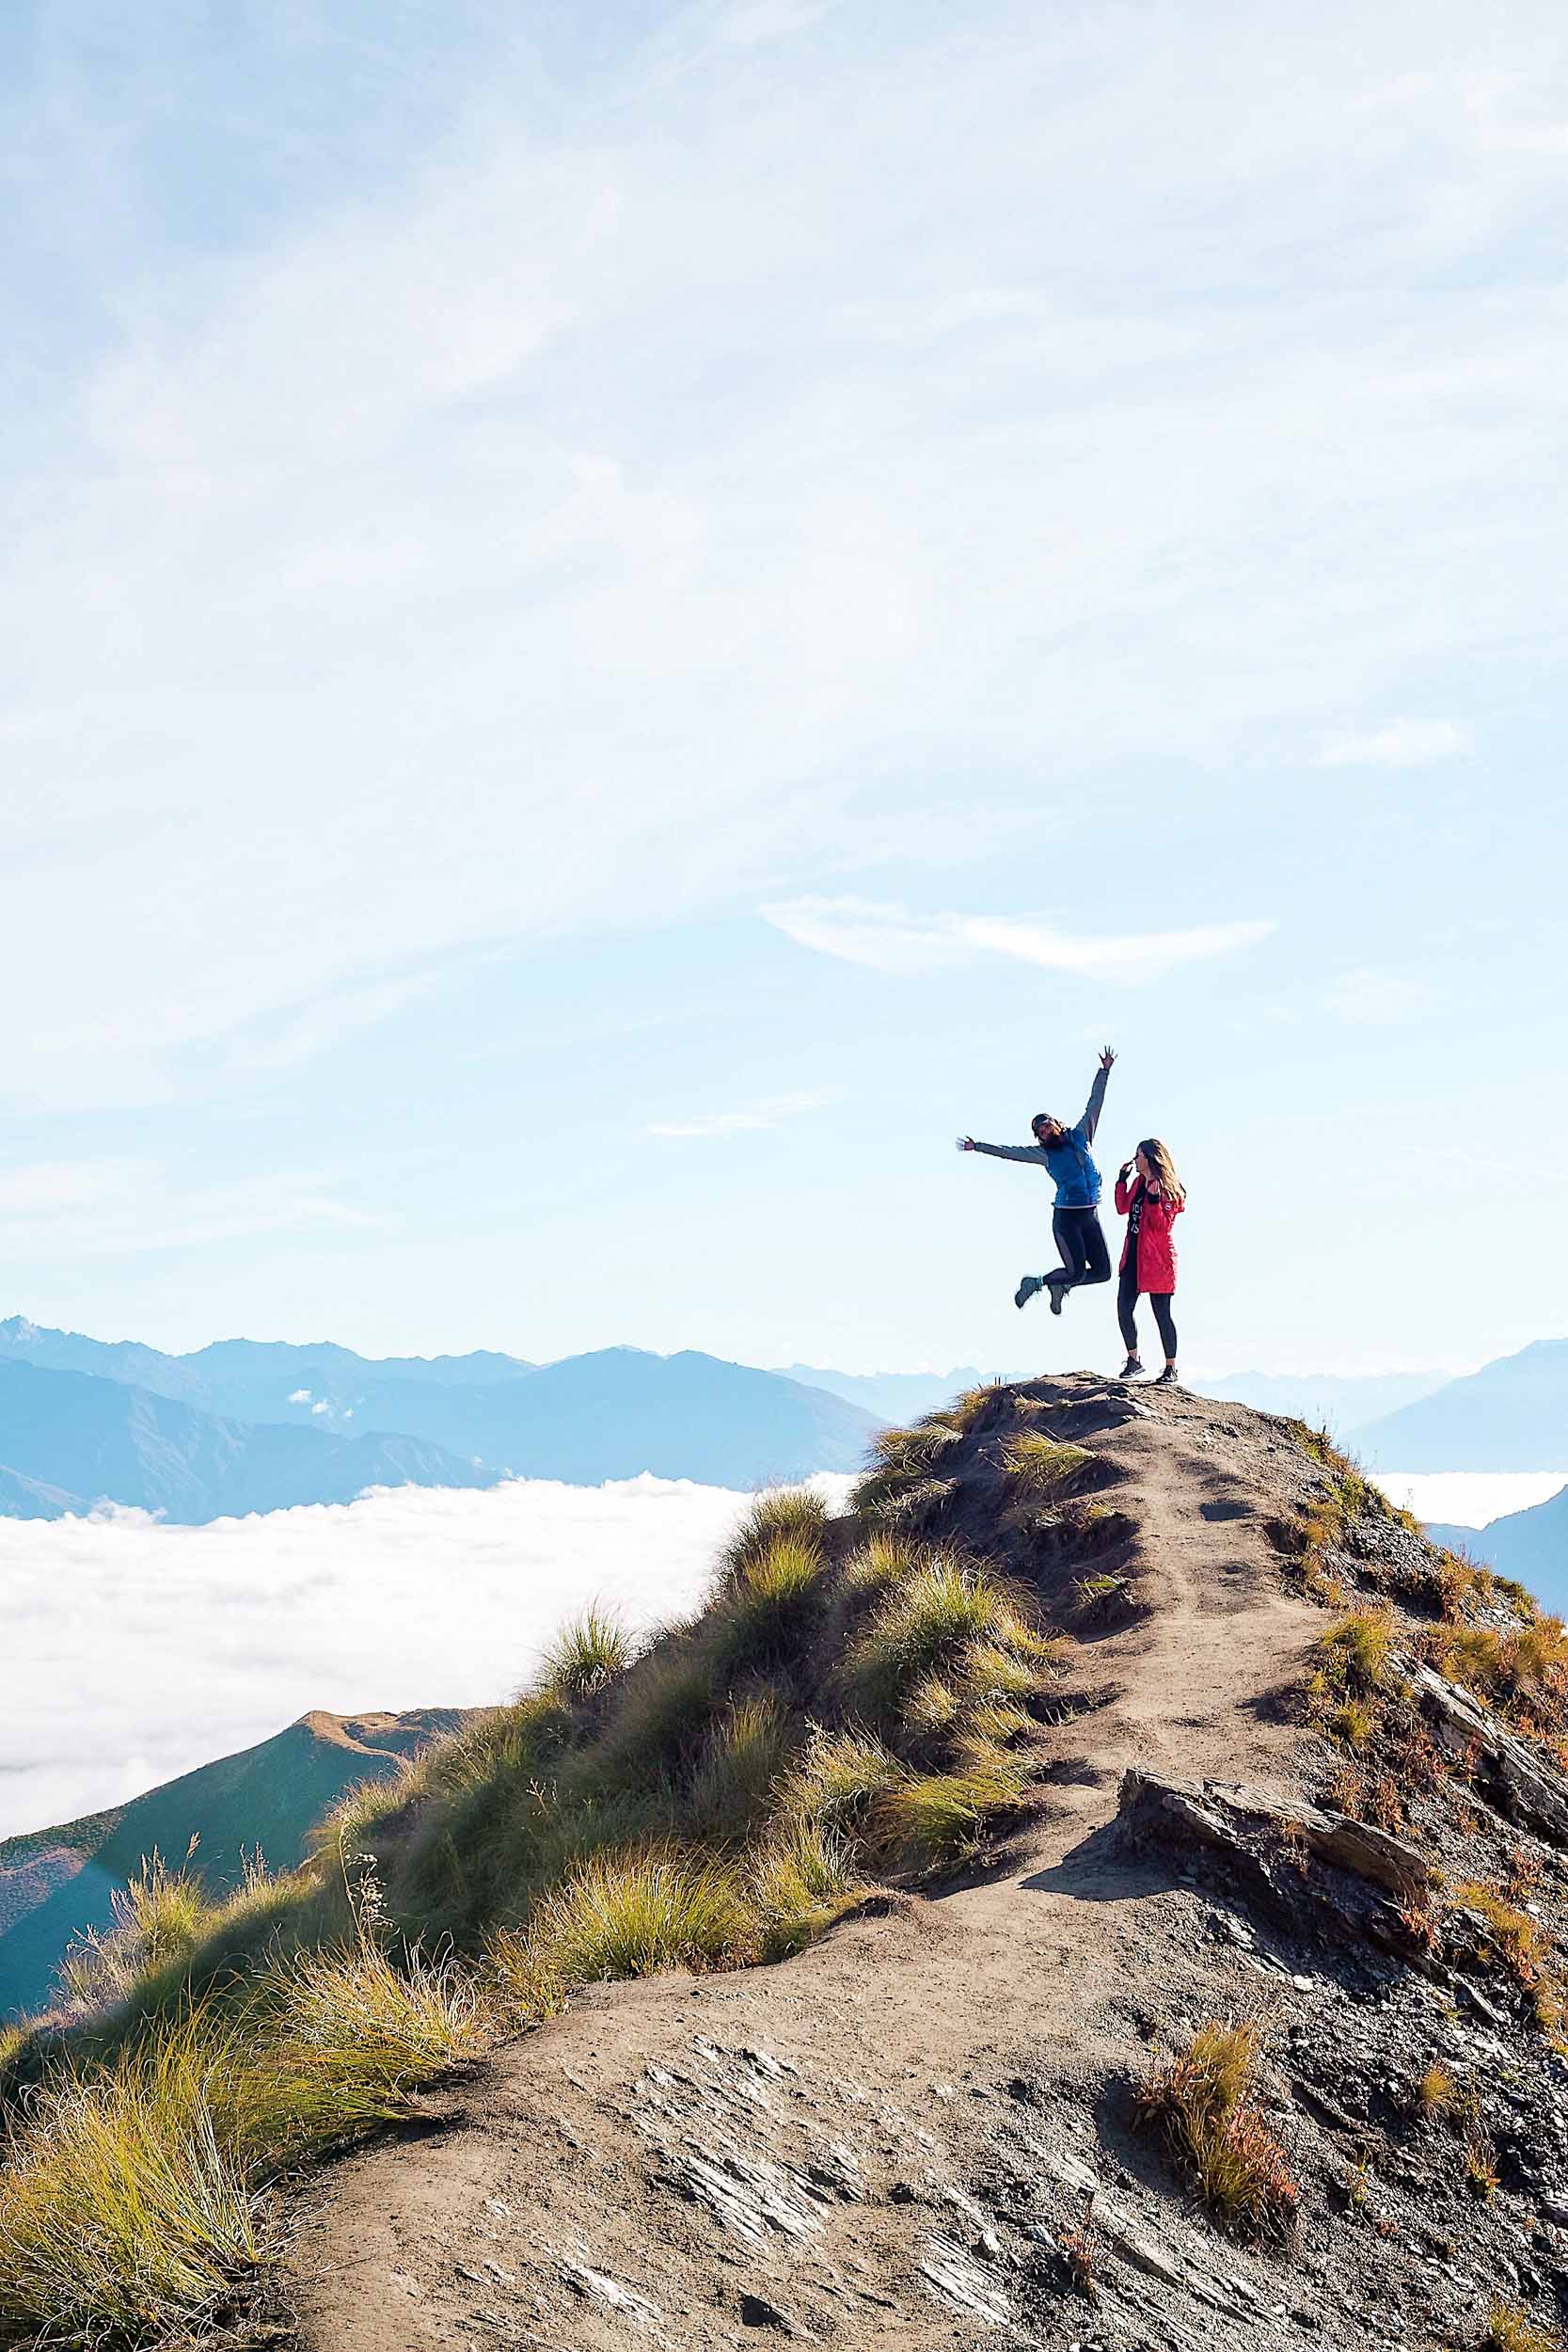
As I mentioned, the hike is a full day trek, taking between 5 and 7 hours. It is a steady uphill climb where you walk on a zigzag path back and forth for hours until you reach the top. If you are looking for an exciting adventure - this is not it. The (sole) reason to do this hike is for the view from the top, in my opinion. It is one of the best day hikes in New Zealand if you’re looking for an amazing view.
For the duration of the entire hike you will be exposed to the sun. Because of this I recommend that you (1) leave before the sun rises to avoid being in direct sunlight for up to 7 hours, (2) wear SPF and reapply often, and (3) bring plenty of water with you. There is a hole in the ozone layer over New Zealand, allegedly, and the sun is extremely strong. Also pack some snacks in case you get hungry and make sure to pack a lunch.
There is a strong chance that during the hike you will deal with changing weather patterns, especially if you leave before sunrise. The Wanaka weather forecast can be a bit funky. Make sure you bring the right attire.
We made the trek in April and at the beginning it was chilly, in the middle we were very hot, and then once at the top we were cold once again as we were still in the sun but also caught in a lot of wind. I wore my Canada Goose Stellarton coat which was great because it packs down to almost nothing but still kept me extremely warm. Of course also make sure you wear comfortable shoes!
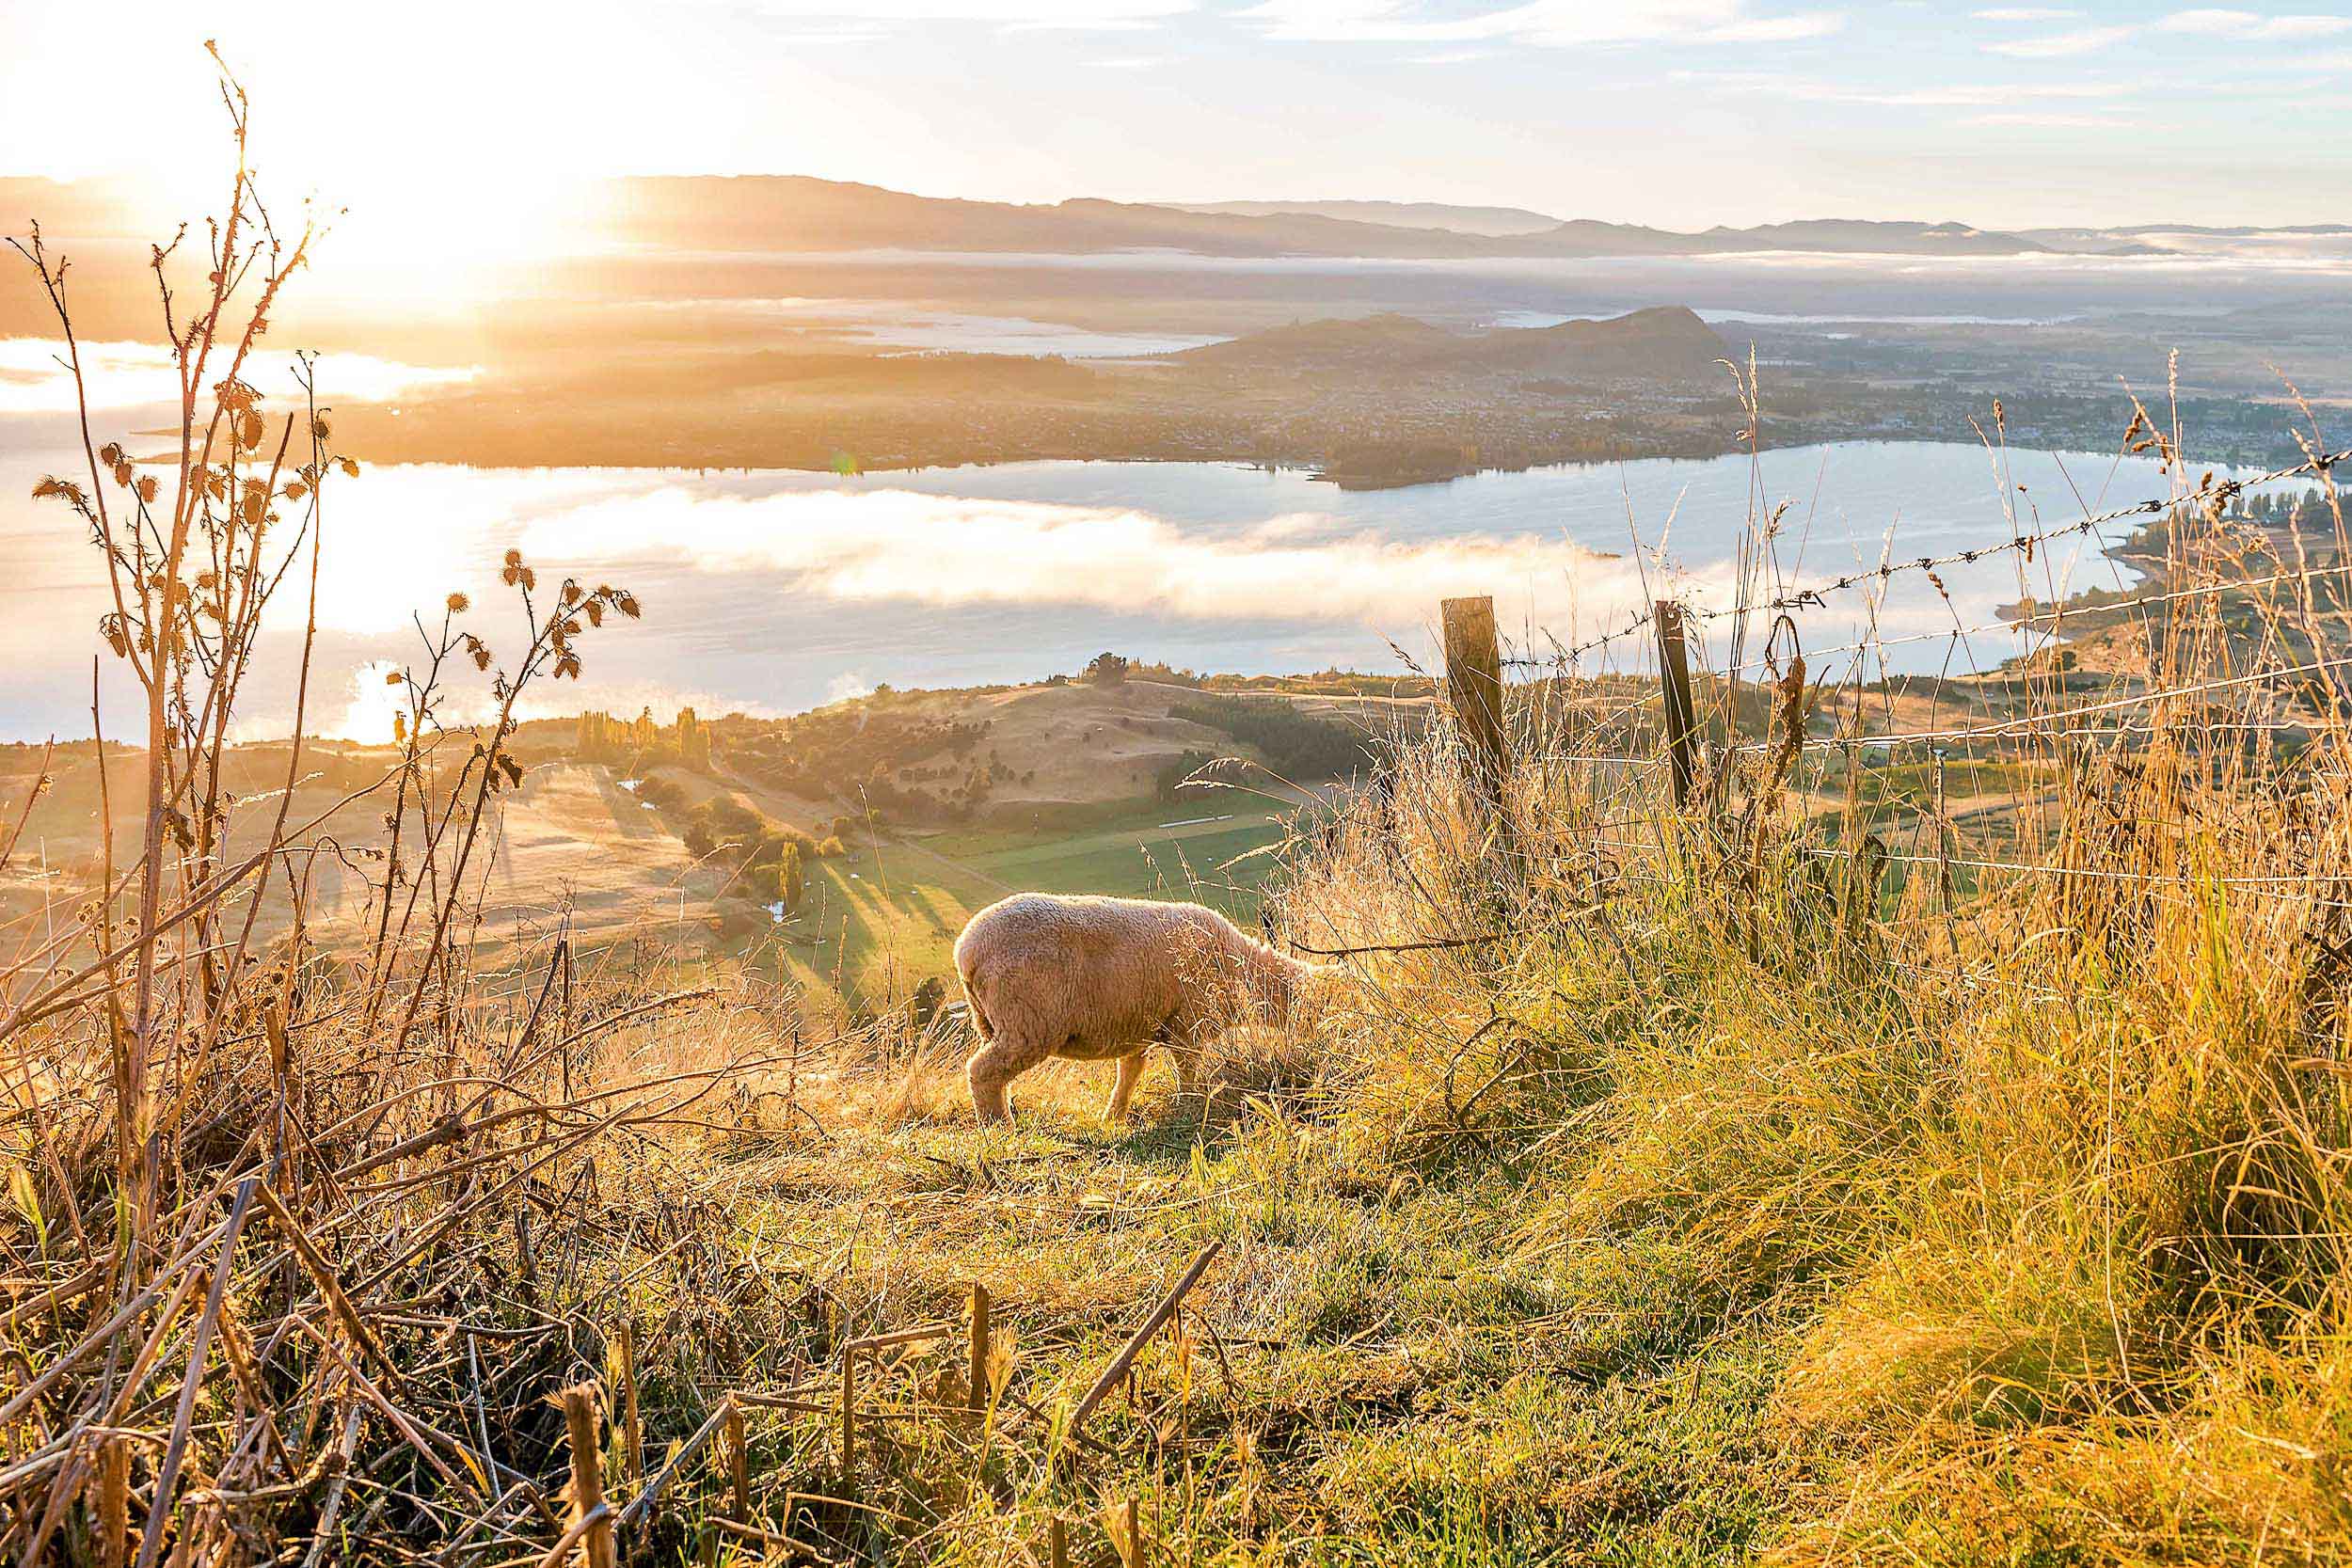
Once you arrive at the top, enjoy your packed lunch and take in the magnificent views! They really are out of this world and some of the best I have ever seen. And do not forget your camera.


Things to do in Wanaka
Aside from Wanaka hikes, you should make sure to also spend some time actually in Wanaka. It was one of my favorite stops of my two week trip. Some of my favorites there were Big Fig for a healthy lunch, Kai Whakapai for a beer in the sun with the locals, and Lake Bar for dinner.
WHAT I WORE
LIKE THIS POST? PLEASE SAVE IT ON PINTEREST!