
My PM Anti Aging Skincare Routine
As promised, here is a rundown of my nighttime skincare routine. If you haven’t already, make sure to read my AM anti-aging skincare routine post (click here for that). Some of my PM routine overlaps with my AM and that post explains in more detail why I use those specific items.
Also be sure to read my post on the 3 most important skincare products (click here for that), especially if you are just starting to get into skincare and wondering where to get the biggest bang for your buck. And for more skincare and beauty favs, follow along on my new Instagram account @skincarethatilike!
FOLLOW ALONG @SKINCARETHATILIKE

My Nighttime Anti Aging Skincare Routine

Step 1: Double Cleanse
Step one of my nighttime skincare routine is double cleansing. Double cleansing involves, as the name suggests, cleansing twice! It’s ideally done once with an oil-based cleanser, followed by a second cleanse with a water-based cleanser. Oil cleansing is important because it removes makeup, sebum, SPF, pollution, etc. The second cleanse using a water-based cleanser removes the water-based residue such as sweat and dirt. And yes, everyone - including those with oily skin - can use an oil-based cleanser.
Fully cleansing your skin prior to applying your PM products is incredibly important. There are many reasons why, not least of which is because you want to prep your skin to properly absorb the products you will be applying. I personally use a lot of medical grade products that are not inexpensive. Because of that I really don’t want to waste a single drop, and therefore I take this step seriously!
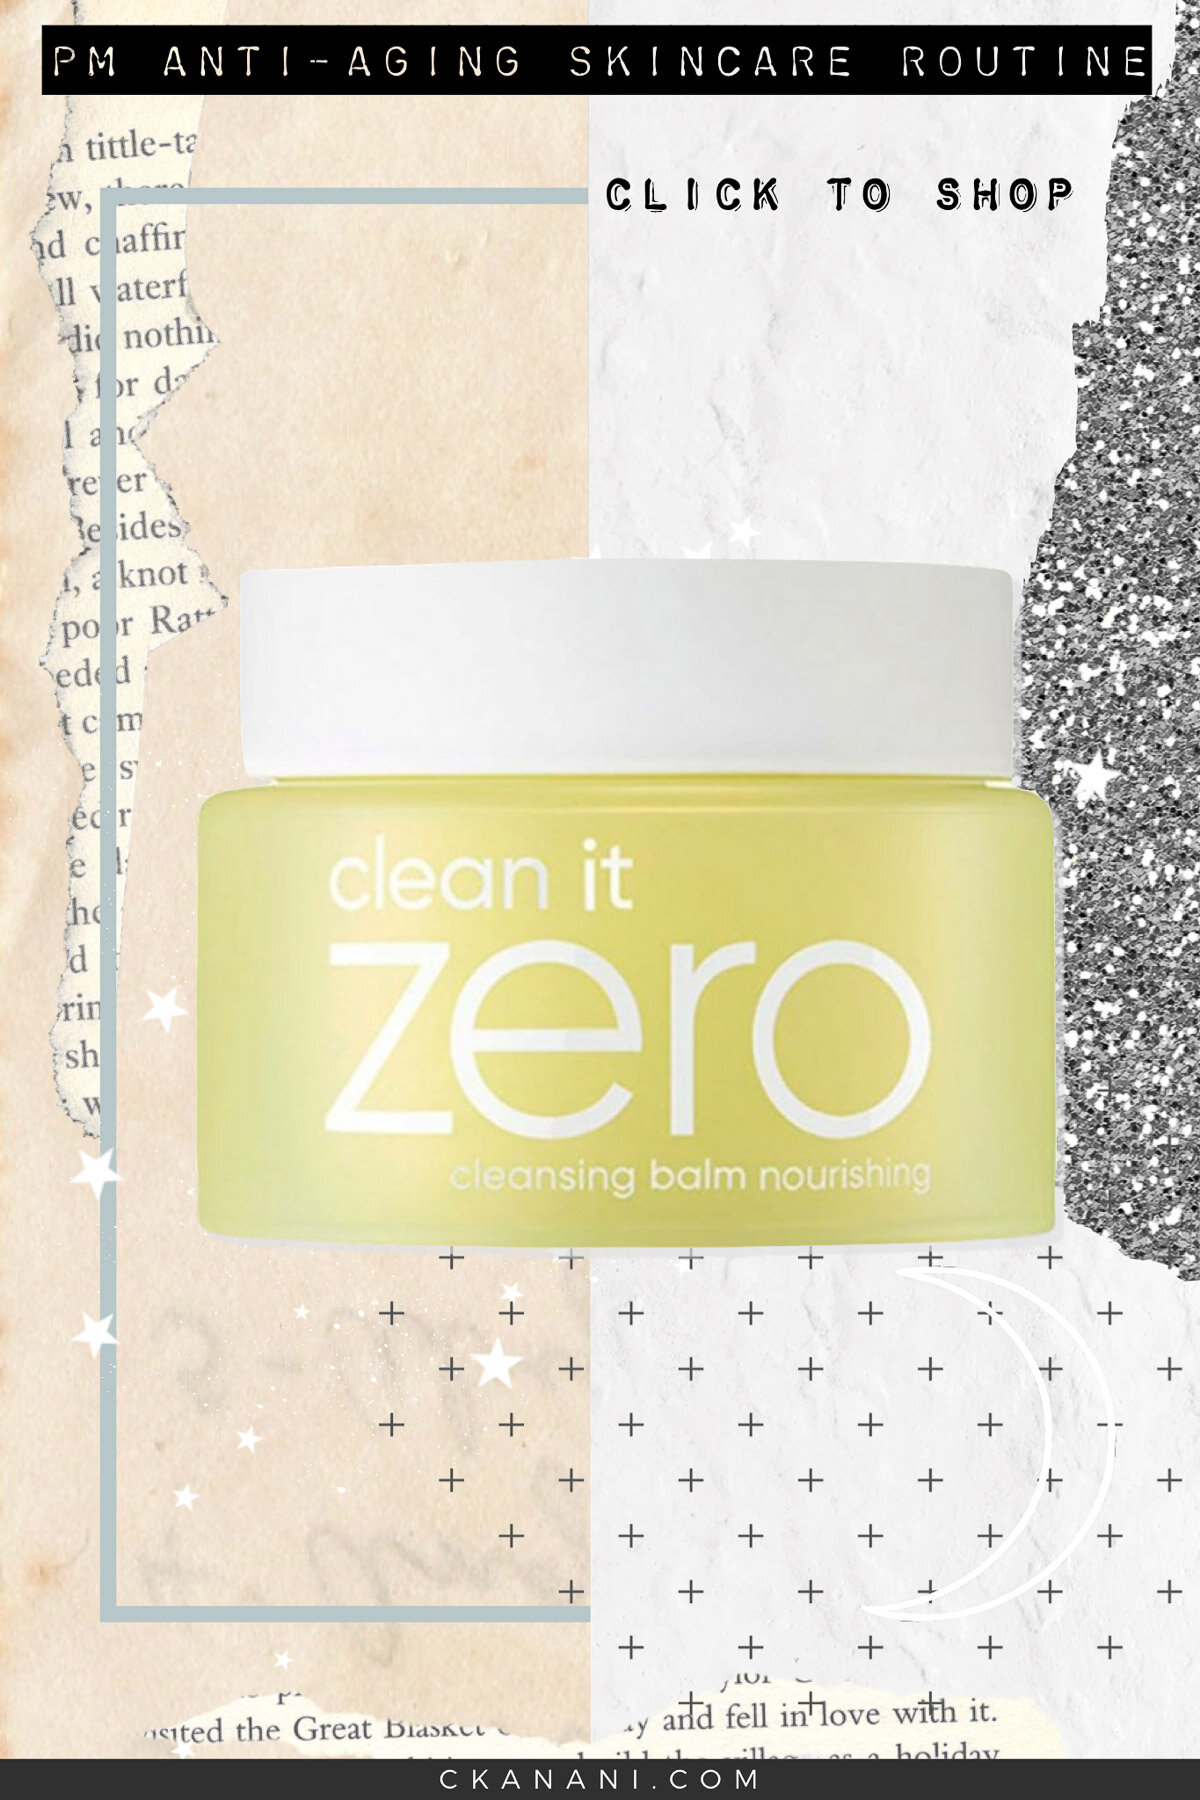
I start my double cleanse with Banila Co. Cleansing Balm. This specific version is for dry skin and uses royal jelly extract (something my mom takes in pill form to prevent migraines) to deeply moisturize along with ginseng extract to revitalize. If you don’t have dry skin, there’s also an original version, purifying, and revitalizing. Click here to check those out.
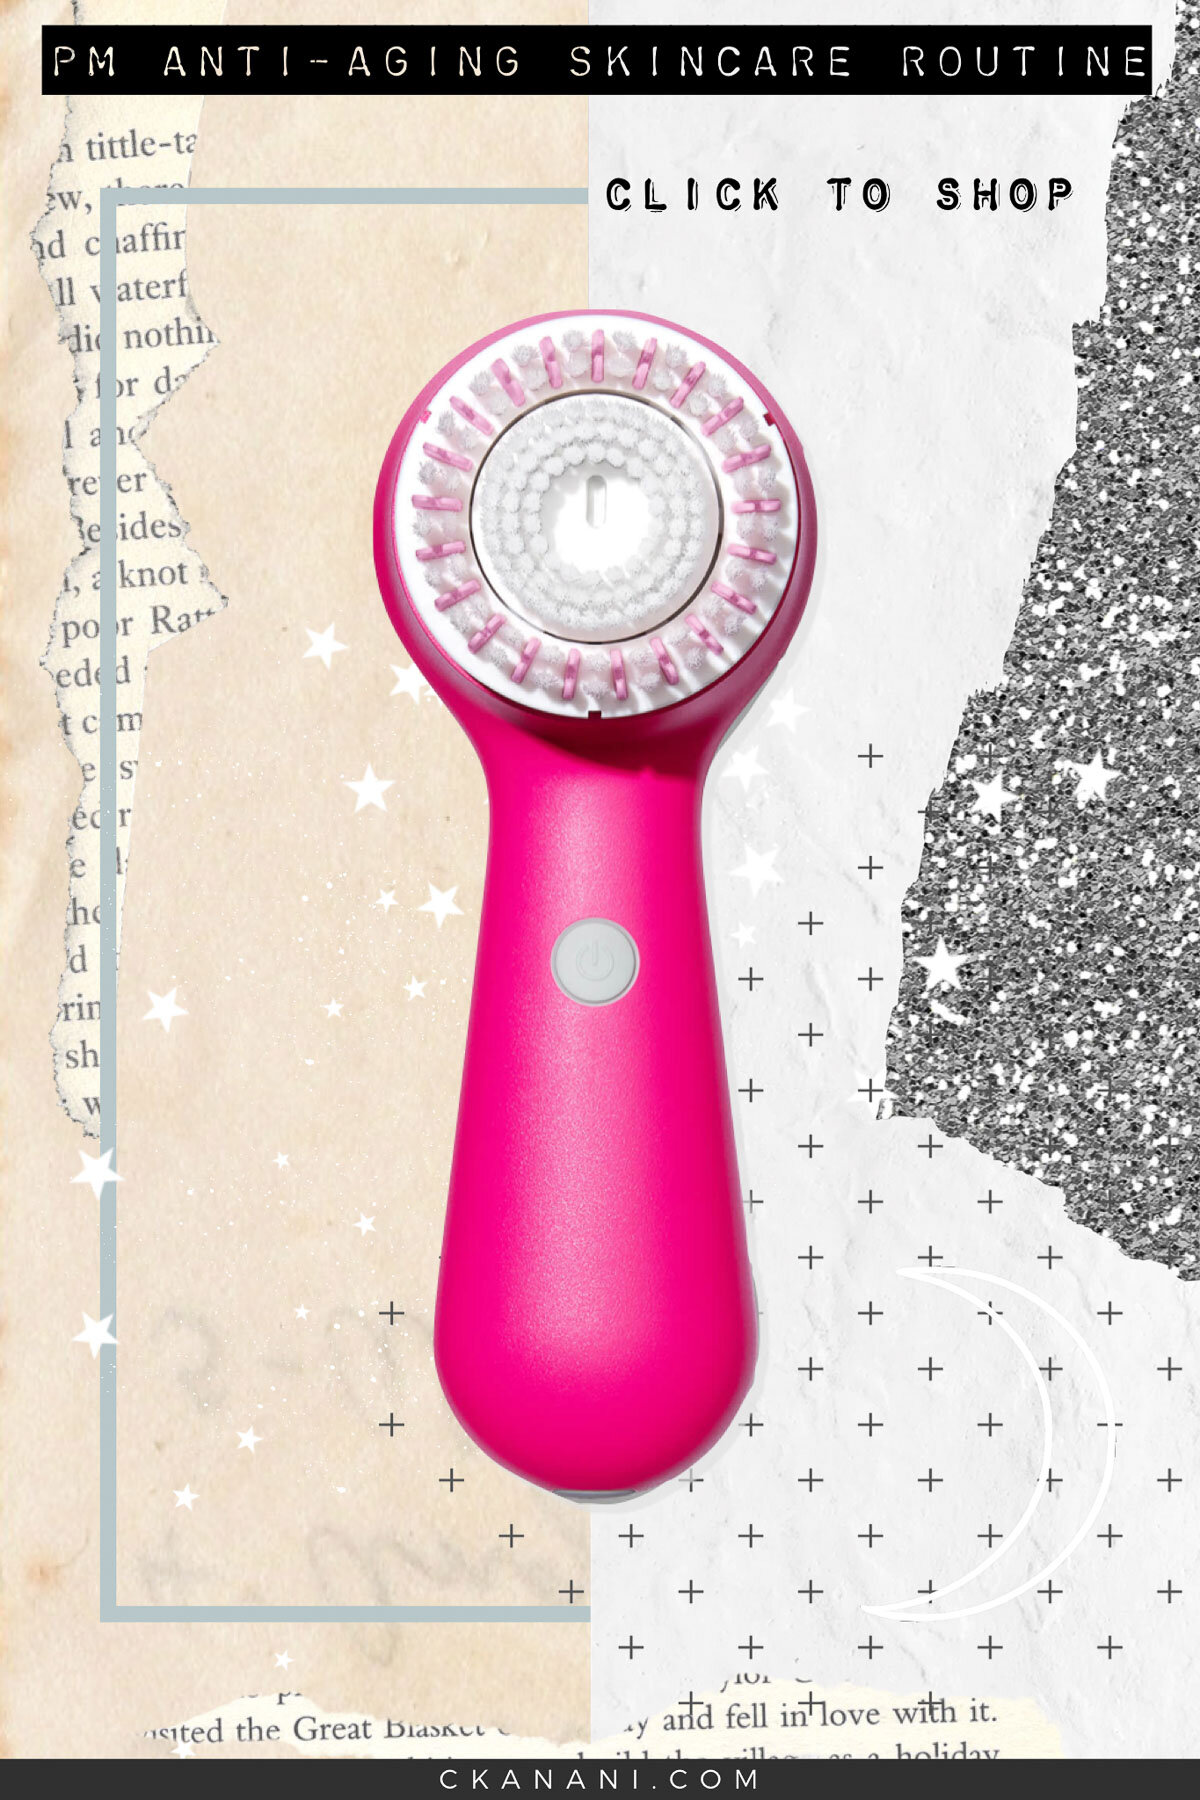
This particular cleanser is a solid balm but once you place it on your skin it melts into the most luxurious oil. I use my Clarisonic with this step, which my cosmetic dermatologist says is essential. I notice a huge difference when I clean my face with the Clarisonic vs. when I don’t. If you don’t already have and use a Clarisonic, I highly recommend picking one up! Click here for the one I recommend.
After the first cleanse, I cleanse again with Glowbiotics Probiotic Revitalizing Cleanser. I like this one specifically because it cleanses gently without stripping the skin. Click here to see the latest prices.
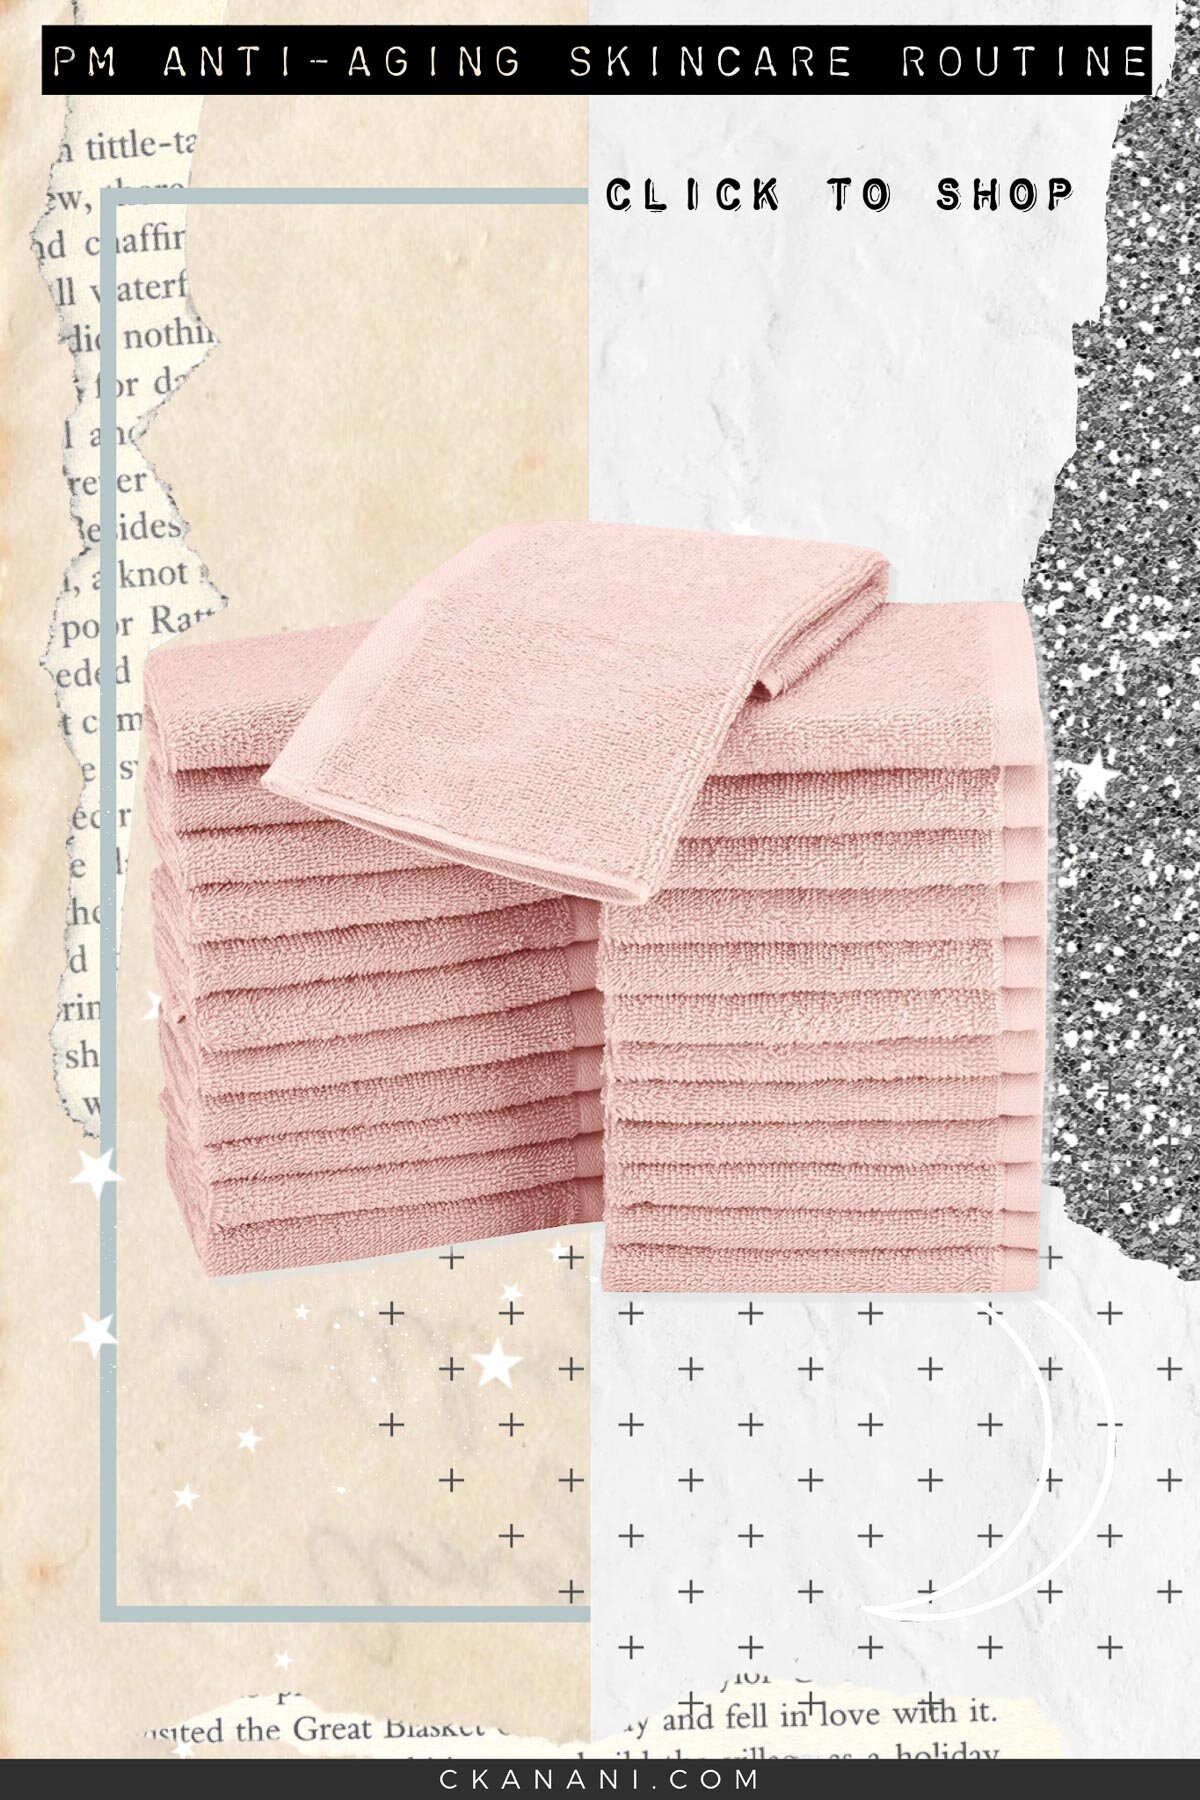
I also make sure to use a clean wash cloth every time I wash my face. Yes, two towels per day! Click here for the ones I use from Amazon. Make sure to pat your face dry, not rub it.

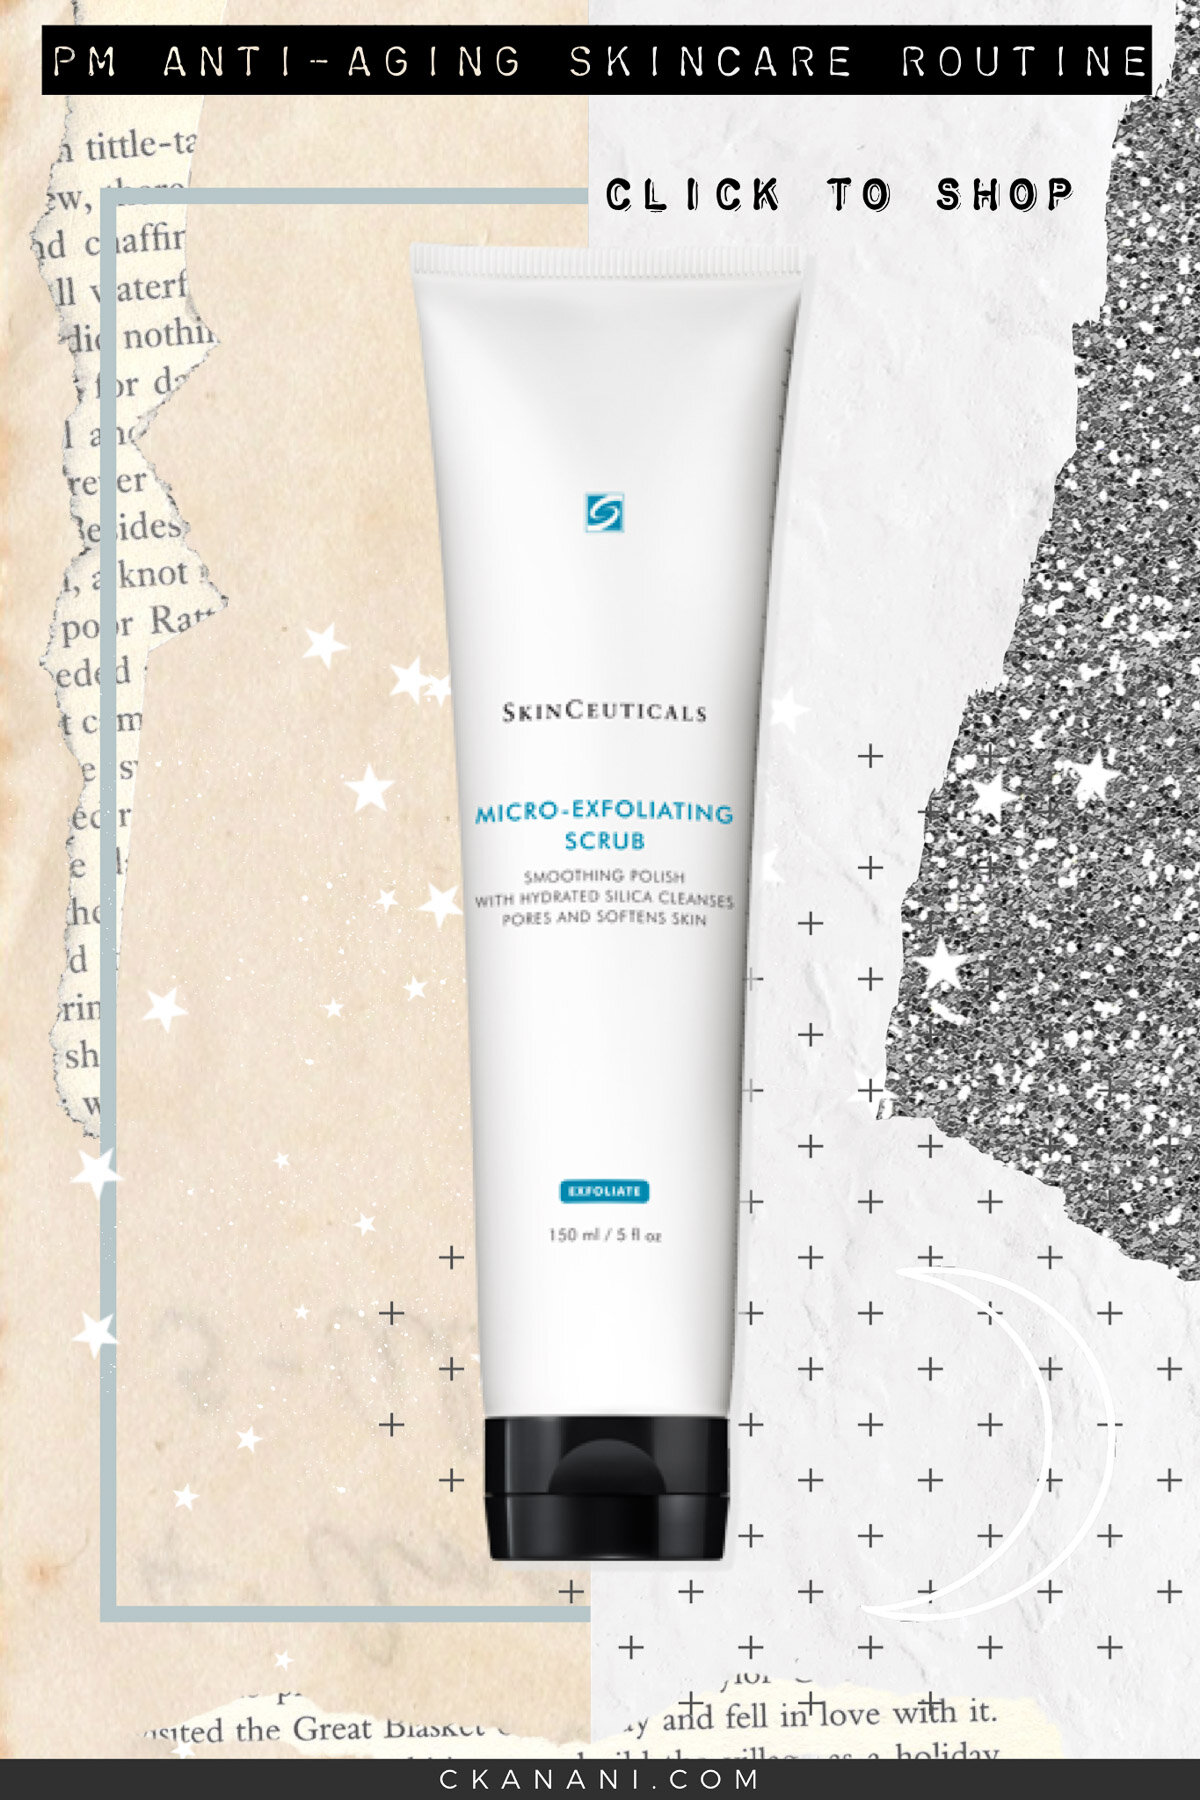
Step 2: Exfoliate (if needed)
Next up, I will exfoliate if needed. Exfoliants come in two common forms - physical and chemical. Physical exfoliants are scrubs that you can physically feel on your skin - using some kind of gritty texture to remove dead skin cells. Chemical exfoliants are ones that you can’t physically feel but instead using things like acids to exfoliate chemically. Both are great - it’s more a matter of personal preference.
The physical exfoliant I use is the SkinCeuticals Micro-exfoliating Scrub. It uses microbeads that will not harm or damage your skin, making it gentle enough for everyday. It’s also hydrating and perfect for all skin types! Click here to see the latest prices.
The chemical exfoliant I love is Dr. Dennis Gross Alpha Beta Universal Daily Peel. It is a pack of two pre-soaked pads that are anti-aging and radiance providing. It takes just two minutes and provides powerful, yet gentle exfoliation plus anti-aging benefits. They are marketed as daily and suitable for daily use but I use them a few times per week instead. You can also use them at night instead if you want - it is up to you. Click here to see the latest prices.
If your lips are dry, you should also exfoliate those. I use Fresh’s Sugar Lip Polish Exfoliator.
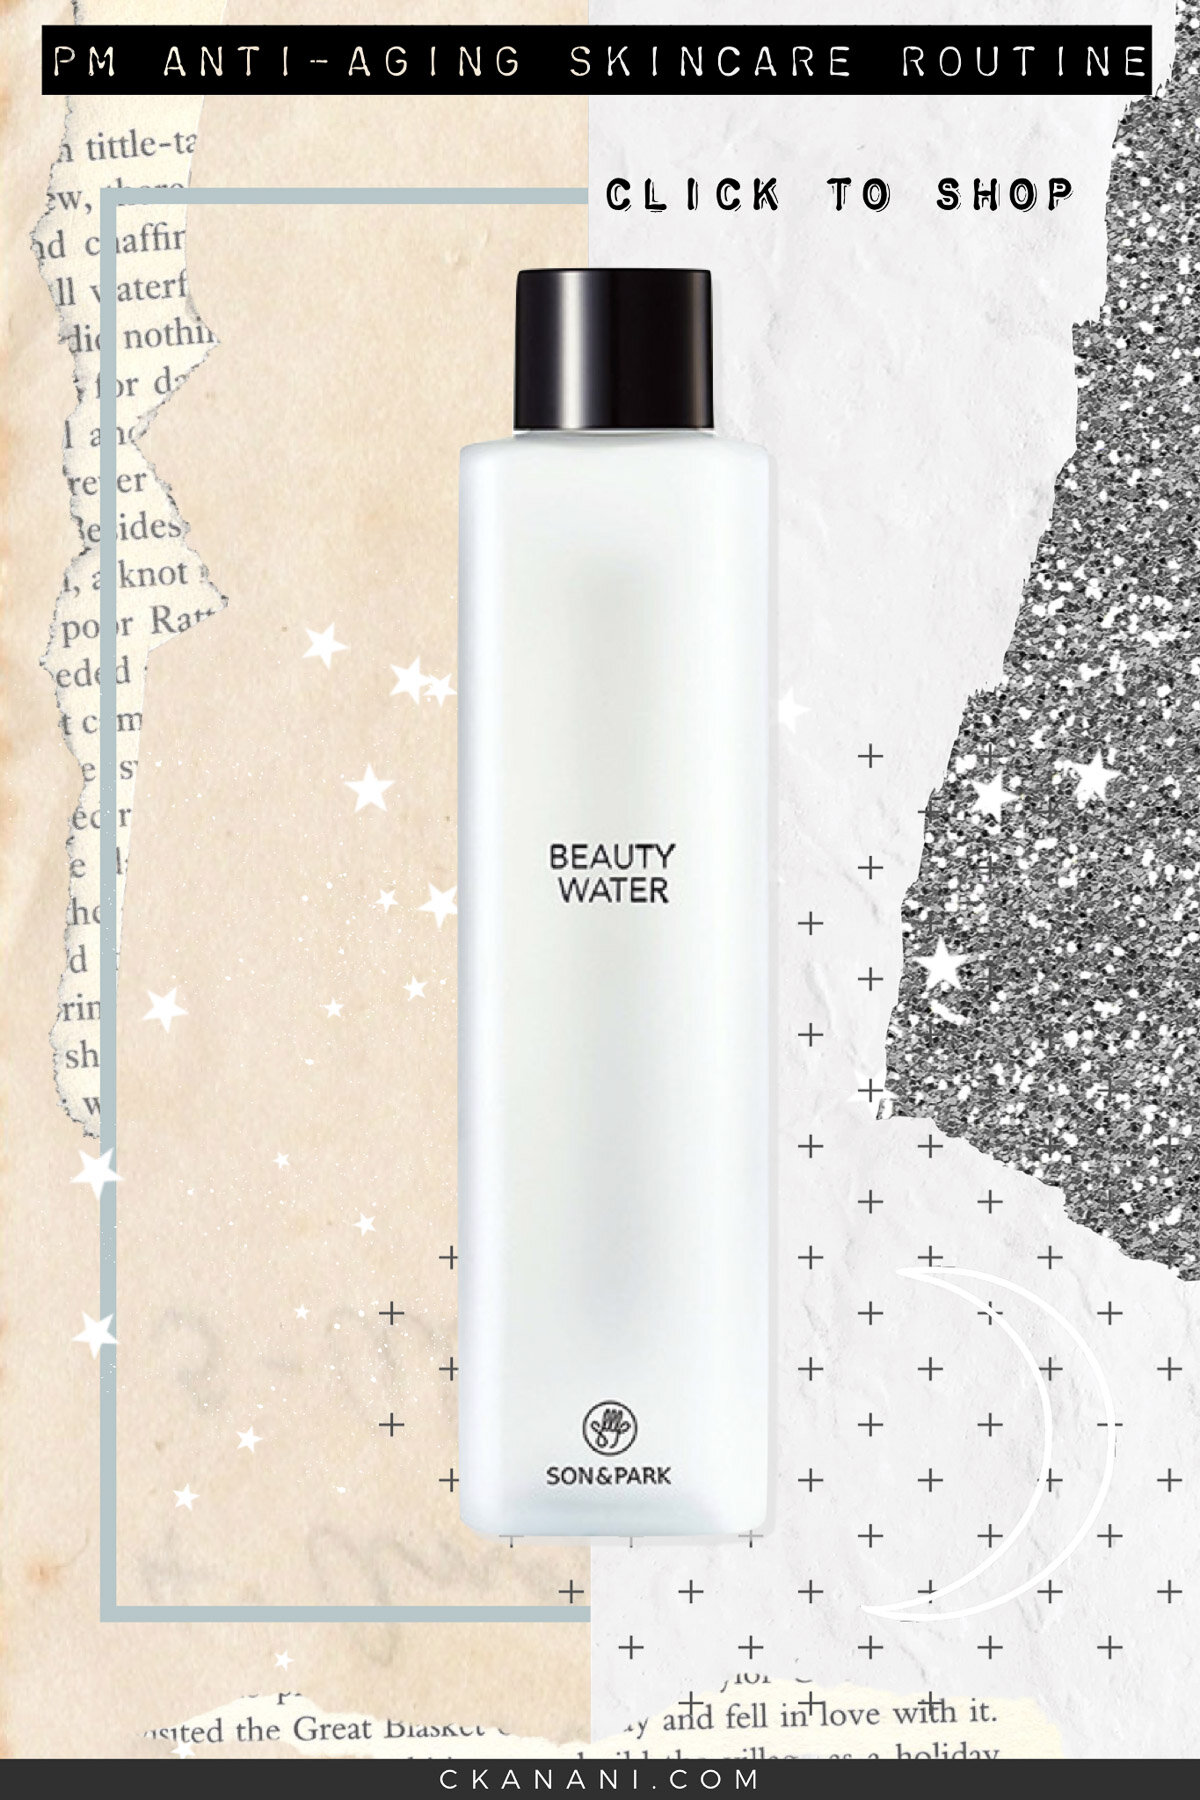
Step 3: Tone (if needed)
My next step is toner. If you aren’t familiar with the purpose and benefits of toner, click here for my morning skincare routine which explains it in detail.
The toner I use is Son & Park Beauty Water. It contains lavender water, rose water, and orange fruit extract which provides hydration, preparing your skin to absorb the next products. It also mildly exfoliates with willow bark and papaya extract, which is smoothing and brightening, too! It is great for all skin types. Click here to see the latest prices.
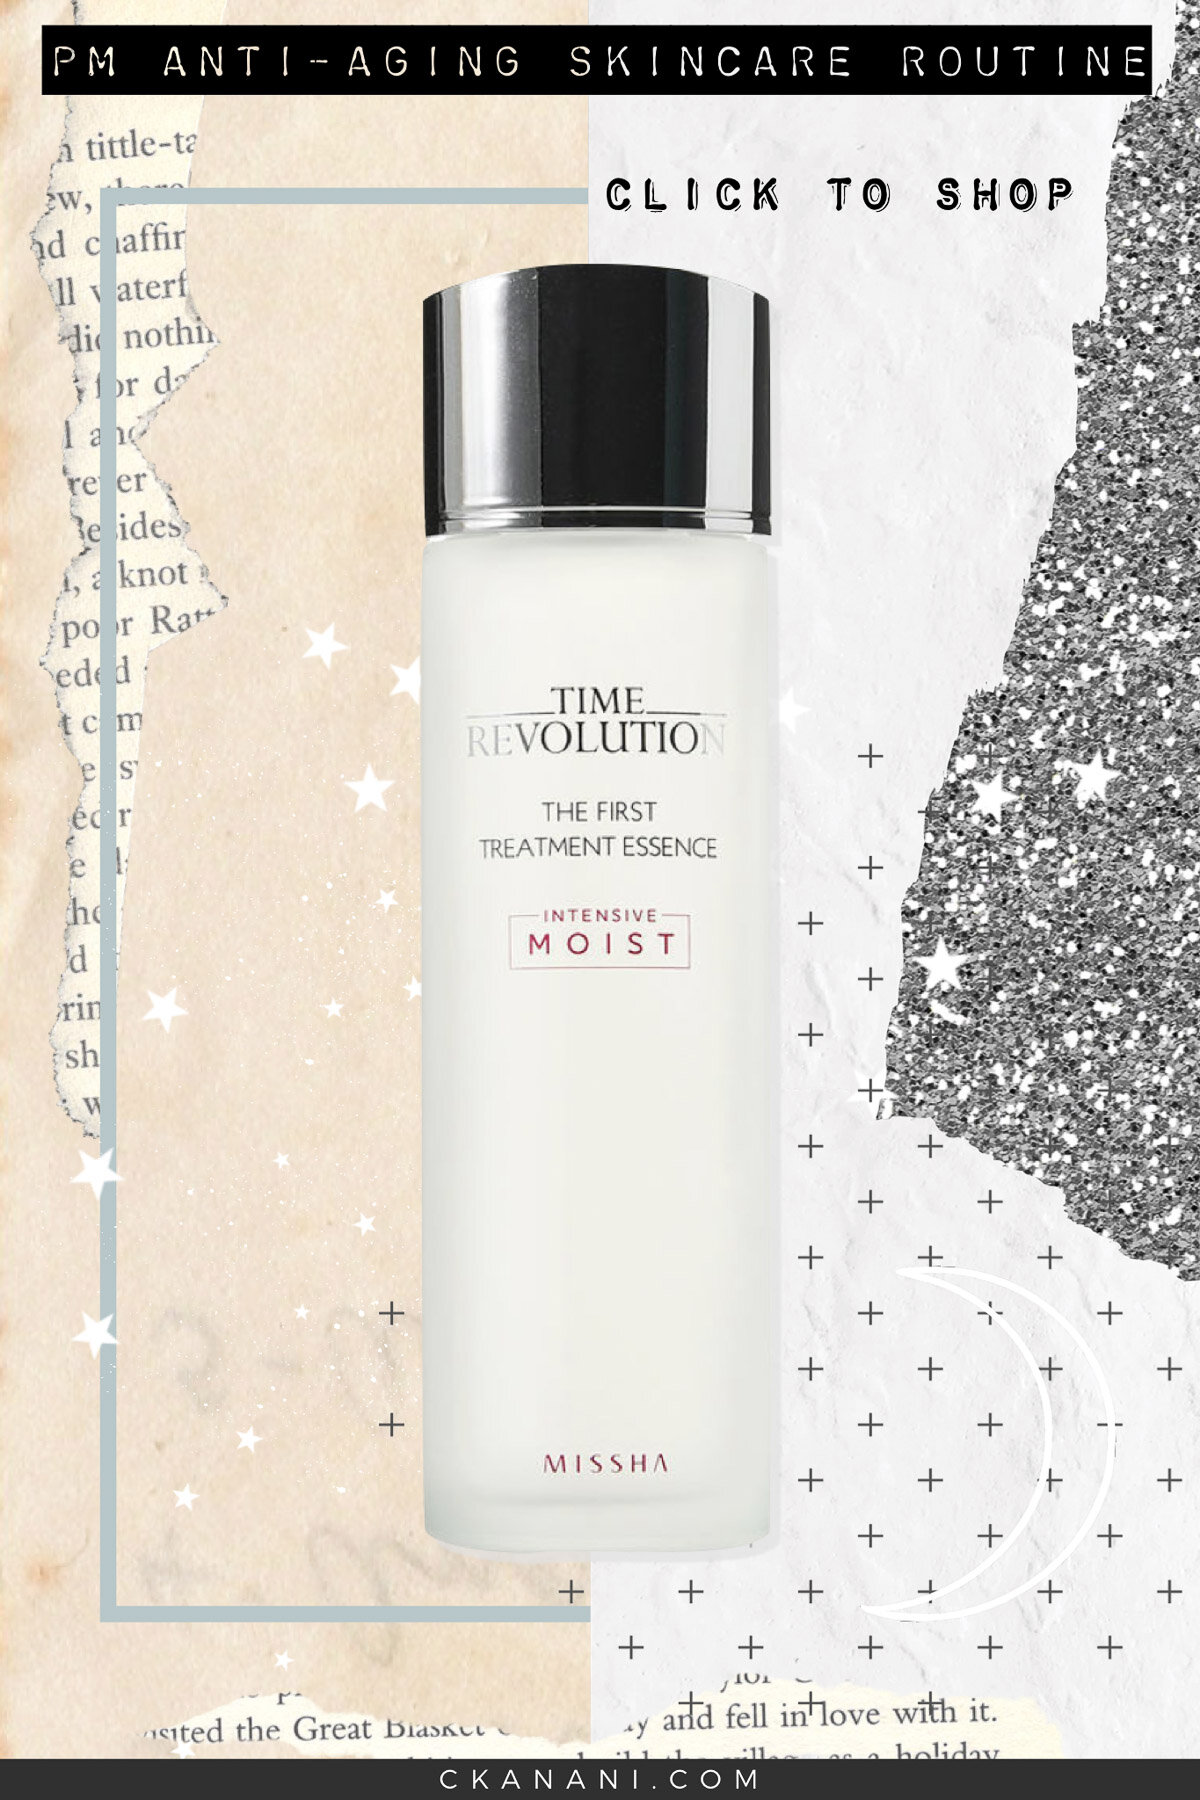
Step 4: Essence or Mask (if needed)
Next up, if needed, essence! Essences are the heart of the Korean beauty skincare routine. They are lightweight yet packed with powerful ingredients to hydrate, anti-age, and enhance your complexion.
If I feel the need, I’ll use Missha Time Revolution First Treatment Essence Intensive Moist at this time. It contains 90% fermented yeast, one of the most important ingredients in Korean skincare. It has a water-like consistency that repairs damage, hydrates, an evens out skin tone. It’s also plumping, texture refining, and pigmentation reducing! It helps your skin retain moisture for longer and I notice my skin is much more hydrated when I use it. Click here to see the latest prices.
Alternatively, I sometimes use a mask here instead if I feel like my skin needs a more intense pick me up. For a list of my favorite face masks, click here.
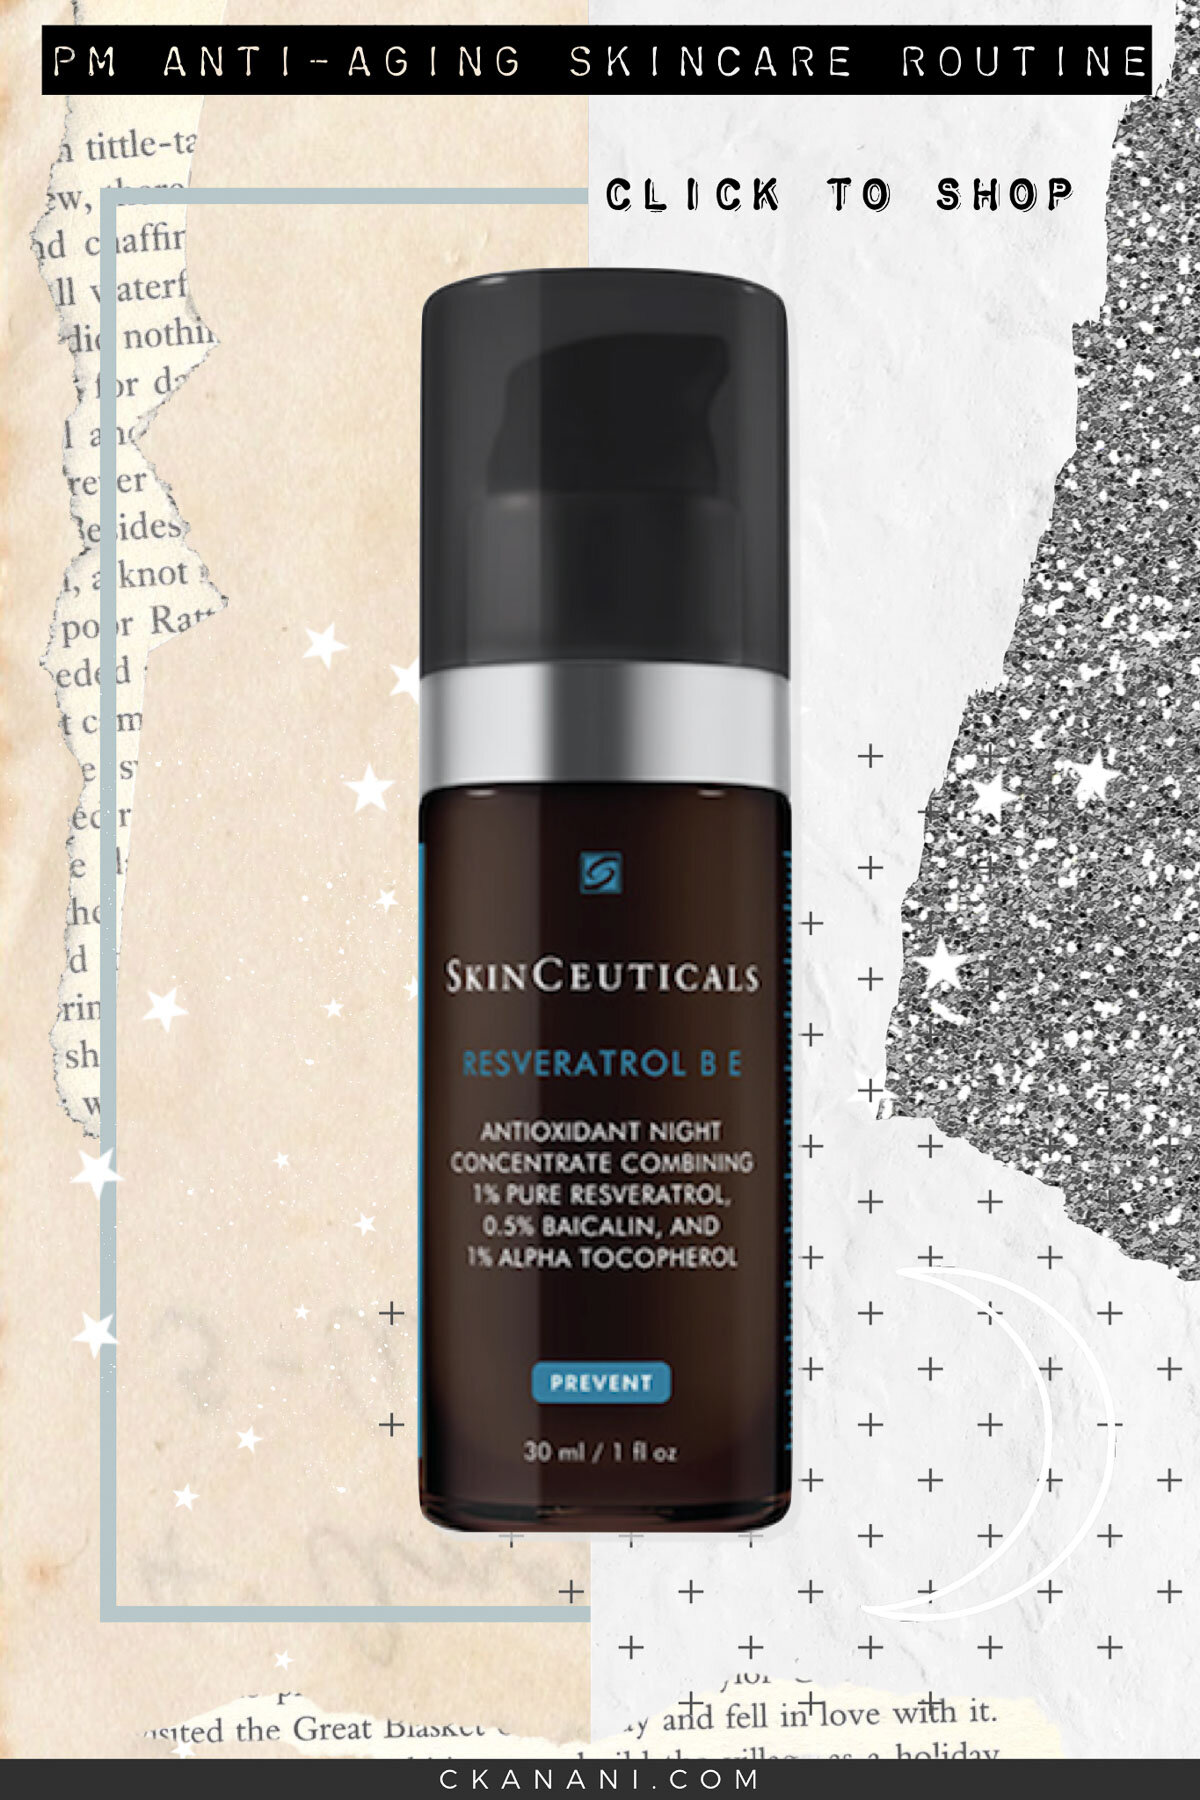
Step 5: Antioxidant Serum
Step five is arguably one of the most important steps, an antioxidant serum. This step is the nighttime equivalent of my favorite C E Ferulic. Click here for more information on C E Ferulic and why it’s my favorite skin product of all time!
The antioxidant night serum that I use is SkinCeuticals’ Resveratrol B E. It is anti-aging, proven to make your skin more radiant, and can rebuild your skin’s firmness and density by 18.9%. I have been using it for 5+ years, since I went to my first appointment with my cosmetic dermatologist, and cannot live without it. Click here to see the latest prices.
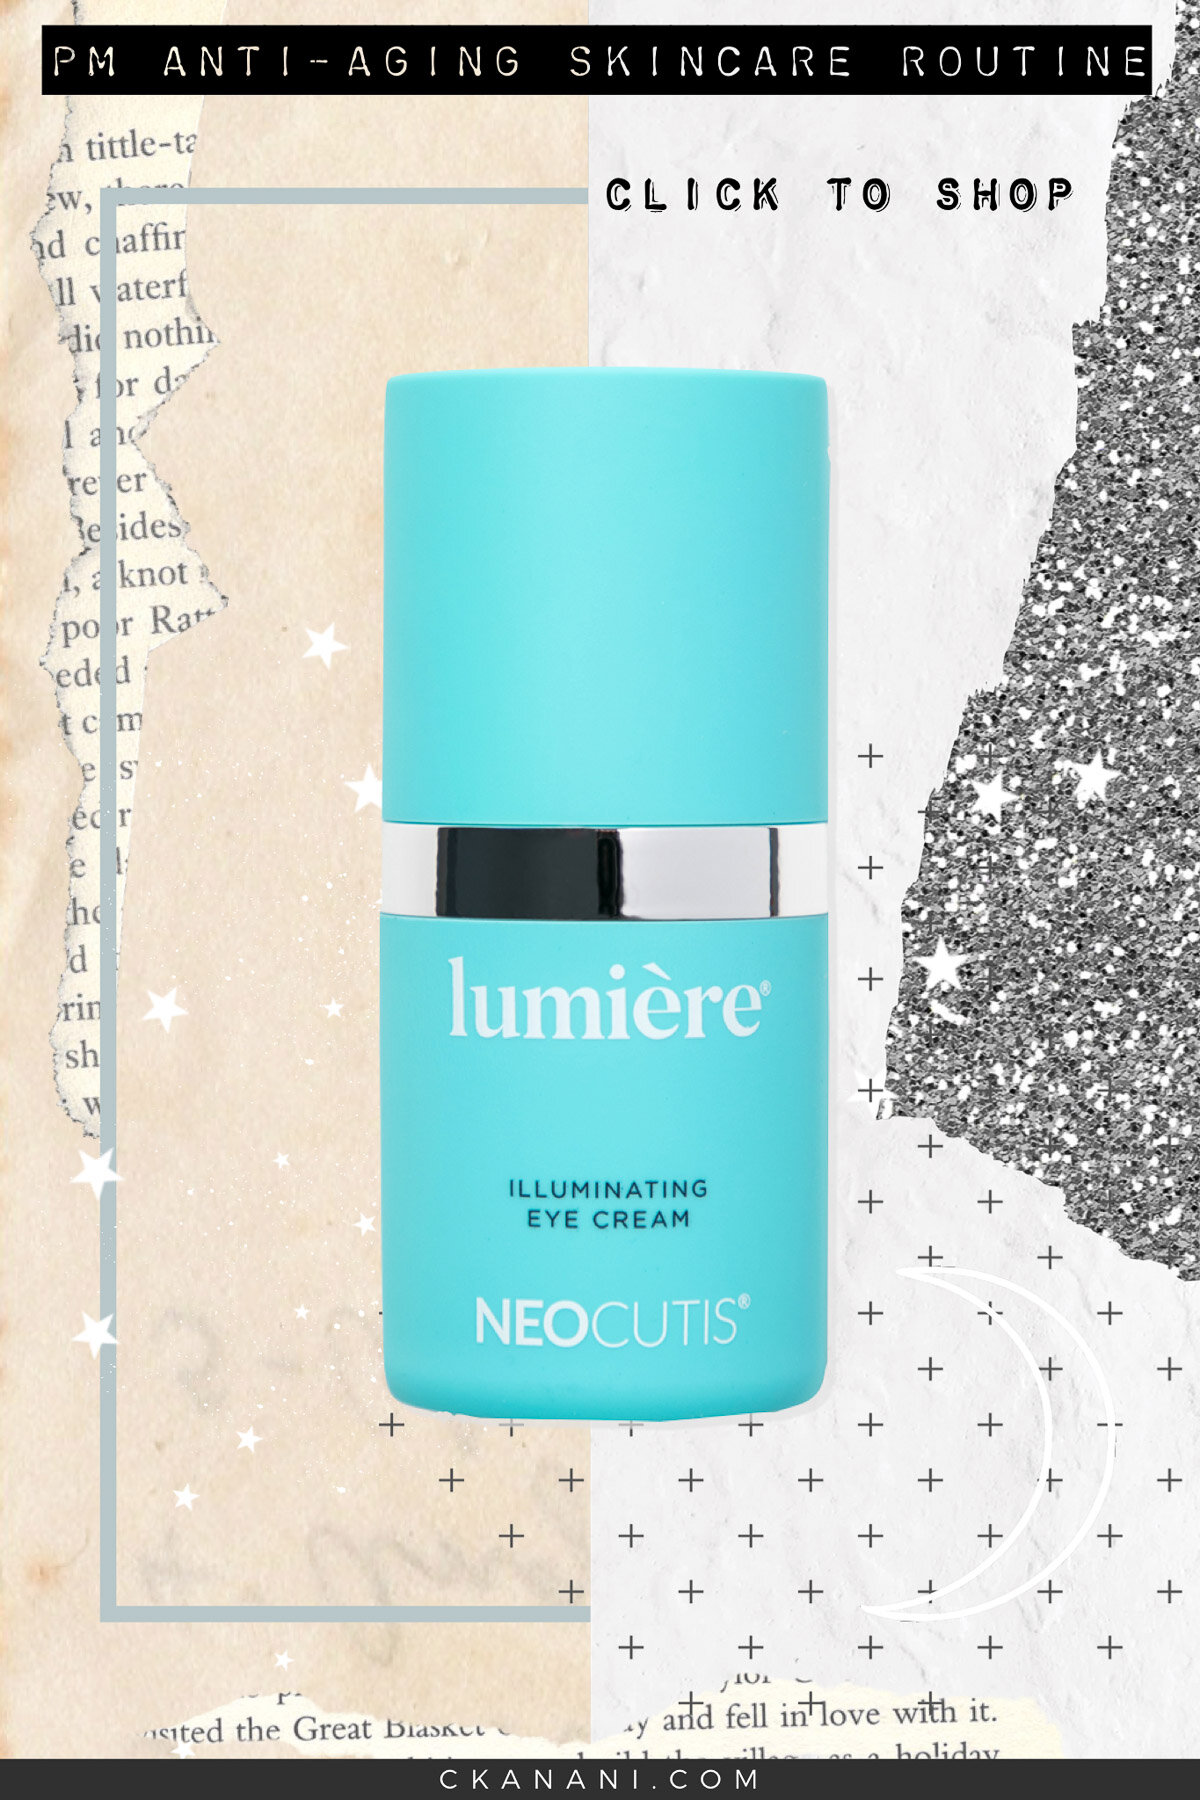
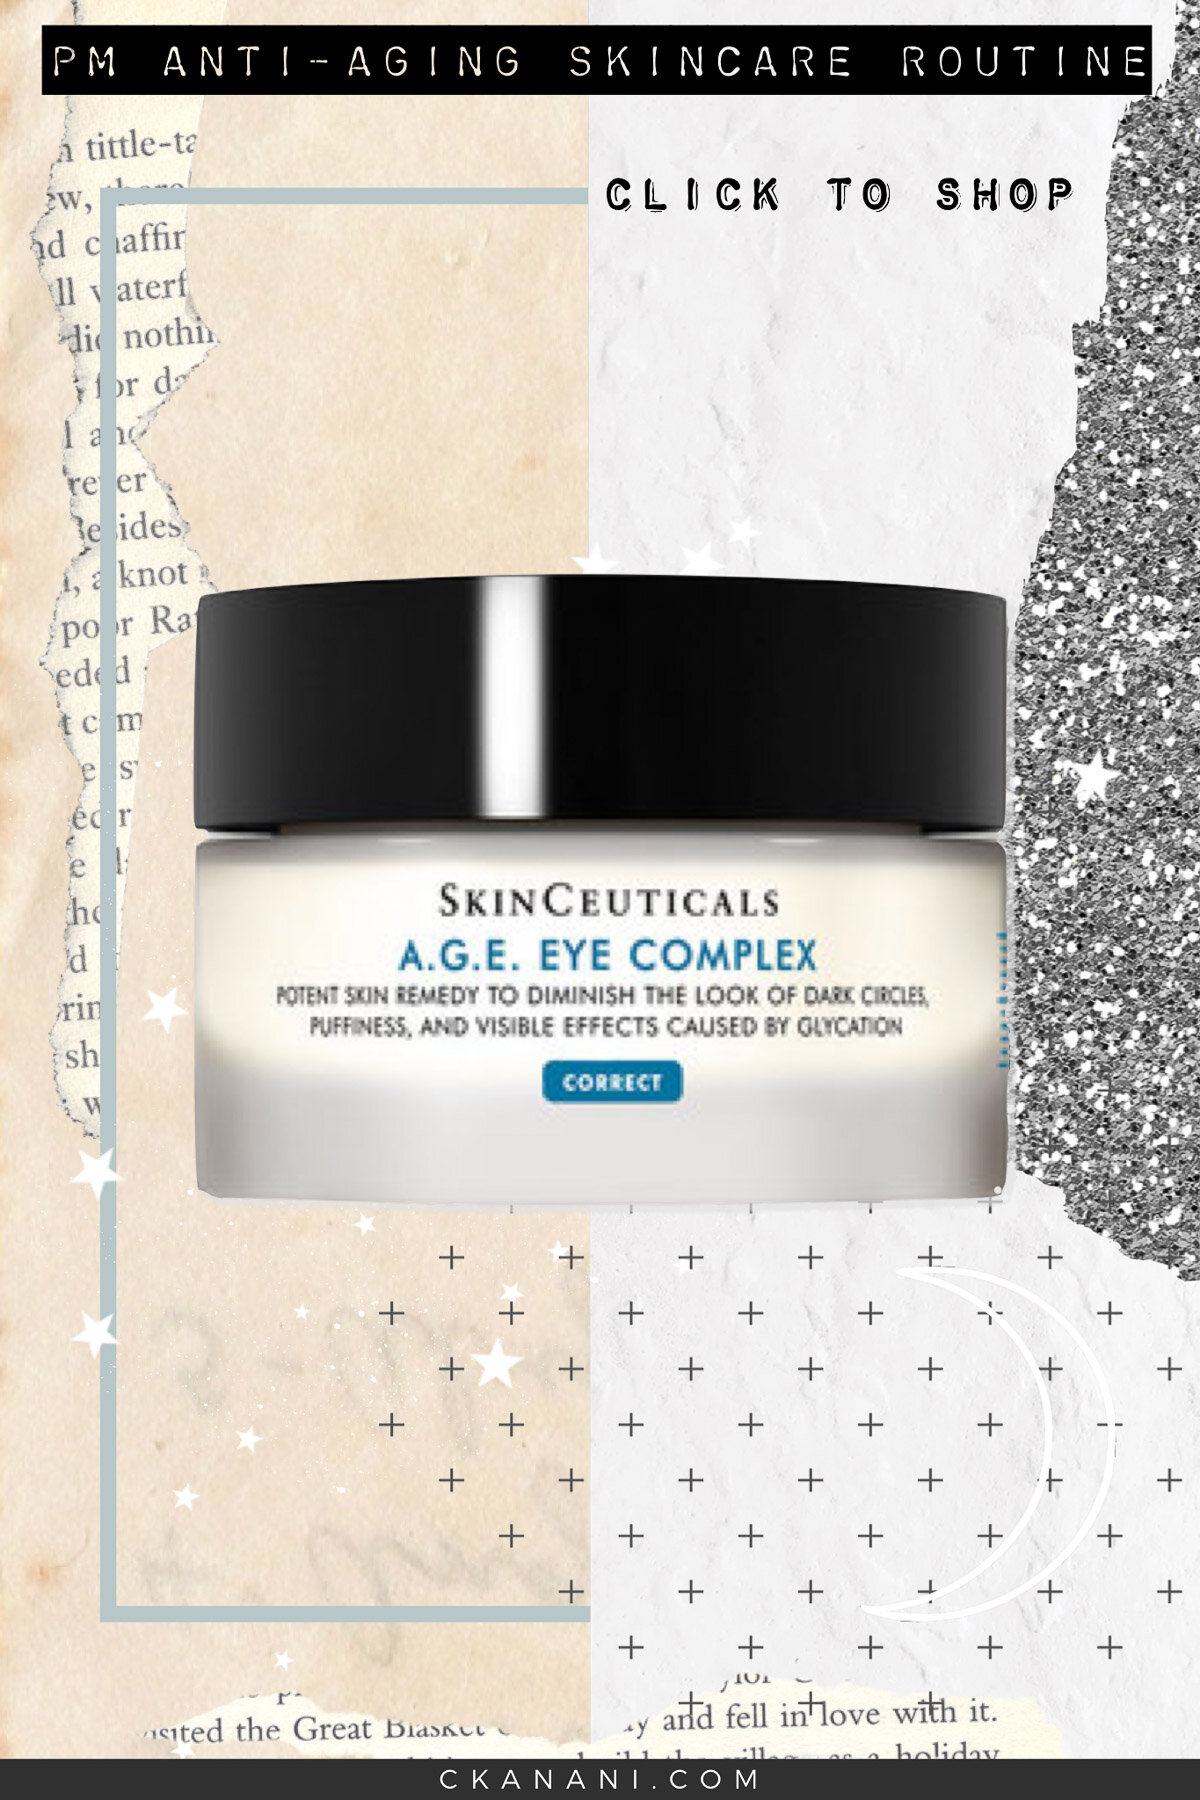
Step 6: Eye Cream
Step 6 in my routine is eye cream. My under eyes are dry so for me this step is essential. For many years I used SkinCeuticals A.G.E. Eye Complex and liked it, but I recently bought Neocutis Lumiere Eye Cream to try. I find it to be even more hydrating, so for me with extremely dry under eyes it seems to be a better fit. I do love and recommend both though, depending on your needs!
Click here for SkinCeuticals A.G.E. Eye Complex and here for Neocutis Lumiere Eye Cream.
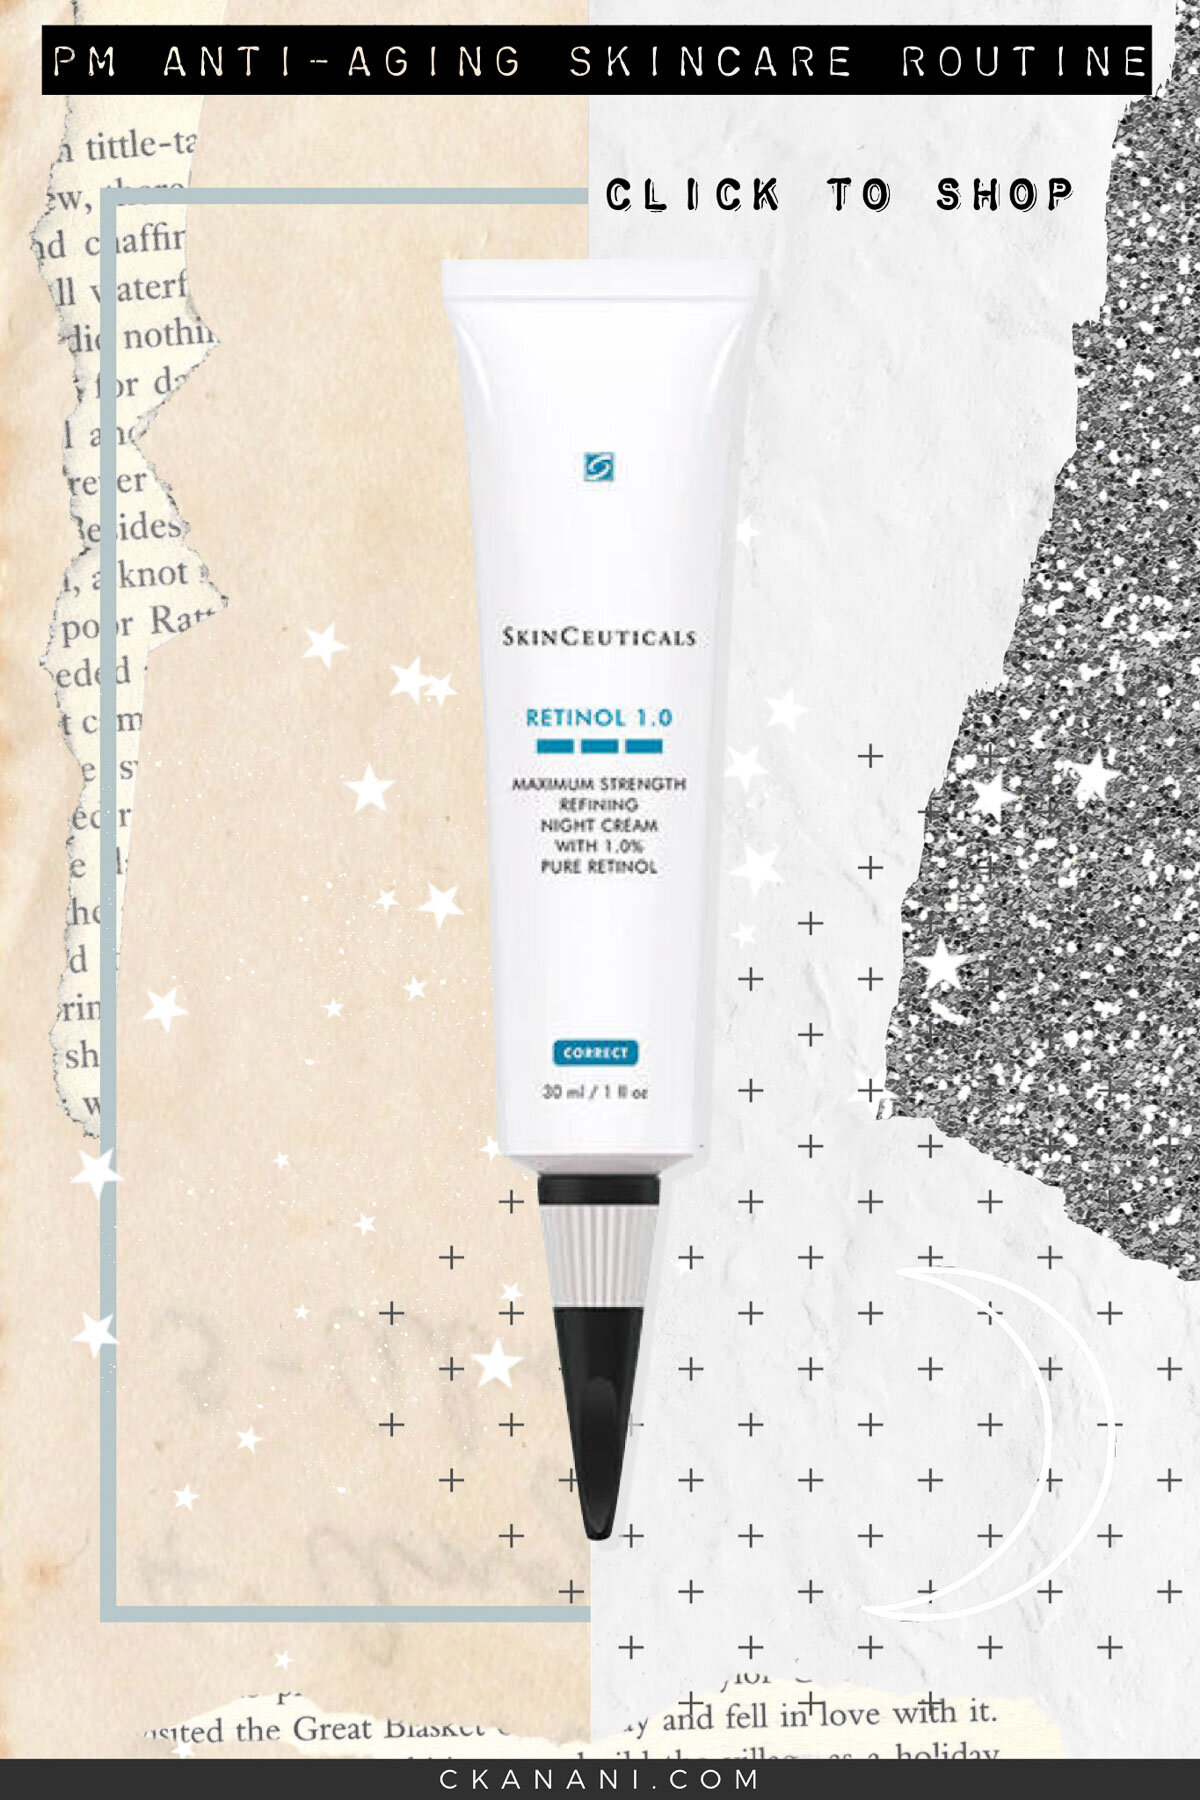
Step 7: Retinol
Retinoids (Retin-A, retinol, etc.) are a skincare superstar and one of the three most important skincare products. They are anti-aging, improve uneven skin tone, promote cell turnover, improve the appearance of fine lines and wrinkles, improve the appearance of blemishes, and more.
The retinol that I use is from, of course, SkinCeuticals. SkinCeuticals’ advanced retinol creams are enhanced with the latest delivery techniques, designed to provide maximum efficacy. They claim they’re formulated to minimize the typical retinol irritations, and from my experience that is the truth. My skin tolerates their retinol much better than any of the prescriptions I tried.
SkinCeuticals retinols are available in three different strengths — 0.3%, 0.5%, and 1%. If you are new to retinol you should start with SkinCeuticals Retinol 0.3. It is designed specifically for first-time users as a prerequisite to SkinCeuticals Retinol 0.5. Click here to see the latest prices.
Once you have ramped up on Retinol 0.3, you can then move onto Retinol 0.5 (click here for that) and eventually Retinol 1.0 (click here for that). If you have used retinoids before you may be able to start with one of those instead.


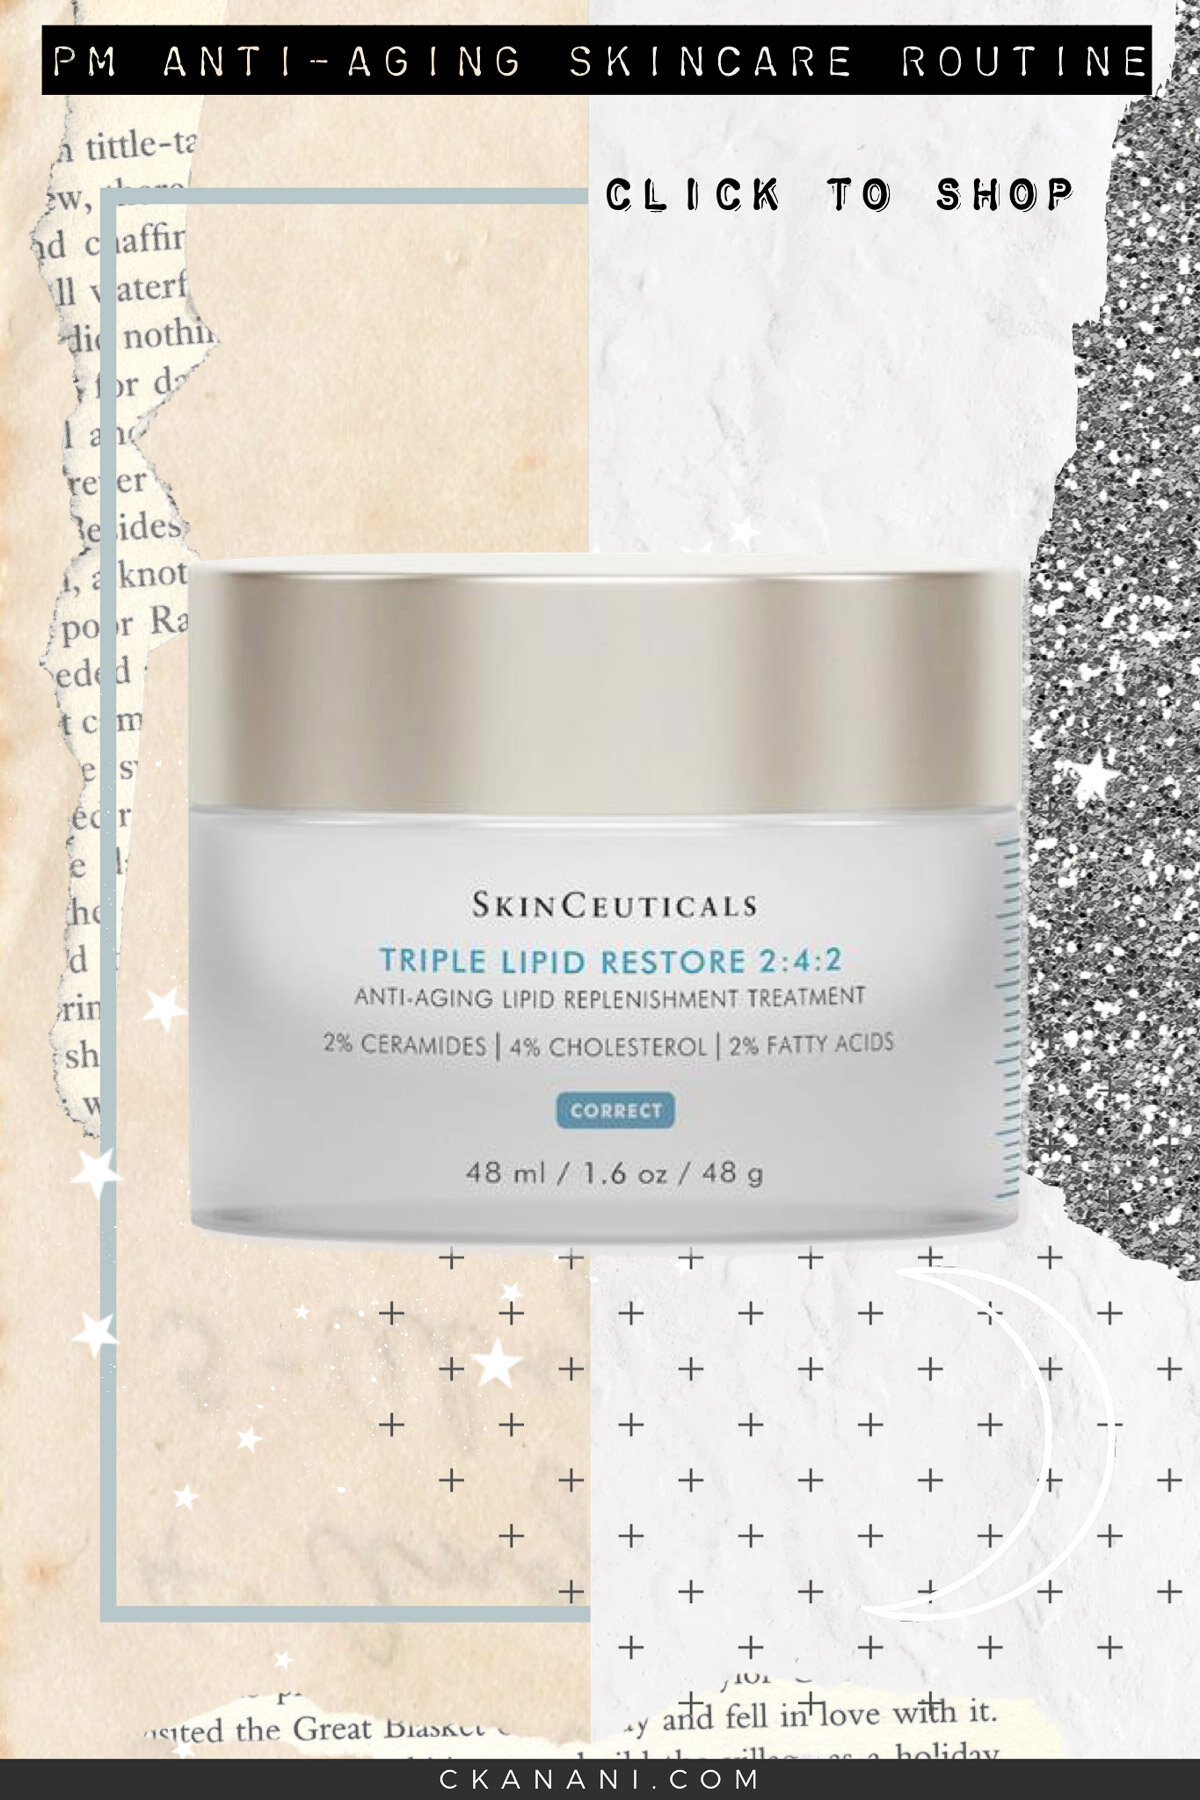
Step 8: Moisturizer
Last but not least, moisturizer. What I use depends on how my skin is feeling and what I think it needs. The options I always have on hand:
SkinCeuticals Triple Lipid Restore 2:4:2 is an anti-aging cream that is incredibly nourishing. If you are not yet using a retinoid and planning to start, this is the cream you should get to apply after. This is because it is scientifically proven to shorten the adjustment period to retinoids up to one week. It also improves skin fullness, texture, pore appearance, evenness, and overall radiance. Since it’s medical grade it is potent and a little goes a long way, so don’t balk over the price! Click here for more information and to get your own.
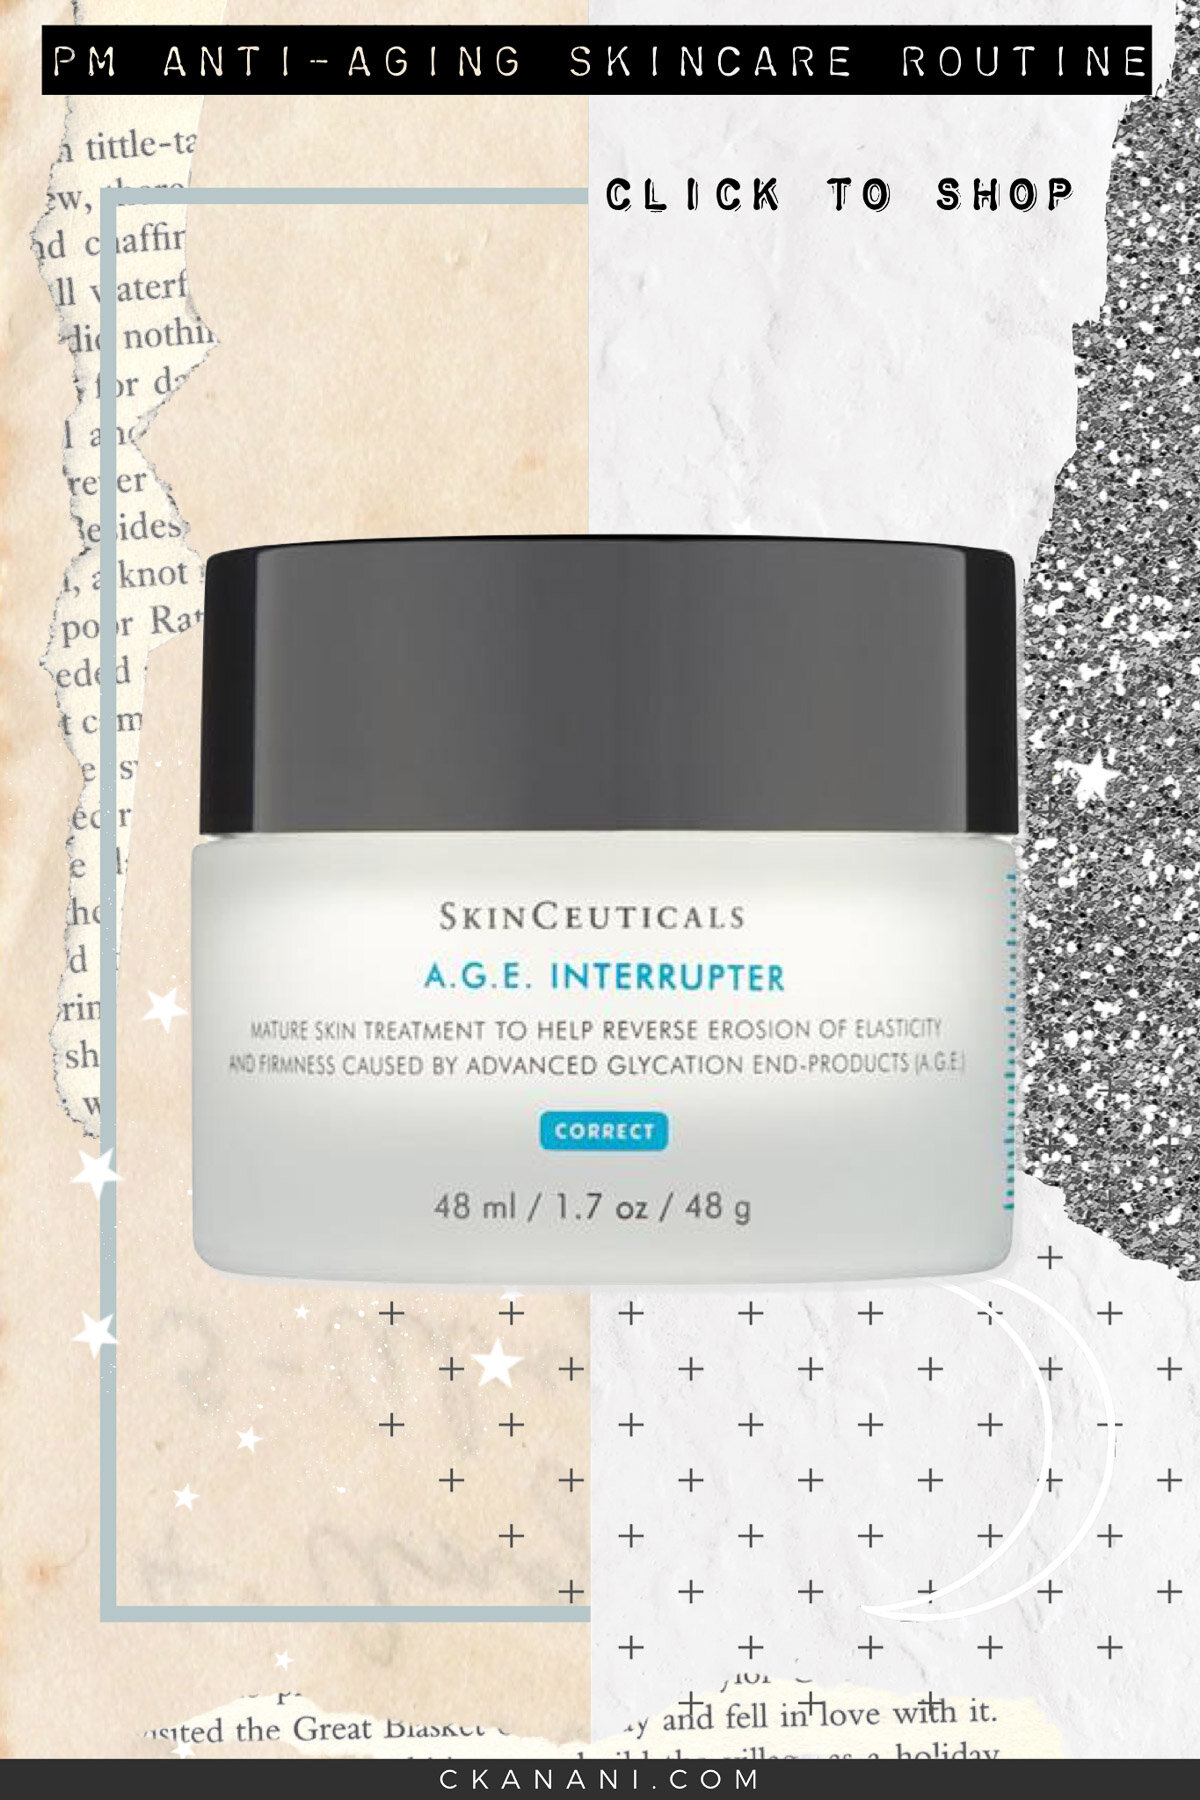
SkinCeuticals A.G.E. Interrupter is another anti-cream from SkinCeuticals that I use, primarily because it is included with my two favorite SkinCeuticals products in this bundle and I needed a moisturizer. Side note: that bundle is a great deal, saves you a ton of money (over $100!), and every product is excellent and something I use! Click here to get it. https://rstyle.me/+1LBWjpAfZwDNvd_3FTiQ5w It improves the appearance of fine lines, wrinkles, texture, skin creping, thinning, and more. Click here for more information and to get your own.
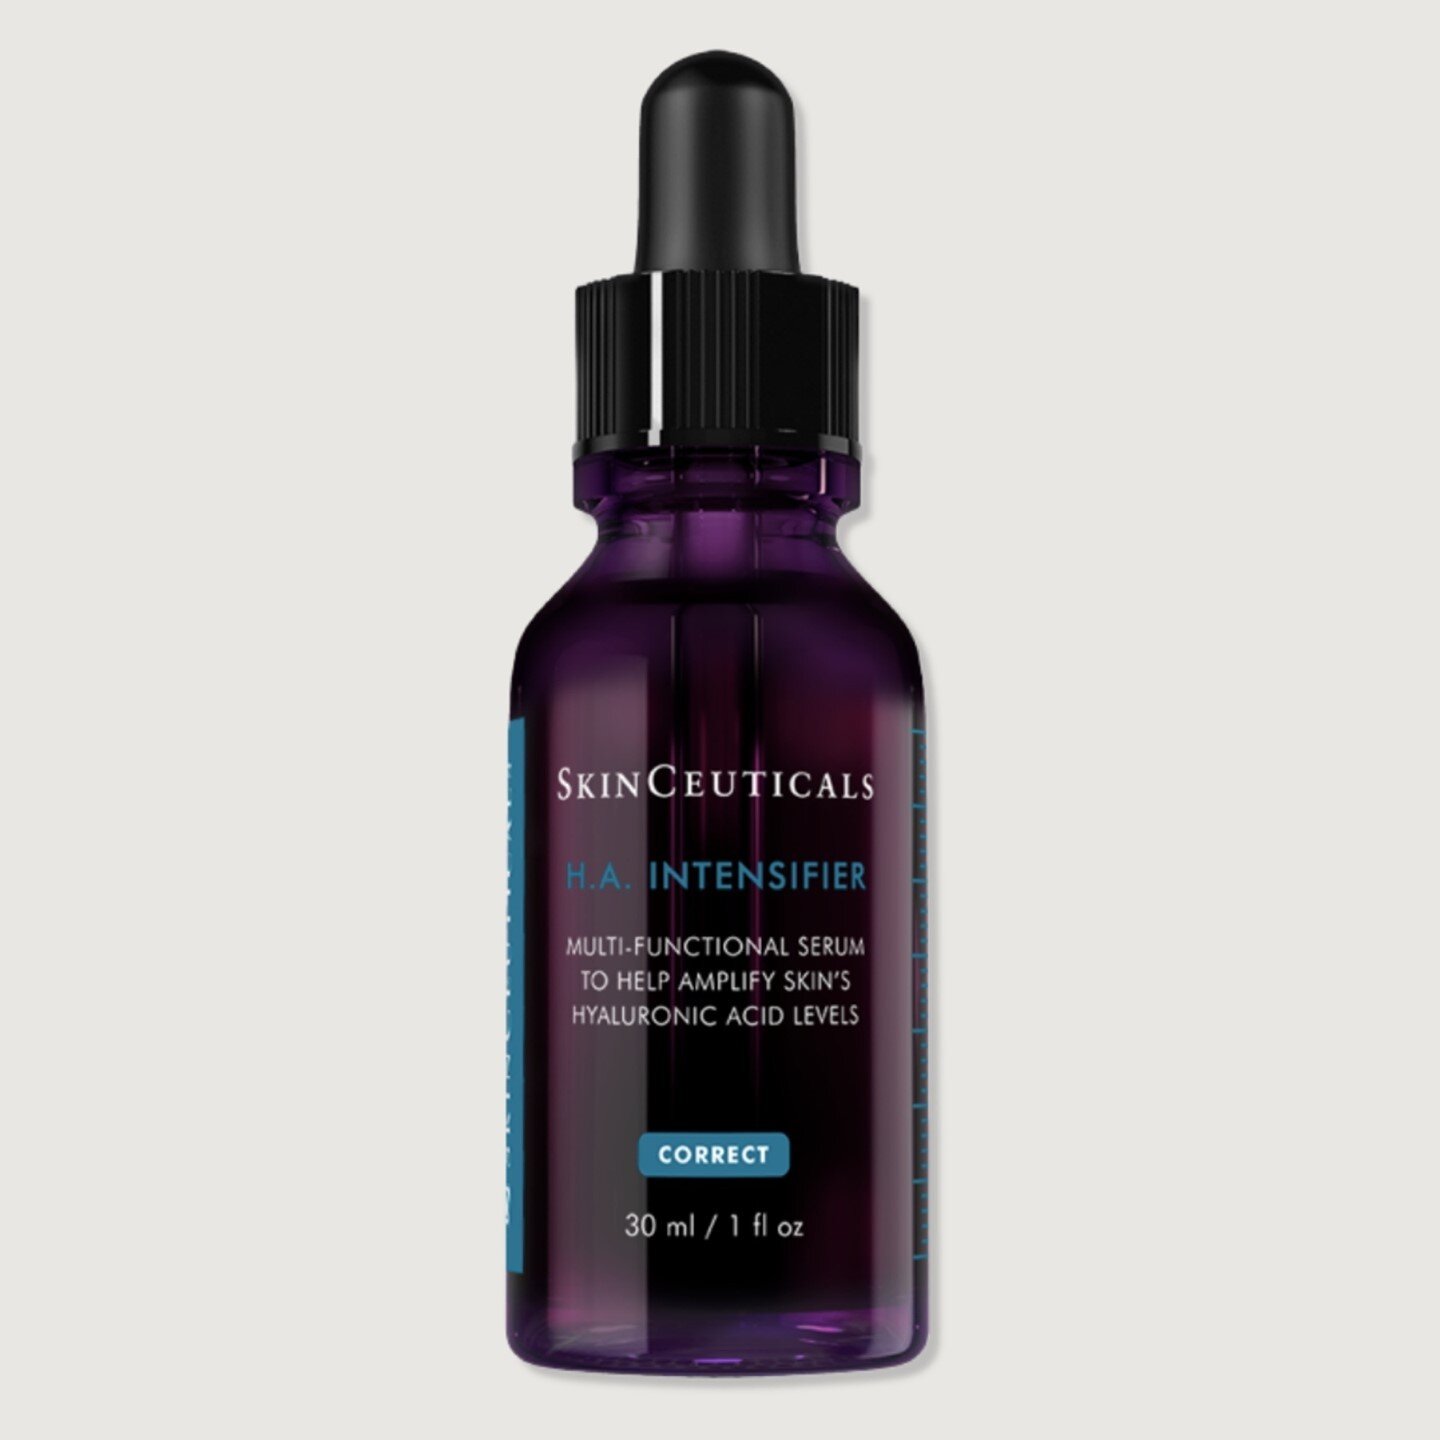
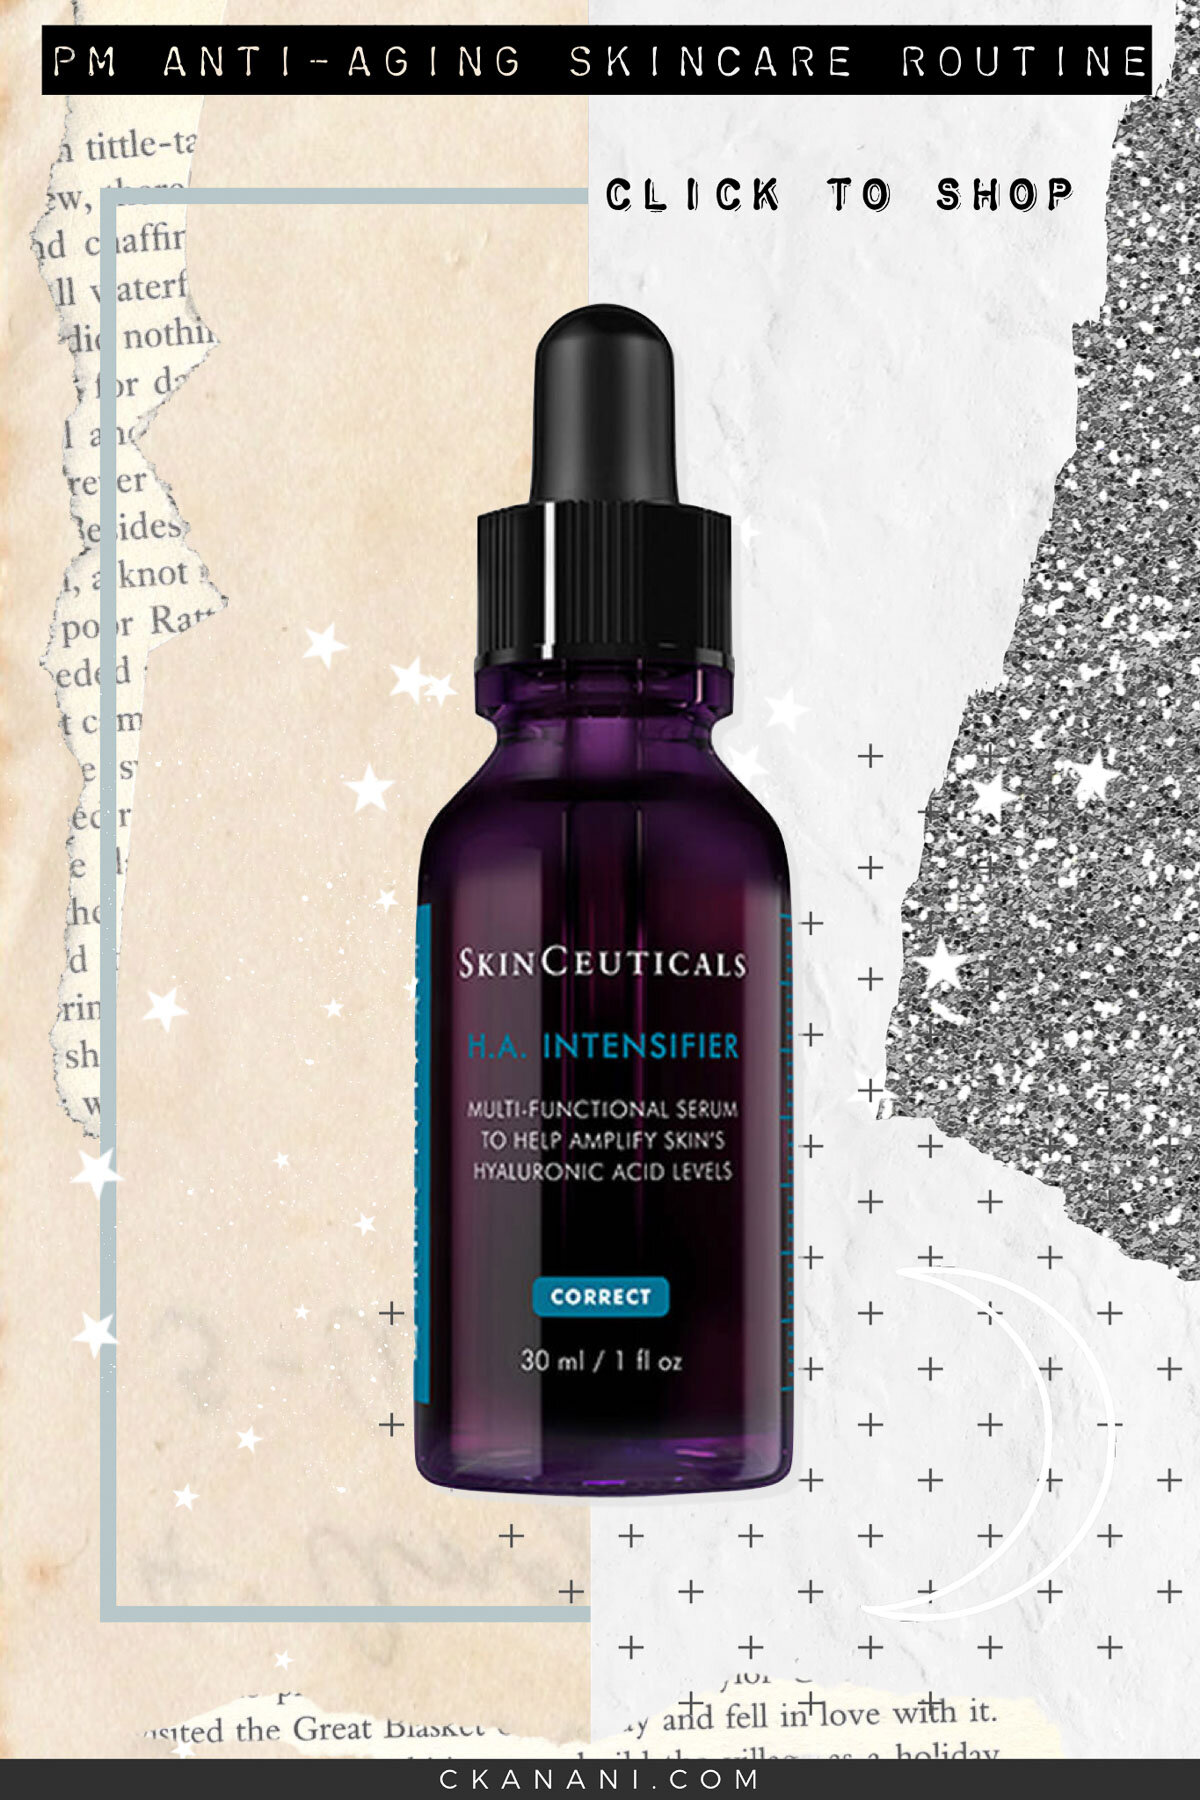
SkinCeuticals HA Intensifier is technically a serum but you apply it after retinol so I’m including it here. It is a powerful corrective hyaluronic acid serum that deeply hydrates skin. It’s plumping, firming, smoothing, and is especially recommended to use at home after getting fillers. Click here for more information and to get your own.
Farmacy Honey Grail Face Oil is a deeply hydrating yet fast-absorbing, lightweight face oil. It’s not going to be as effective as any of the SkinCeuticals products because cosmetics products only work on the skin’s outer most layer (the epidermis) and are not permitted to affect structural change to the skin. But if the top layer of my skin feels extra dry and I need something nourishing, I love to use this. Click here for more information and to get your own.
Biossance 100% Squalane is another oil I own and use. It’s not nearly as thick feeling as Farmacy’s, so if you need something less intense this is a great option. Click here for more information and to get your own.
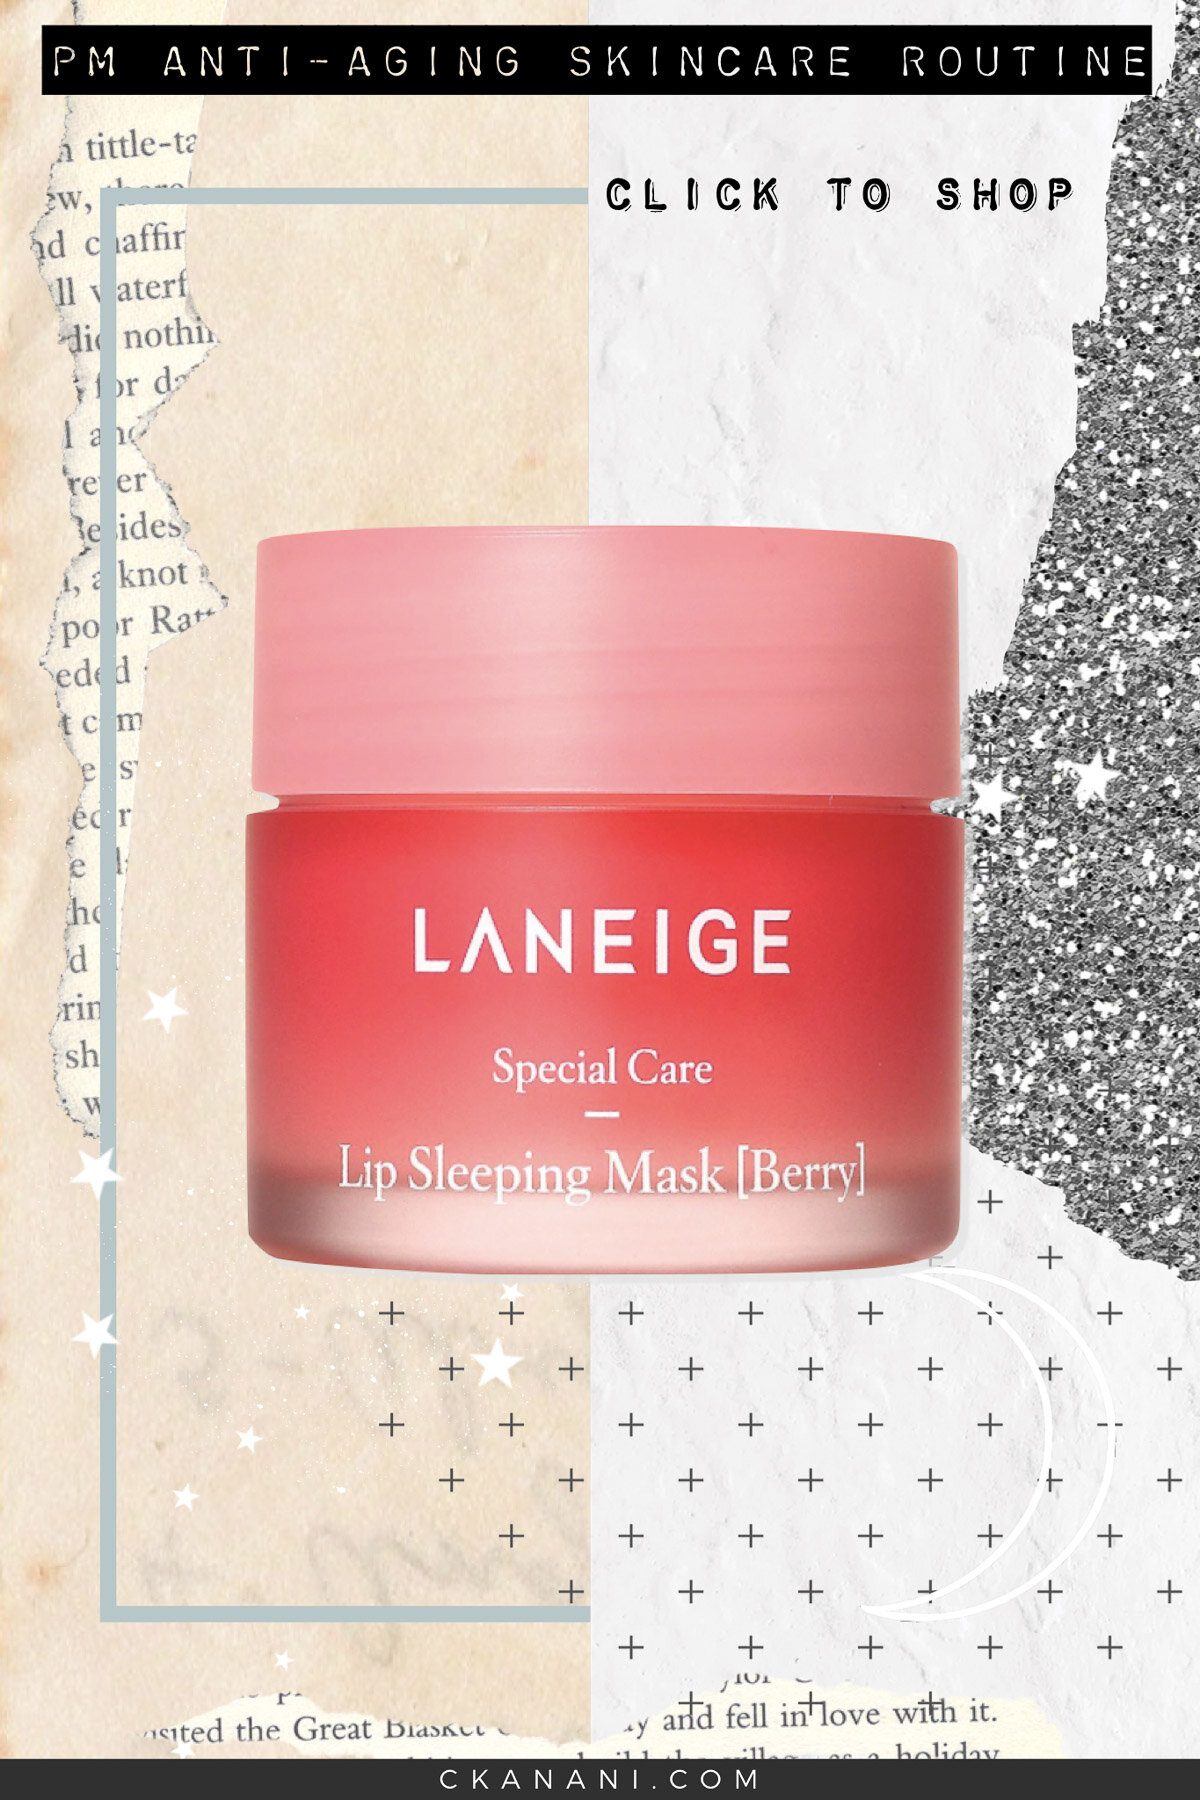
I also apply Laneige Lip Sleeping Mask every night before going to bed. If you don’t yet own this, do yourself a favor and pick it up immediately. It is truly wonderful. Click here for more information and to get your own.
Last but not least, if I am feeling paler than I want to be, I will mix self tanning drops into my moisturizer during this step. The ones I use are the Isle of Paradise Self Tanning Drops in shade dark (yes, even though I am very pale). Click here for more information and to get your own.
Read Next:
My Morning Anti Aging Skincare Routine
The 3 Most Important Skincare Products (And Why)
How to Get Shiny Hair - The Best Healthy Hair Products and Tools
My Natural Everyday Makeup Routine
Tips for Glowing Skin: Make Your Face Glow With the Best of K-Beauty
16 Skincare Items You Need to Add to Your Winter Routine