How to Create a Gallery Wall

If you follow me on Instagram, you’ve likely seen that I have one complete gallery wall and another one in the works. I’ve gotten so many different questions about them so, as promised, here are all the details on how to create a gallery wall of your own!
How to Create a Gallery Wall
Pick a Style
The first thing I do when creating a gallery wall, after actually picking a wall of course, is deciding what style I want the gallery to be. There are so many different styles to choose from but to me they all more or less fall into one of two categories: a grid wall or a "salon style" wall.
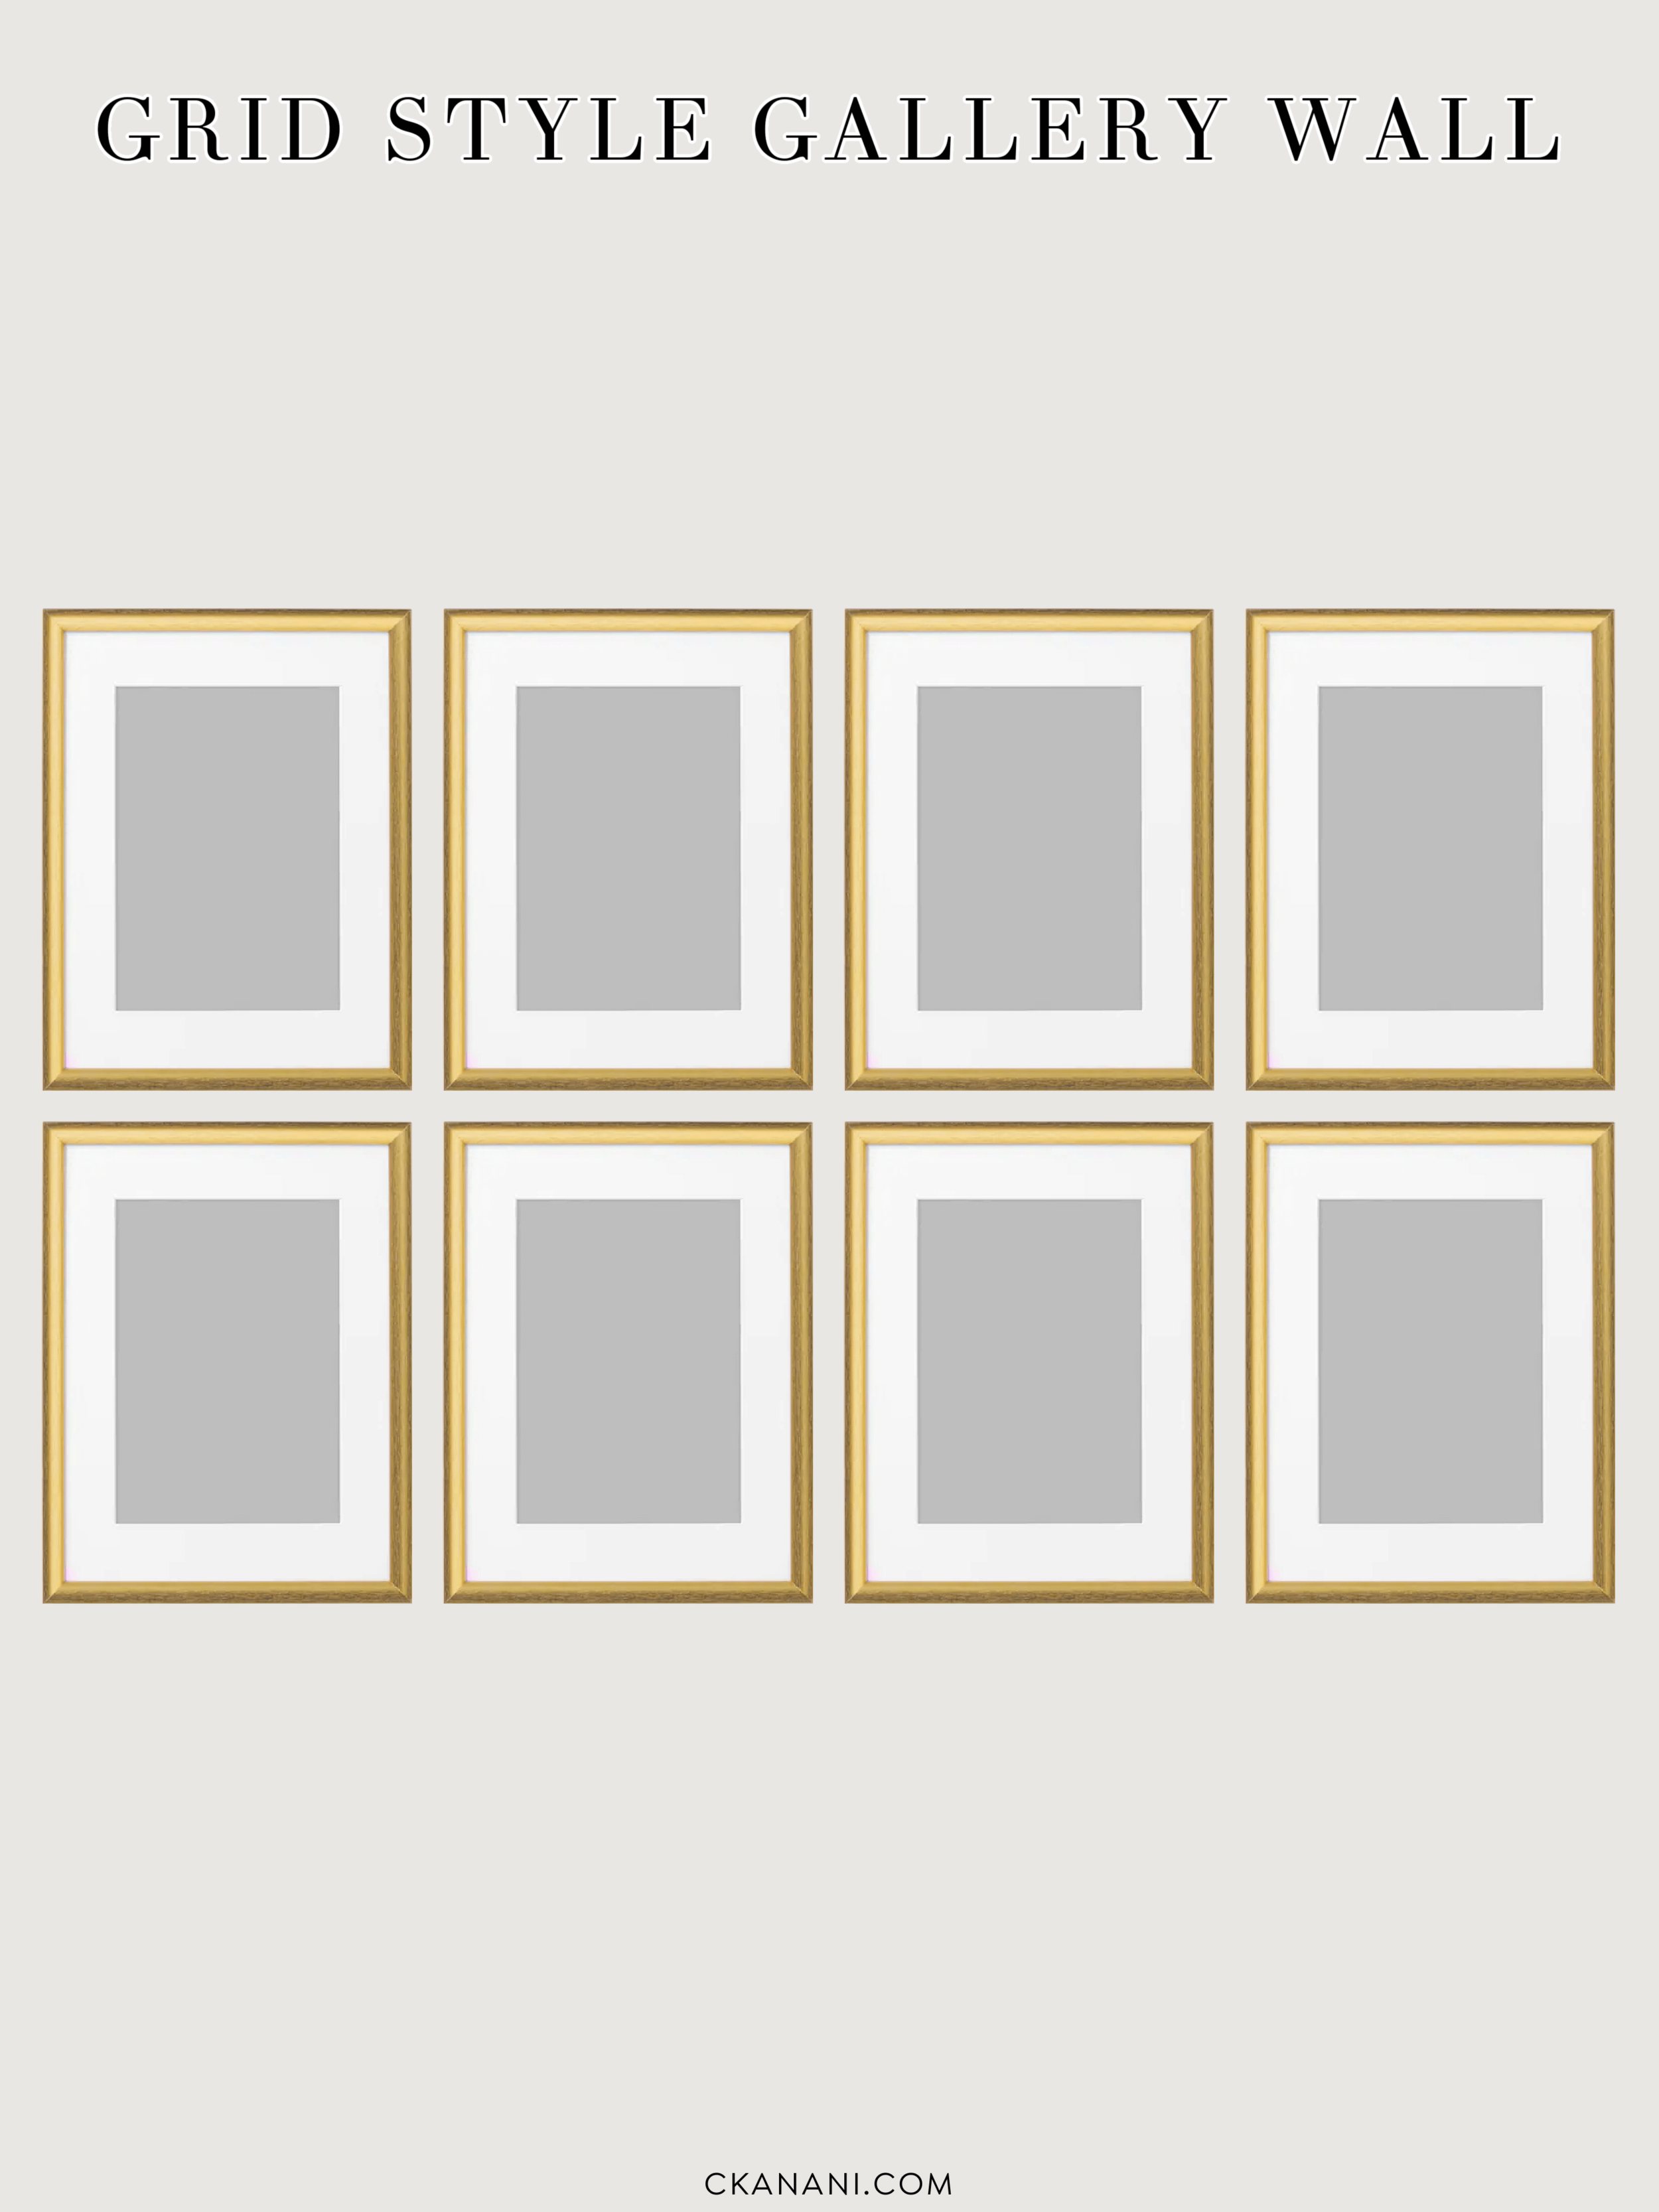
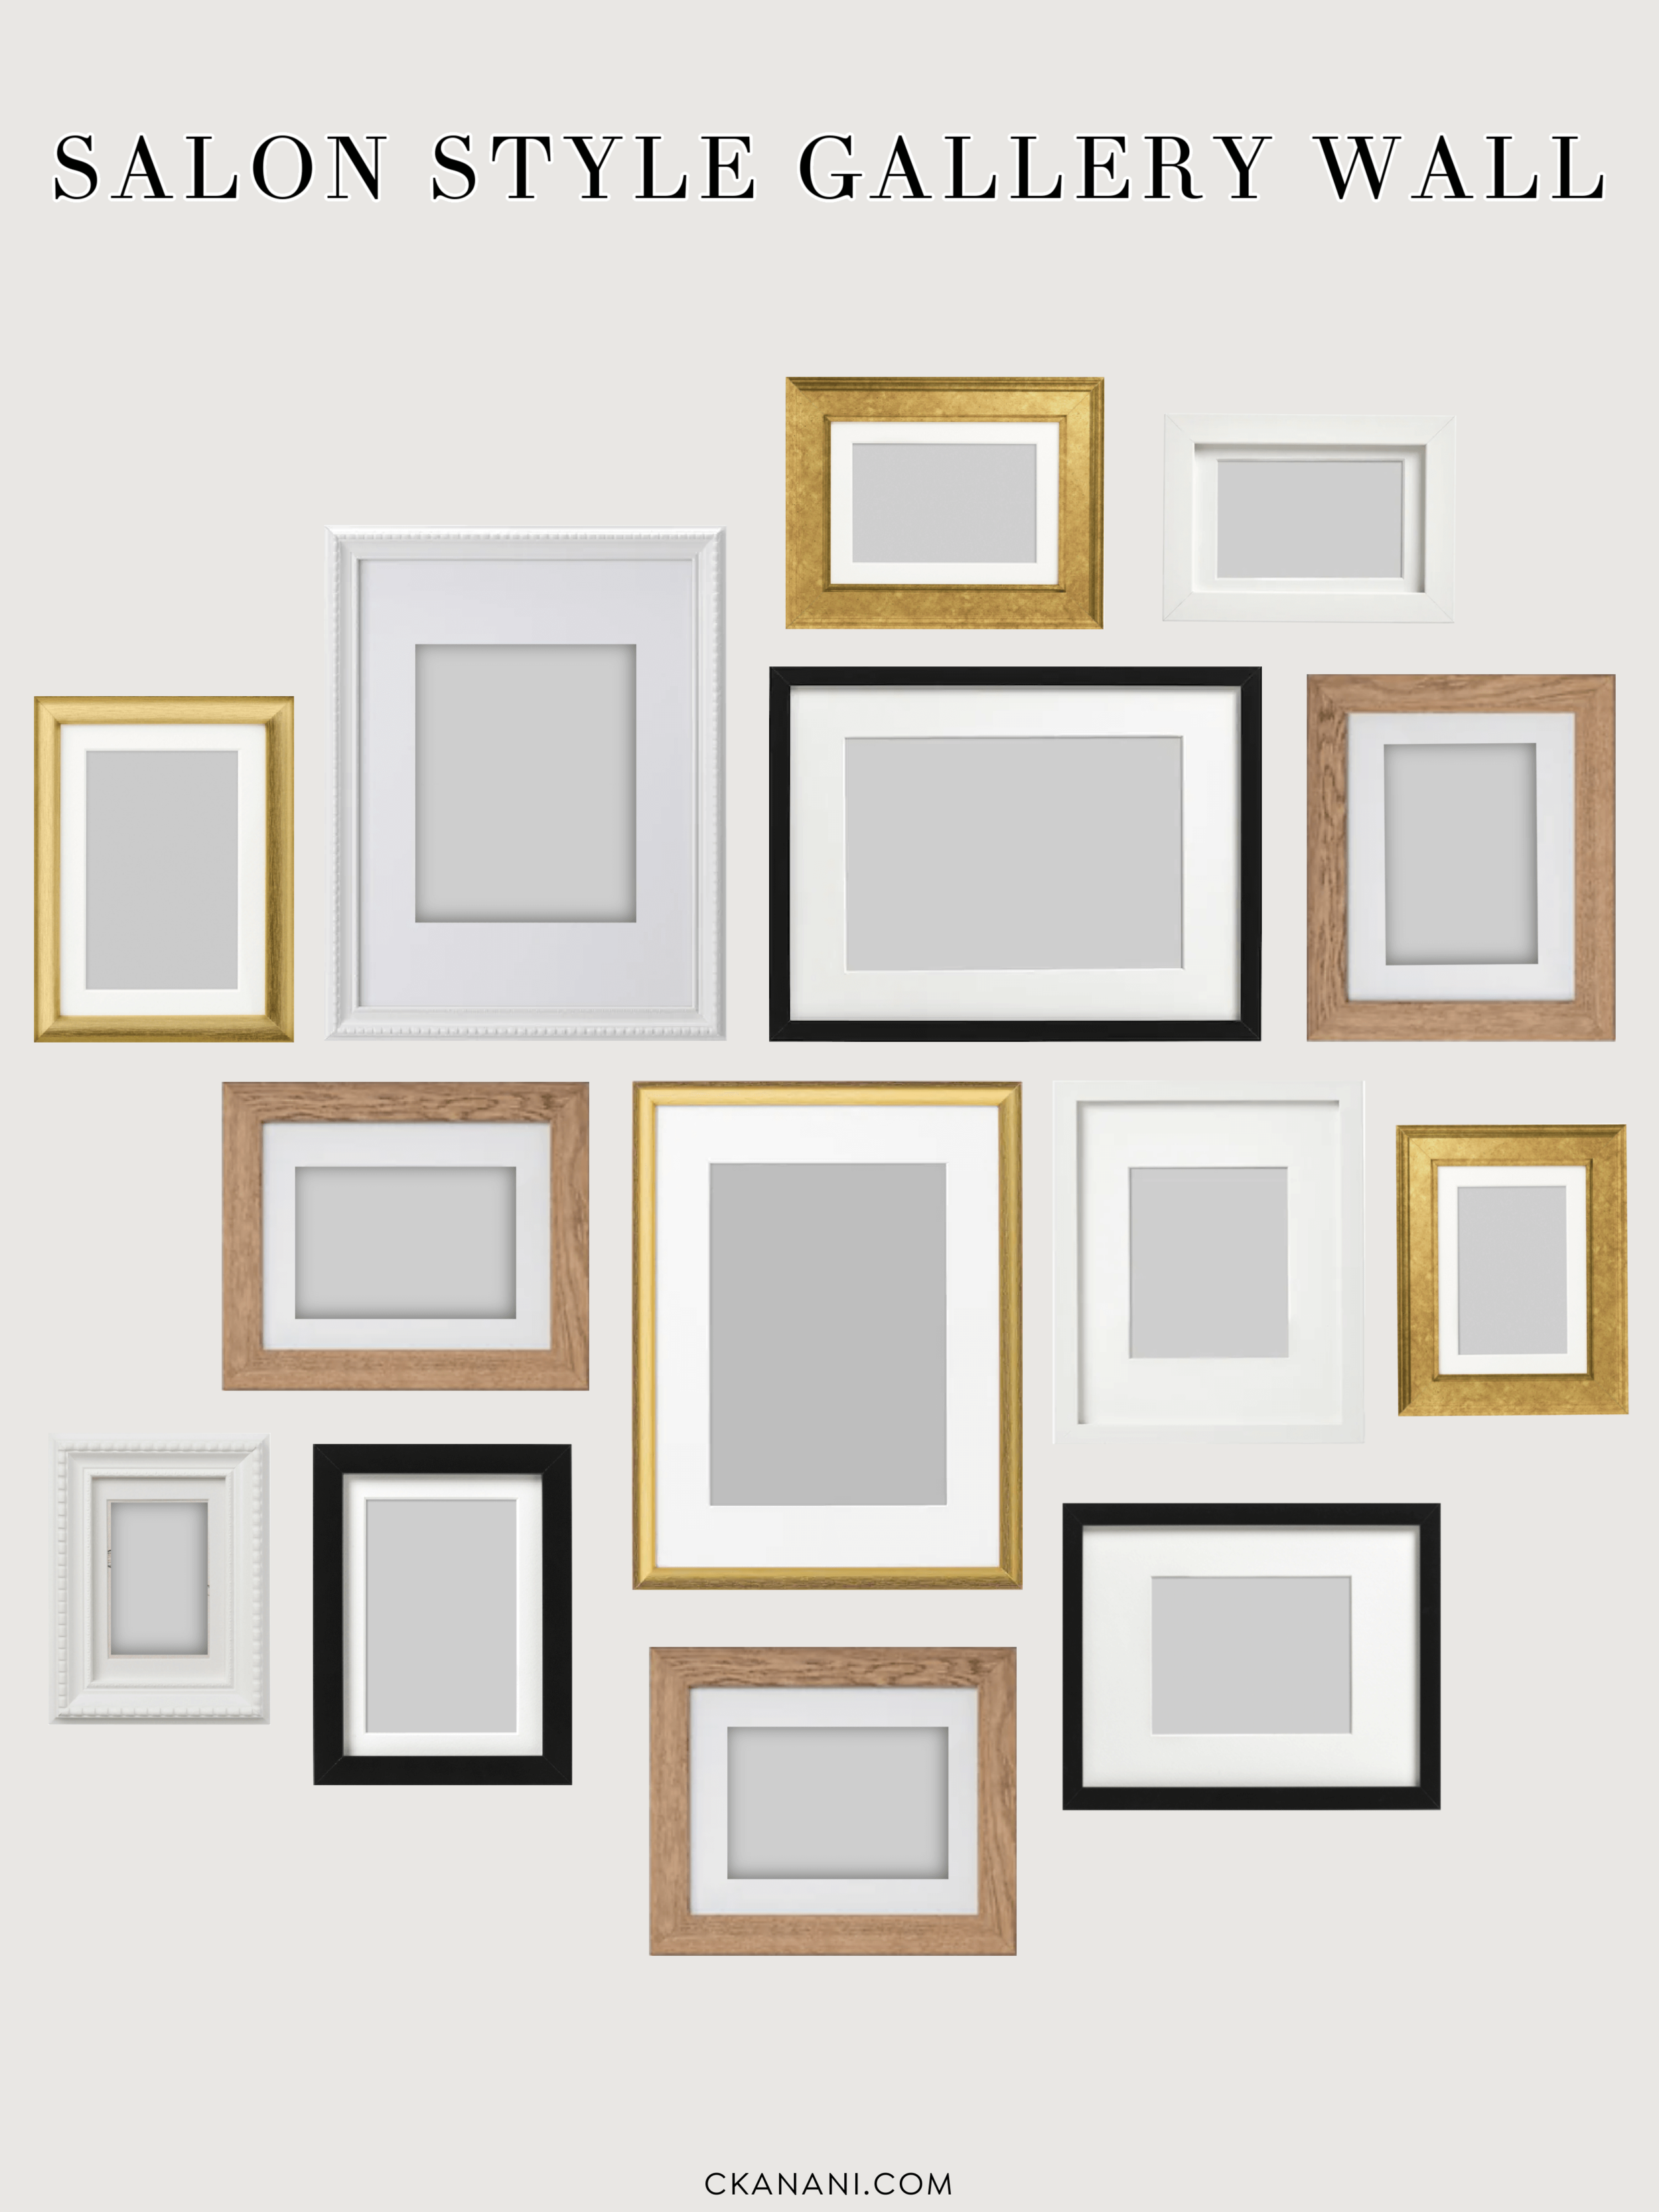
A grid wall is uniform, with all frames being the same size and displayed in a grid. It can be linear with just one row or many different rows, but the gist is that it's cleanly and perfectly aligned. A salon style wall is much more chaotic, generally with varying sized frames fit together kind of like a Tetris game.
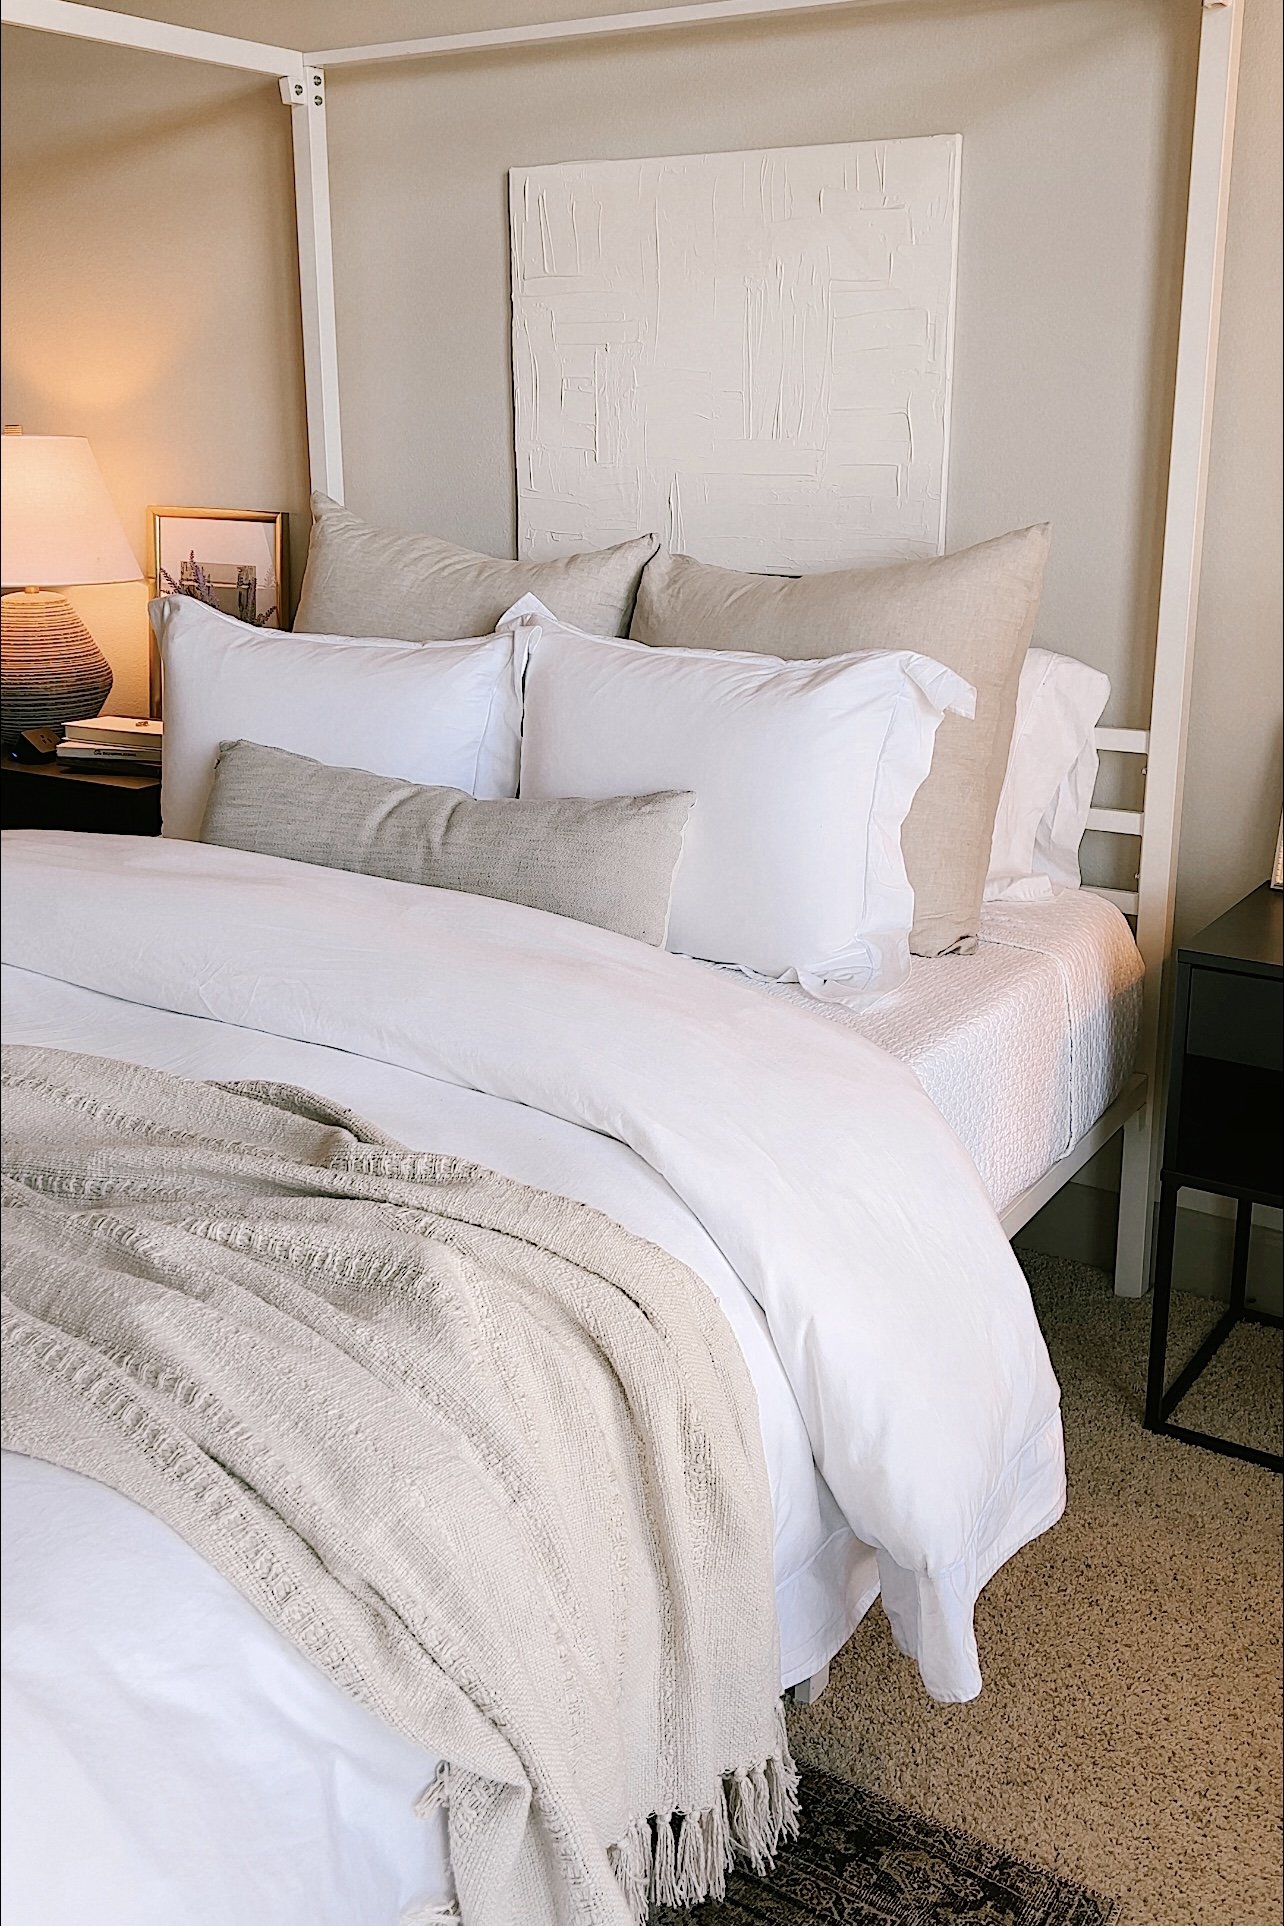
Both are great and give off different vibes. I personally love both, which is why my kitchen gallery wall is a grid wall, and my living room gallery wall is salon style.
You'll also want to decide on frame colors at this point. In my opinion, a grid wall should use all frames of the same color. I chose black but I think white, gold, natural wood, etc. are all equally beautiful, as long as the whole gallery uses identical frames! (More on picking out specific frames later)
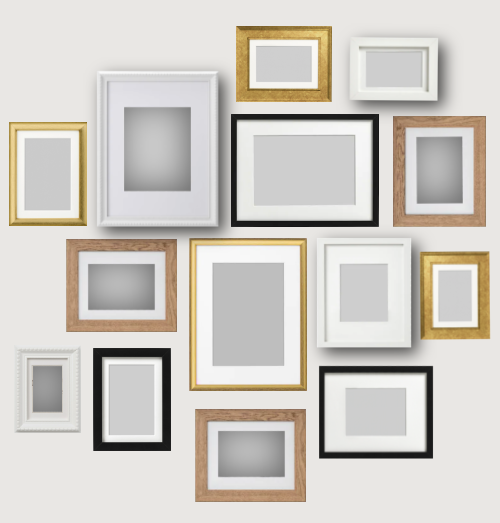
A salon style wall can also use all frames of the same color or a mixture for a more eclectic feel. Make sure to take note of the space you're planning the gallery wall in so that the entire space will maintain cohesion. For my salon style wall I am using a variety of different frame sizes, styles, and colors - all black, white, gold, or wood.
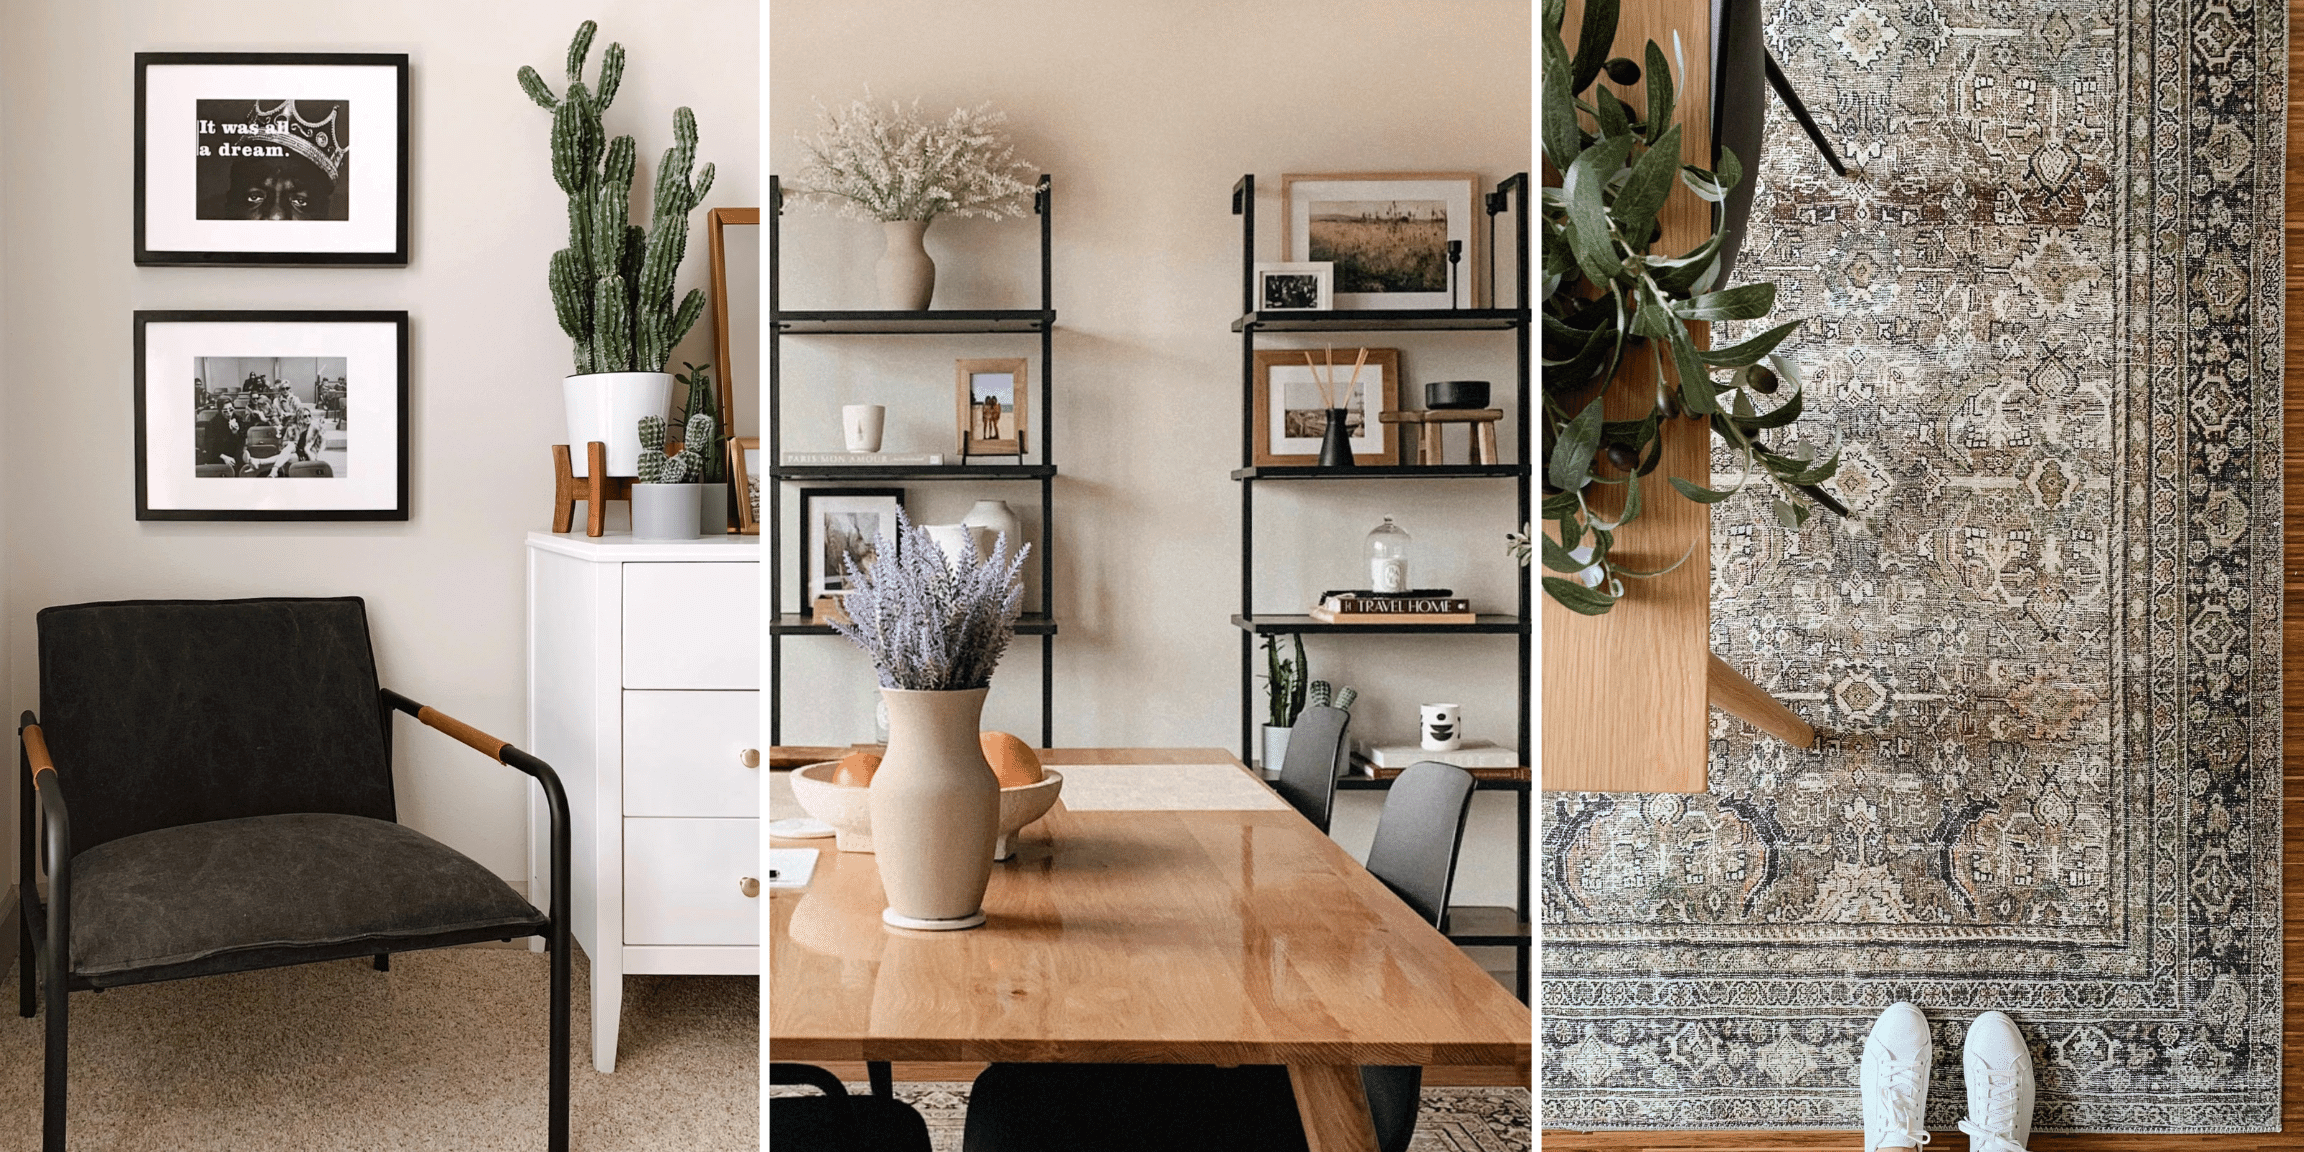
Here are some more ideas for styles you can do:

Pick a Theme
Once you have a style chosen, you'll want to pick a theme. Do you want the whole gallery to be black and white pop culture portraits?
Museum exhibitions?
Sunshine and summertime?
Maps to remind you of your favorite places?
Colored photos from your travels? Neutral colored abstract pieces? Southwestern themed? Botanical?
Side note — I have a million different theme ideas. If you want me to do another post where I curate art for a bunch of different themes as examples, drop me a comment below!
For my kitchen gallery wall, the theme is travel. I absolutely love the look of a black and white grid gallery wall, but turning Mother Earth black and white really sucks the life out of a travel photo so I decided to do colored photos for this wall (for the most part).
For my living room wall, I wanted it to be a random collection of things I love. And random it is: there's Sex & the City, Leonardo DiCaprio, some abstract prints, vintage photos, a few travel-related items, Notorious B.I.G., Kobe, and more! So in order for it to not look too overwhelming, the commonality of it is lack of saturation. Each piece is either black and white or some kind of beige/sepia tone.
Plan Your Layout
Next you'll want to plan your layout. This is pretty easy if you're doing a grid wall - all you need to do is decide how many rows and columns you want, as well as frame shape (landscape, portrait, or square) and size.
As a perfectionist, it's not enough for me to eyeball this part (or any part, really), so I actually mock up the layout on my wall. I do this by taking construction paper (click here for what I use), cutting it into the size of the frame I'm thinking about using, and physically taping it to the wall it will eventually live on. You can do this roughly at this point (i.e. don't worry about making it perfectly level and all that) since you're just trying to get a feel for it.
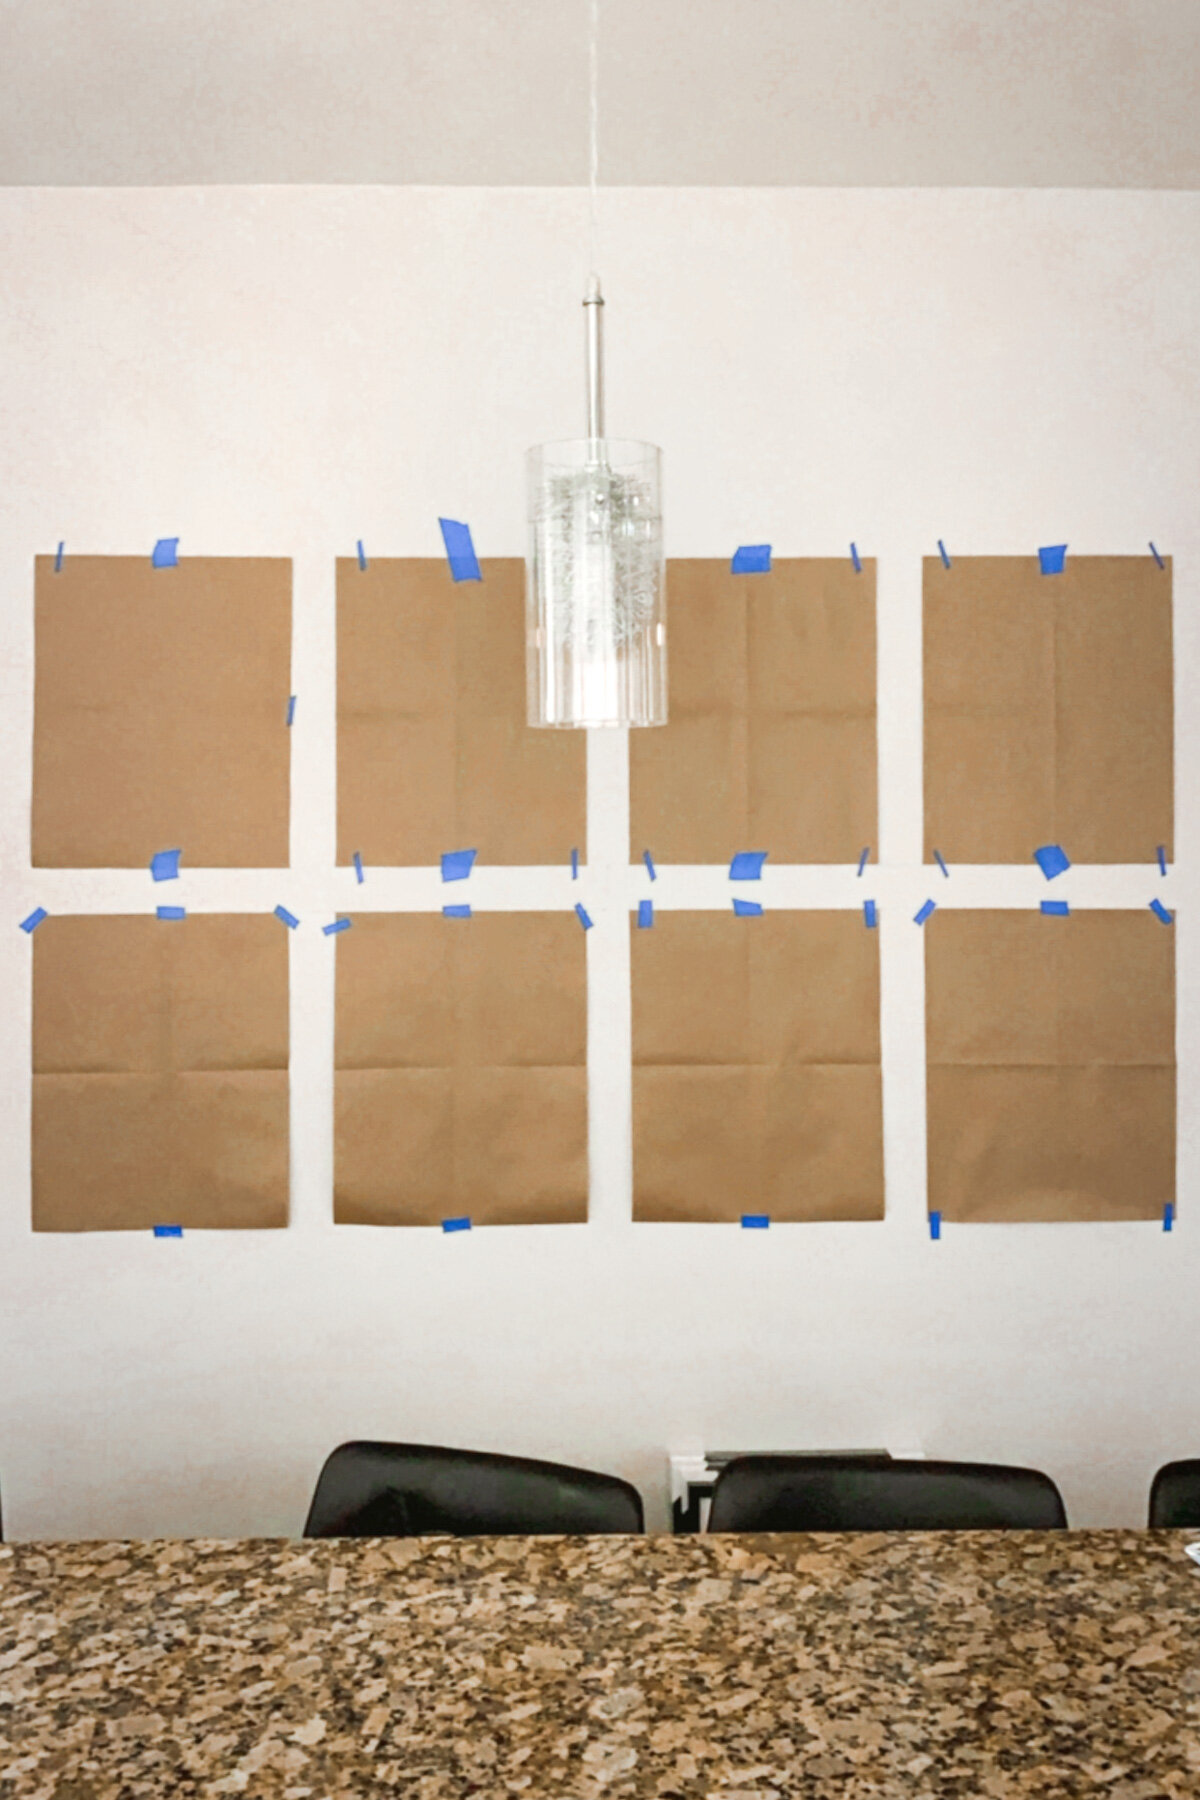
Please excuse the horrible quality photo above! Prior to doing the physical mockup on my wall, I was planning on using three 16” x 20" frames on my wall. Once I had them up I realized I did not love the look of just three linear frames — something was definitely missing. So then I tested out two rows of four. This to me looked a million times better so I changed the plan to an eight frame gallery instead!
For a salon style wall, this part can be a bit more complex. I've seen a lot of people suggest buying your frames prior to planning your layout when doing a salon style wall. This is so you can lay them on your floor to physically plan out what will go where.
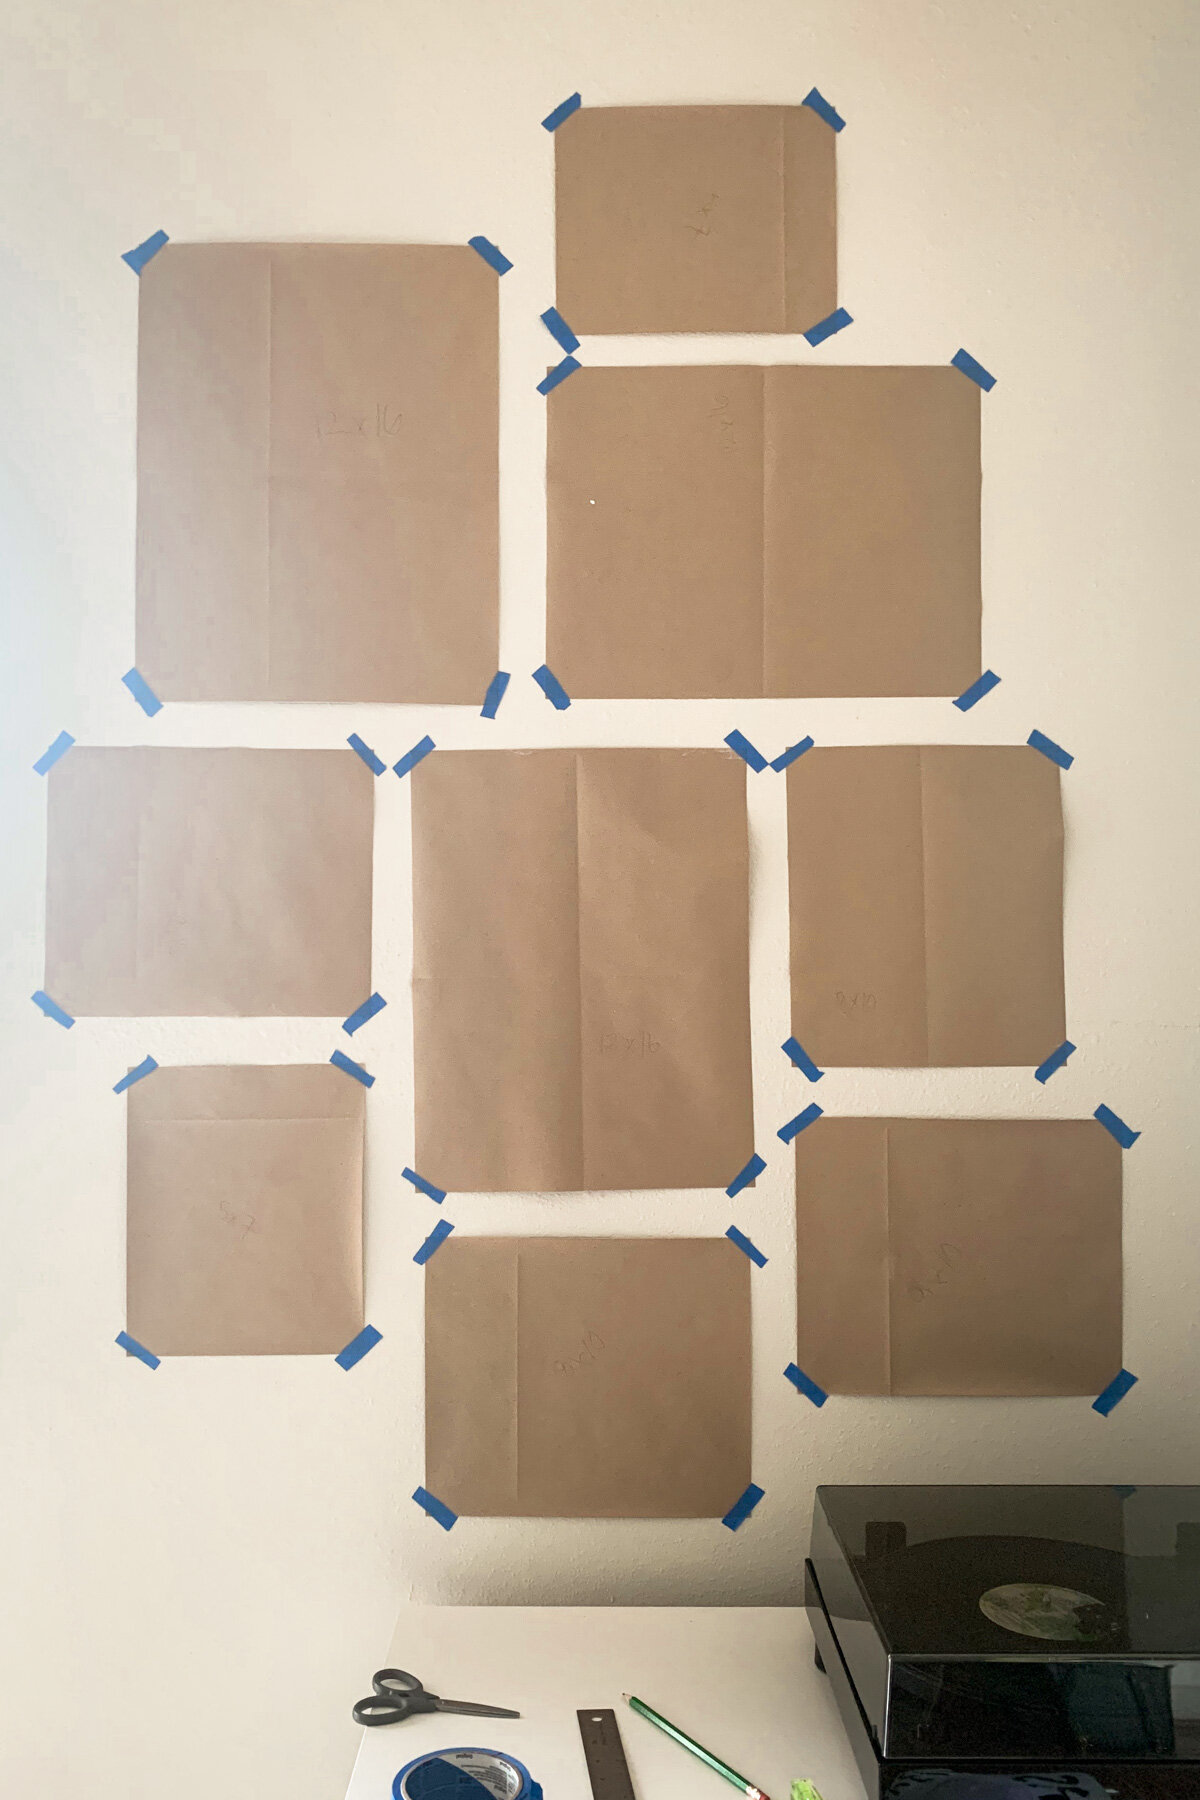
For me I knew I wanted a specific gold to frame to be the center piece. From there I started visualizing what would look best — mixing in 12” x 16”, 11” x 14”, 8” x 10”, 5” x 7” and 4” x 6” frames. Just like with the grid wall, I cut construction paper into those sizes and physically taped them to my wall until I had come up with a rough layout. The above photo is just the beginning of this process — I eventually added a lot more!
I think if you use the same color frames for a salon style wall it is much easier. When you mix colors you have to be sure you don’t have too much of one color in a certain area which means you have to have your layout pretty much totally planned before you buy your frames. To do this I took the above photo of my salon style wall and dropped it into a program called PicMonkey. Then I covered the rectangles with different colored frames to figure out what combo would work best.
Side note: I ended up adding many more frames to this and even changing colors in many places. This was just a rough first draft.
Purchase Your Frames
Now that you have a plan you will want to purchase your frames! My grid wall uses IKEA frames in size 16” x 20". Click here to check those out.
These frames are of course very inexpensive. As you can imagine, because of this they're not the best quality around. The front protection piece is made of polystyrene, not glass, which looks fine but so far I am finding they get dirty pretty easily. It’s becoming a pretty big pain! However, if you need something cheap (I'm furnishing a 1,000 sq. ft. apartment from scratch so I tried to save some money when it came to frames) they're a fine option.
If you want something better but still reasonably priced, these unanimously 5-star rated ones from Target seem to be the best pick! They’re available in 16” x 20” also but they use real glass which I think is a noticeable improvement. Click here to see pricing and availability.
There’s also this eight pack of 16” x 20" frames! They use real glass, come matted (if you don't know: mats are incredibly expensive if you purchase them separately), and the reviews for the brand's products all look great to me. Click here to see pricing and availability.
Depending on what size you need, these Amazon Basics frames are quite good for the price too. They go as large as 11” x 14", come with a mat, and use real glass. I have a few around my house and in my salon style gallery wall. I love them. Similarly, this set of five has really great Amazon reviews.
For a grid-style wall specifically, here are a handful of very highly rated options:
Another option I haven't personally tried but I’ve had numerous people DM me raving around is Framebridge. They have a ton of different gallery wall options (click here to see them) which seems to make this entire process completely painless for you. Especially because you can send in your photos directly from your phone and people have told me unanimously that they look great. If you want a gallery wall in the easiest, quickest way possible, this is definitely your best bet. Click here to see options!
For my salon-style wall, I used a variety of different frames in different sizes and colors, all from different places. Here are some of the best options if you want to make a similar wall:
Curate Your Art
The fun part! You have a theme, you know what size frames you're using and how many, so now you must curate your art.
For my kitchen gallery wall I used my own photos from my travels. If you're interested in doing the same, click below to purchase them (thanks so much in advance for the support!):
PLACES YOU CAN PRINT YOUR OWN ART:
Install Your Gallery Wall
Last but certainly not least, it's time to get your wall installed!
You will need the following items:
Command Picture Hanging Strips (see below)
Rubbing alcohol
Wine (half kidding)
Command Picture Hanging Strips -- I had no idea these even existed until someone asked in a Facebook group I'm in how on earth people are able to hang gallery walls with such perfection. Dozens of people responded that these are essential, and so I bought them. Not only do they allow for damage-free hanging, but they also help you hang your frames in the exact spot you want them. Using nails and a hammer will make this process very difficult because the hanging hardware on each frame will almost surely not be identical, making it almost impossible to hang them perfectly.
Depending on which frames you're using there are a handful of different options: large, medium, narrow, white, black, etc. Click below to see what's available:
IMPORTANT THINGS TO KNOW ABOUT HOW TO HANG YOUR ART CORRECTLY:
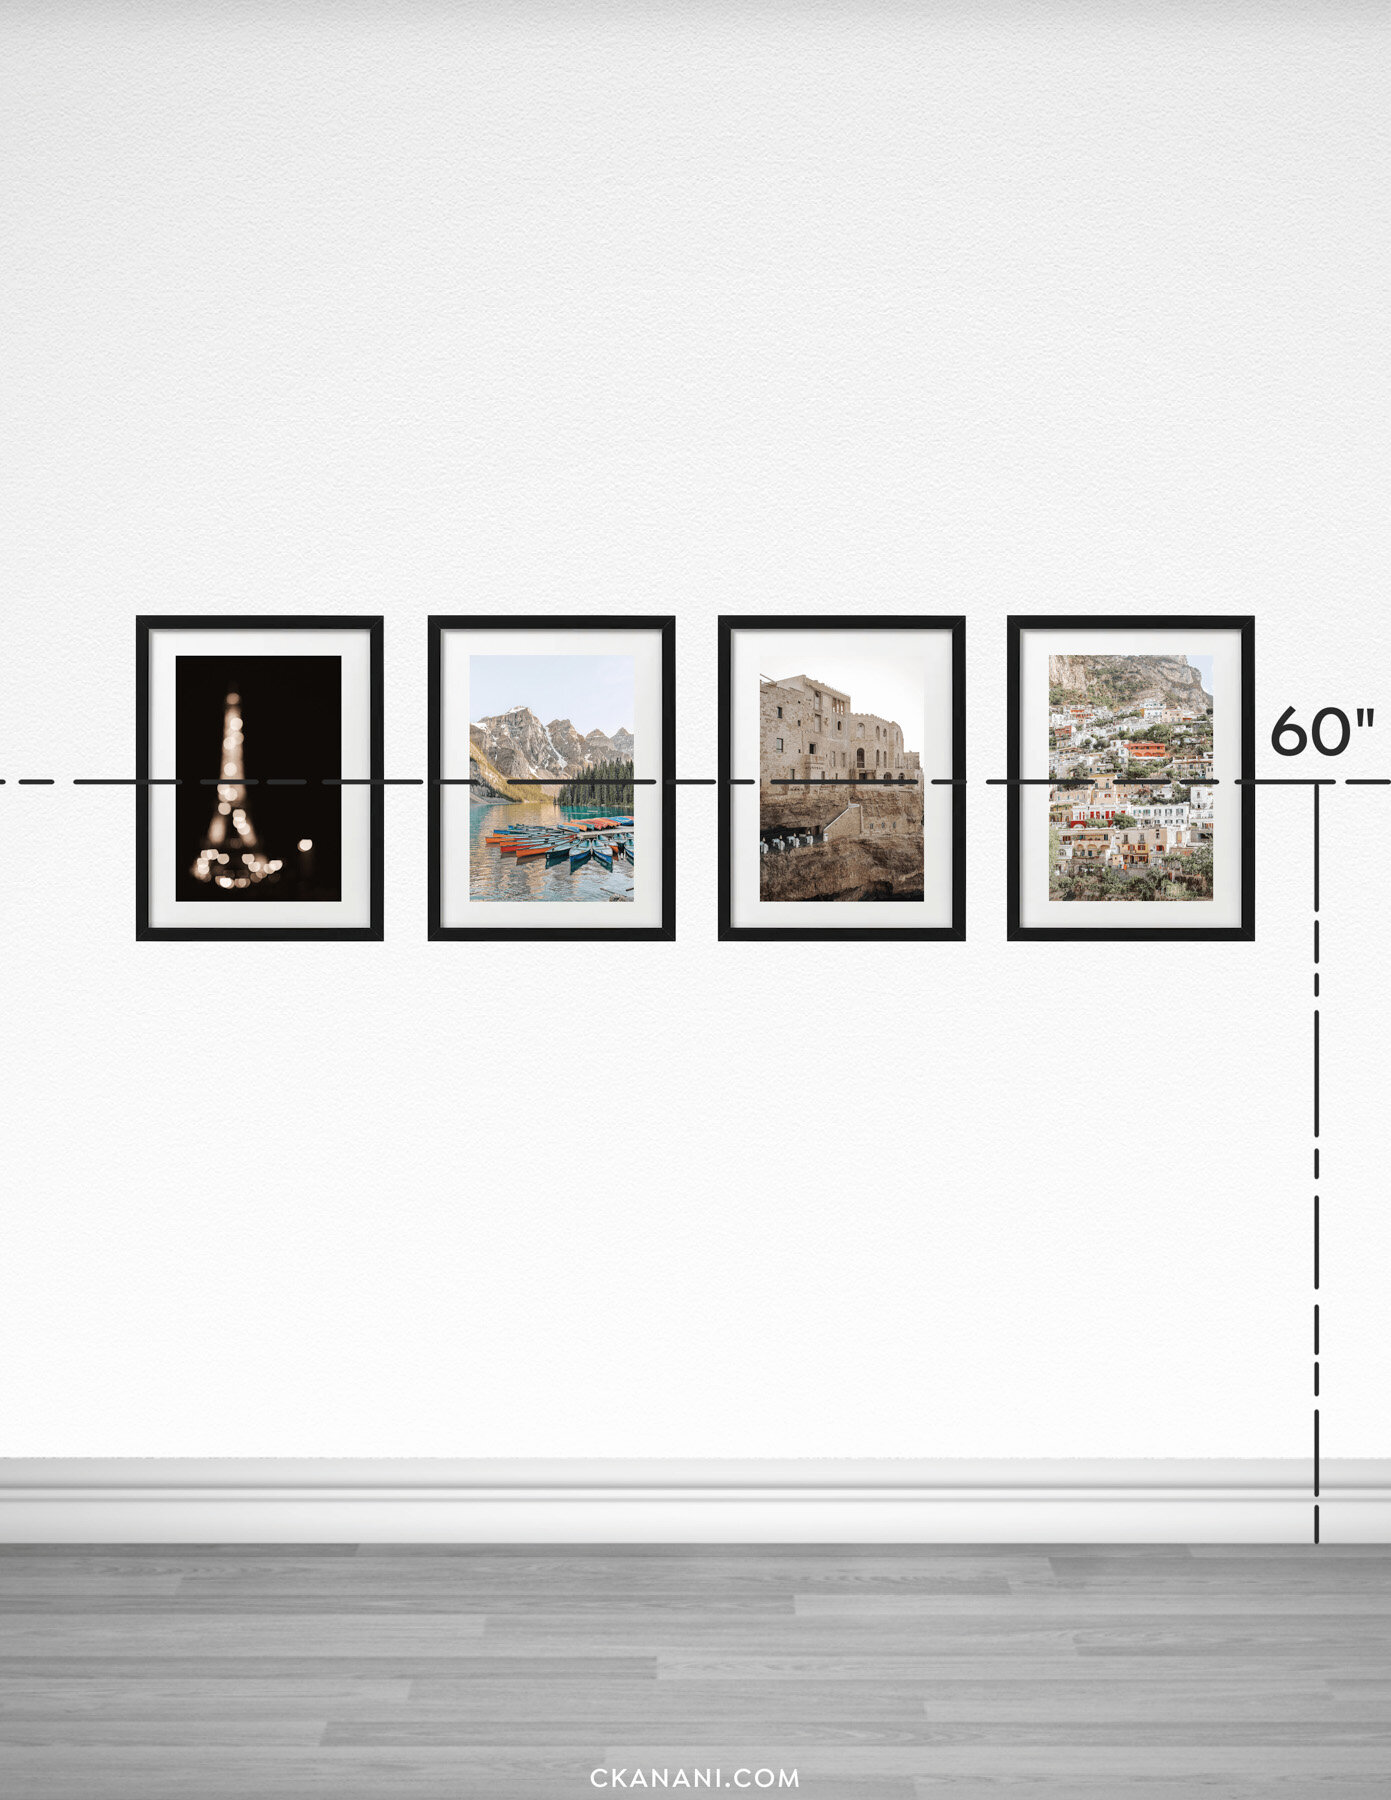
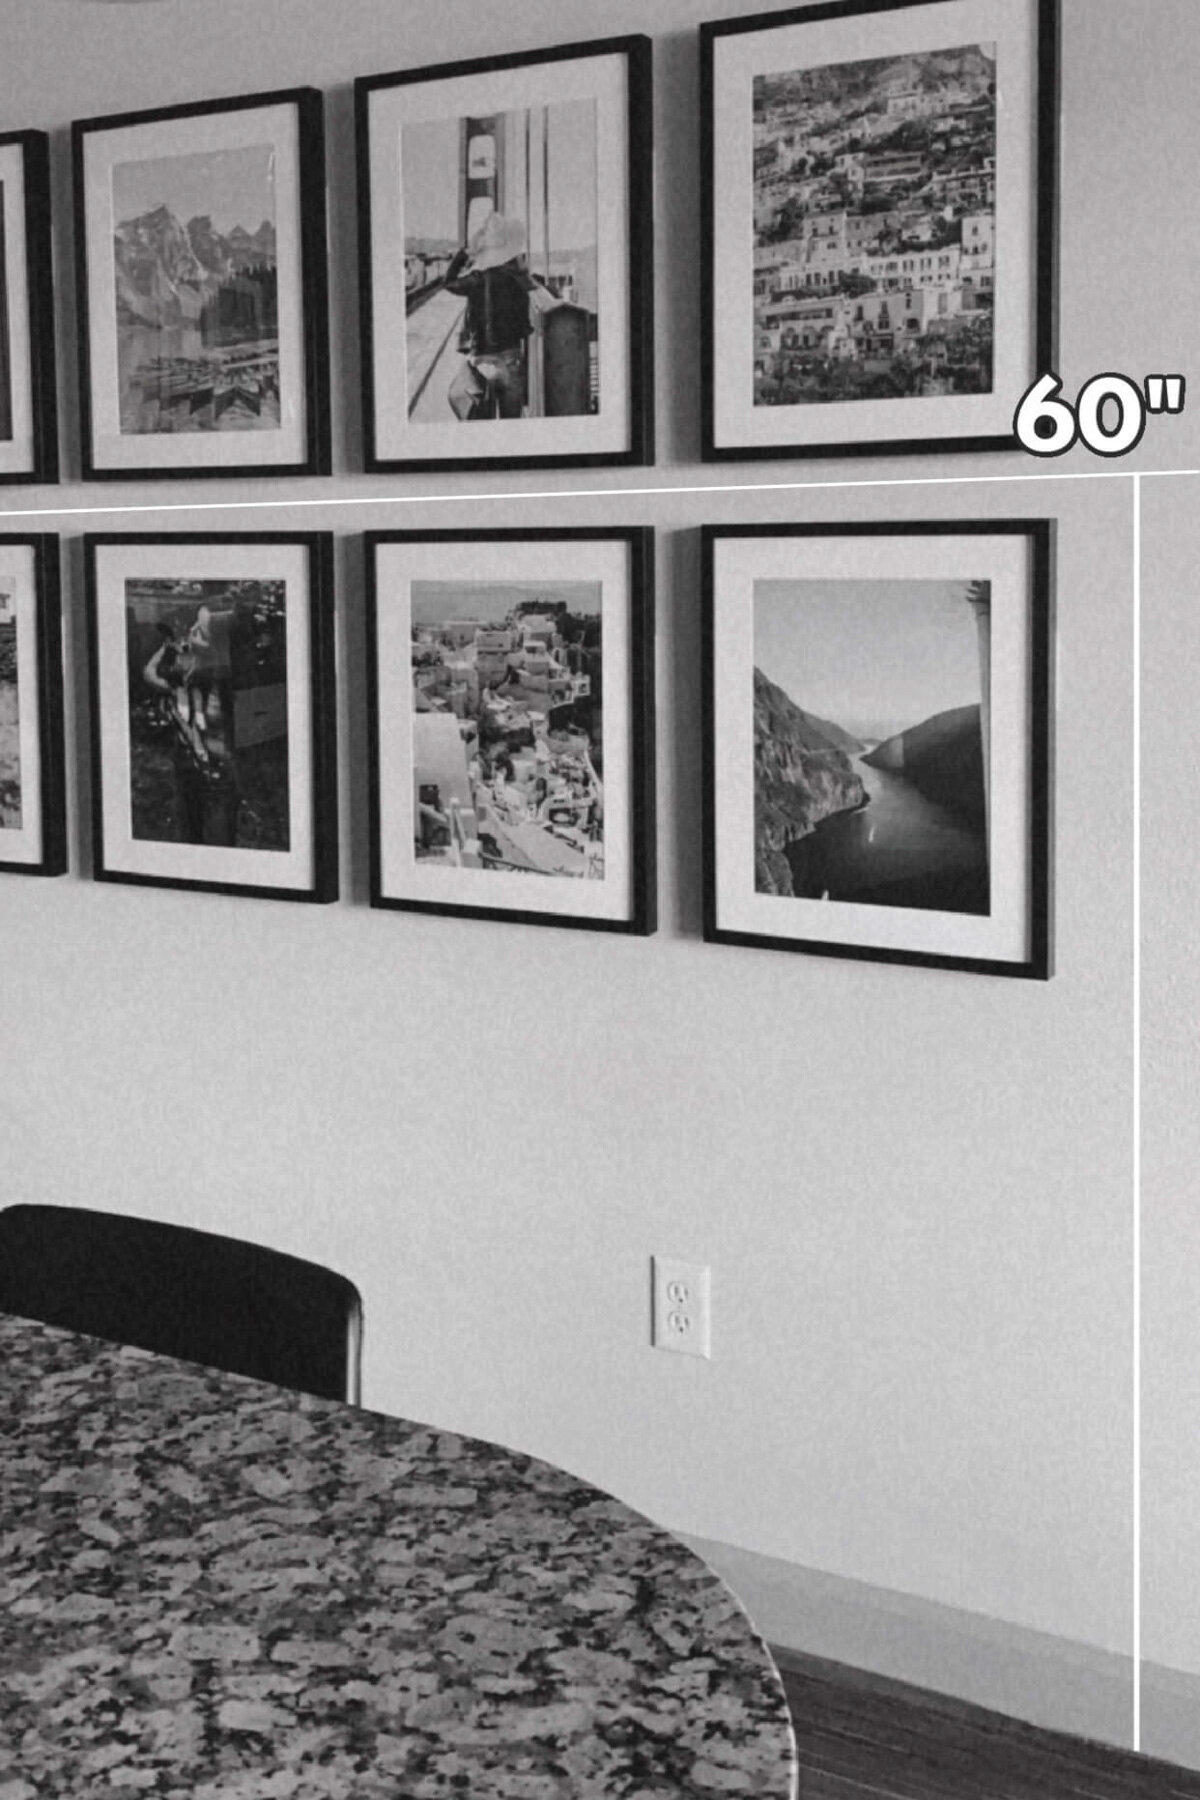
Your gallery wall should be hung at eye level. This means there should be 60 inches from the floor to center of your art. If you have one row of frames, this means from the center of your frames to the floor there should be 60 inches. If you have two rows of frames, from the center of the gallery to the floor there should be 60 inches.
For a visual explanation:
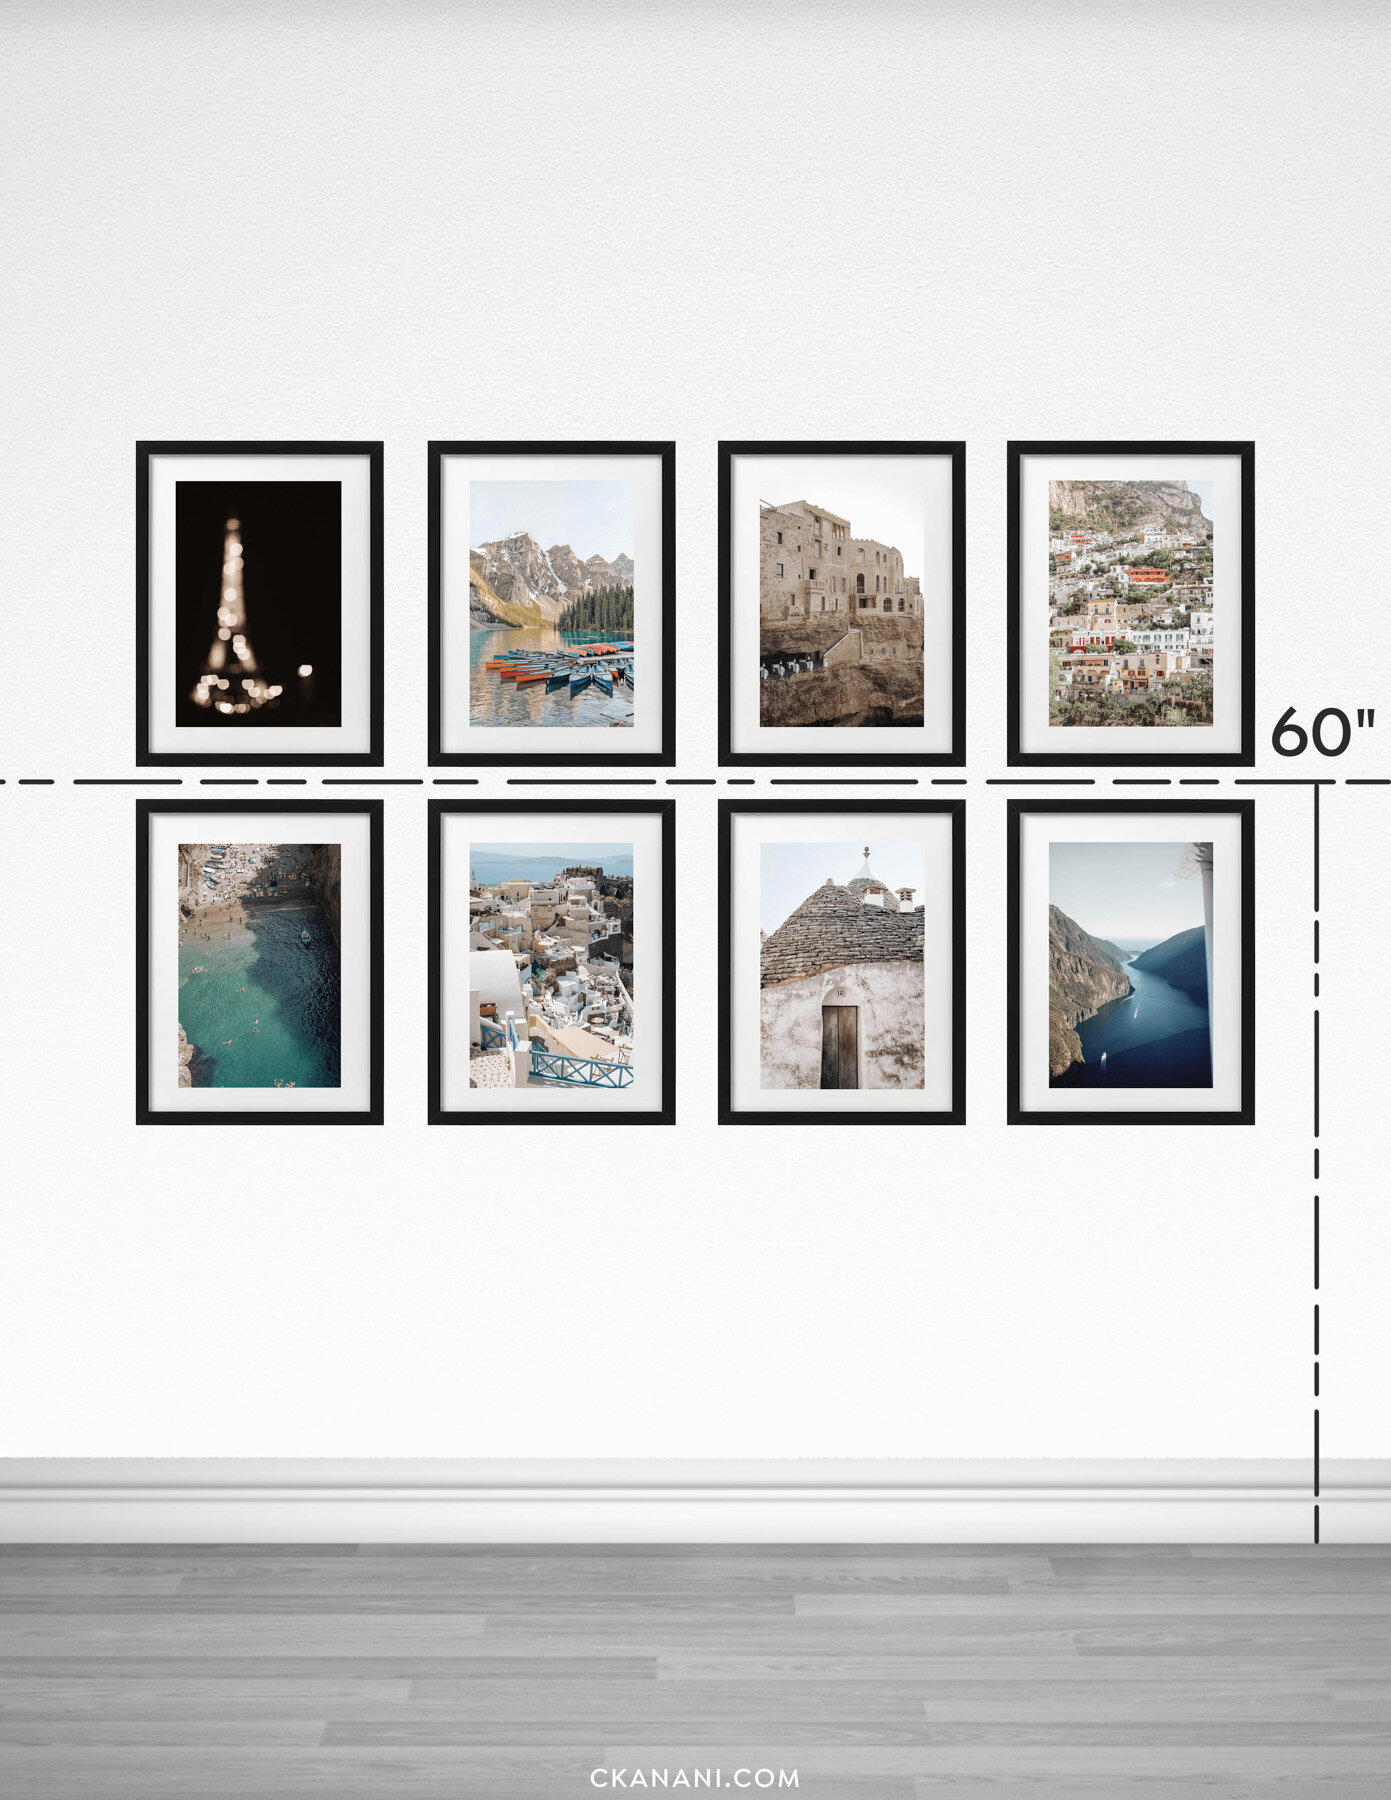
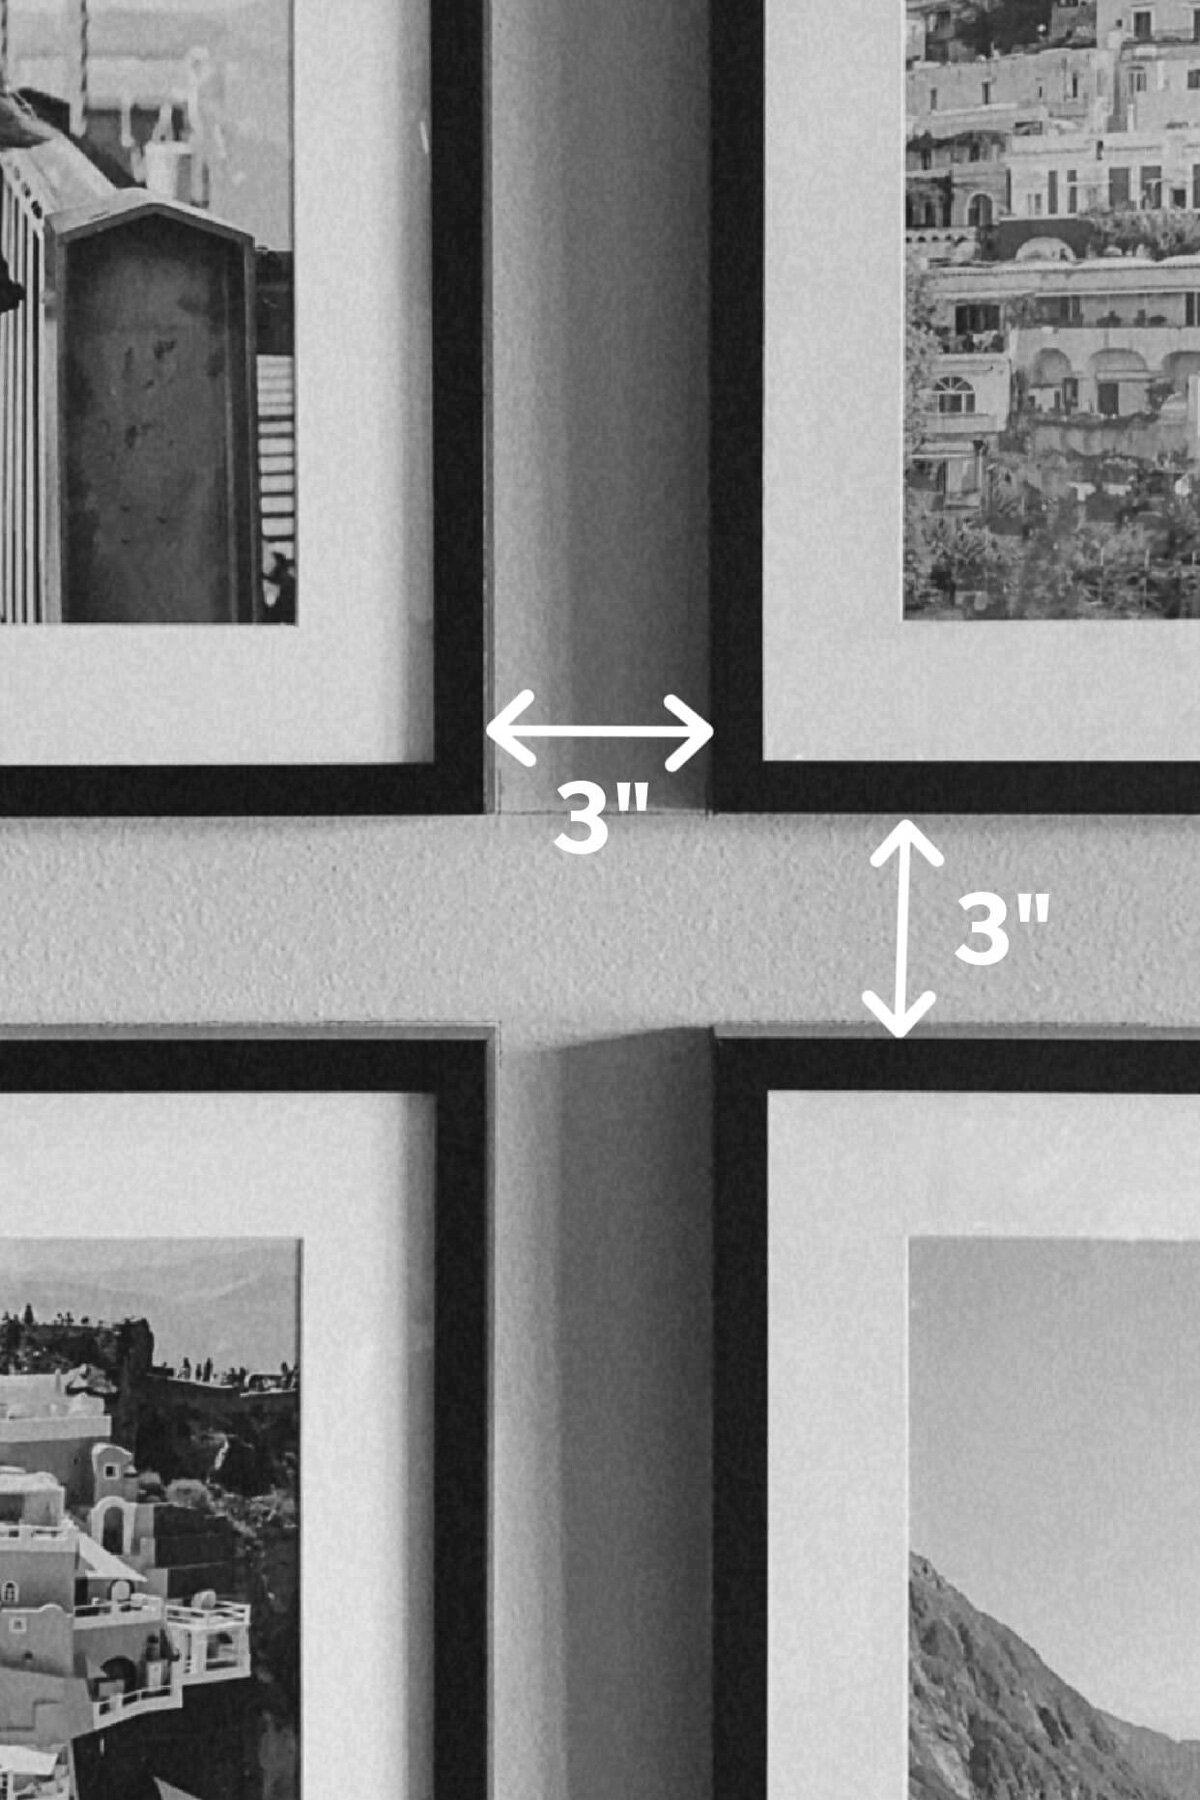
The space between your art is also important. For a grid gallery wall, you'll want to make sure the spacing is exactly the same between all pieces. For a salon style wall you might want to do the same or to have them vary slightly. In general, you should hang your frames somewhere between 1.5-3 inches apart, depending on how big your frames are (the bigger the frames, the more space you can have between).
Here are the specific details for my grid wall:
Prior to hanging my frames, I personally take my ruler, level, and pencil and mark on my wall where everything will go. It's easy to erase the markings when you are done and this helps me to make it perfect.
From here you'll want to follow the directions on the picture hanging strips. It suggests you wipe the wall first with rubbing alcohol to prep the wall which I do do. Then you put the strips together, place one side on the frame (remove the liner first), position the frame perfectly on the wall (I set my level on top of the frame during this part just to double check it's perfectly straight), and press it firmly for at least 30 seconds.
Next you'll remove the frame (make sure to check the directions on your strips for a more detailed explanation of how to), wait for the adhesive to build, and then rehang the frame to it's new permanent home! It's so simple and - dare I say - idiot proof.
And that’s all! Now you’ll have a beautiful, picture perfect gallery wall ready to wow your guests.
Questions? Anything I left out? Leave me a comment below and I’ll get back to you!